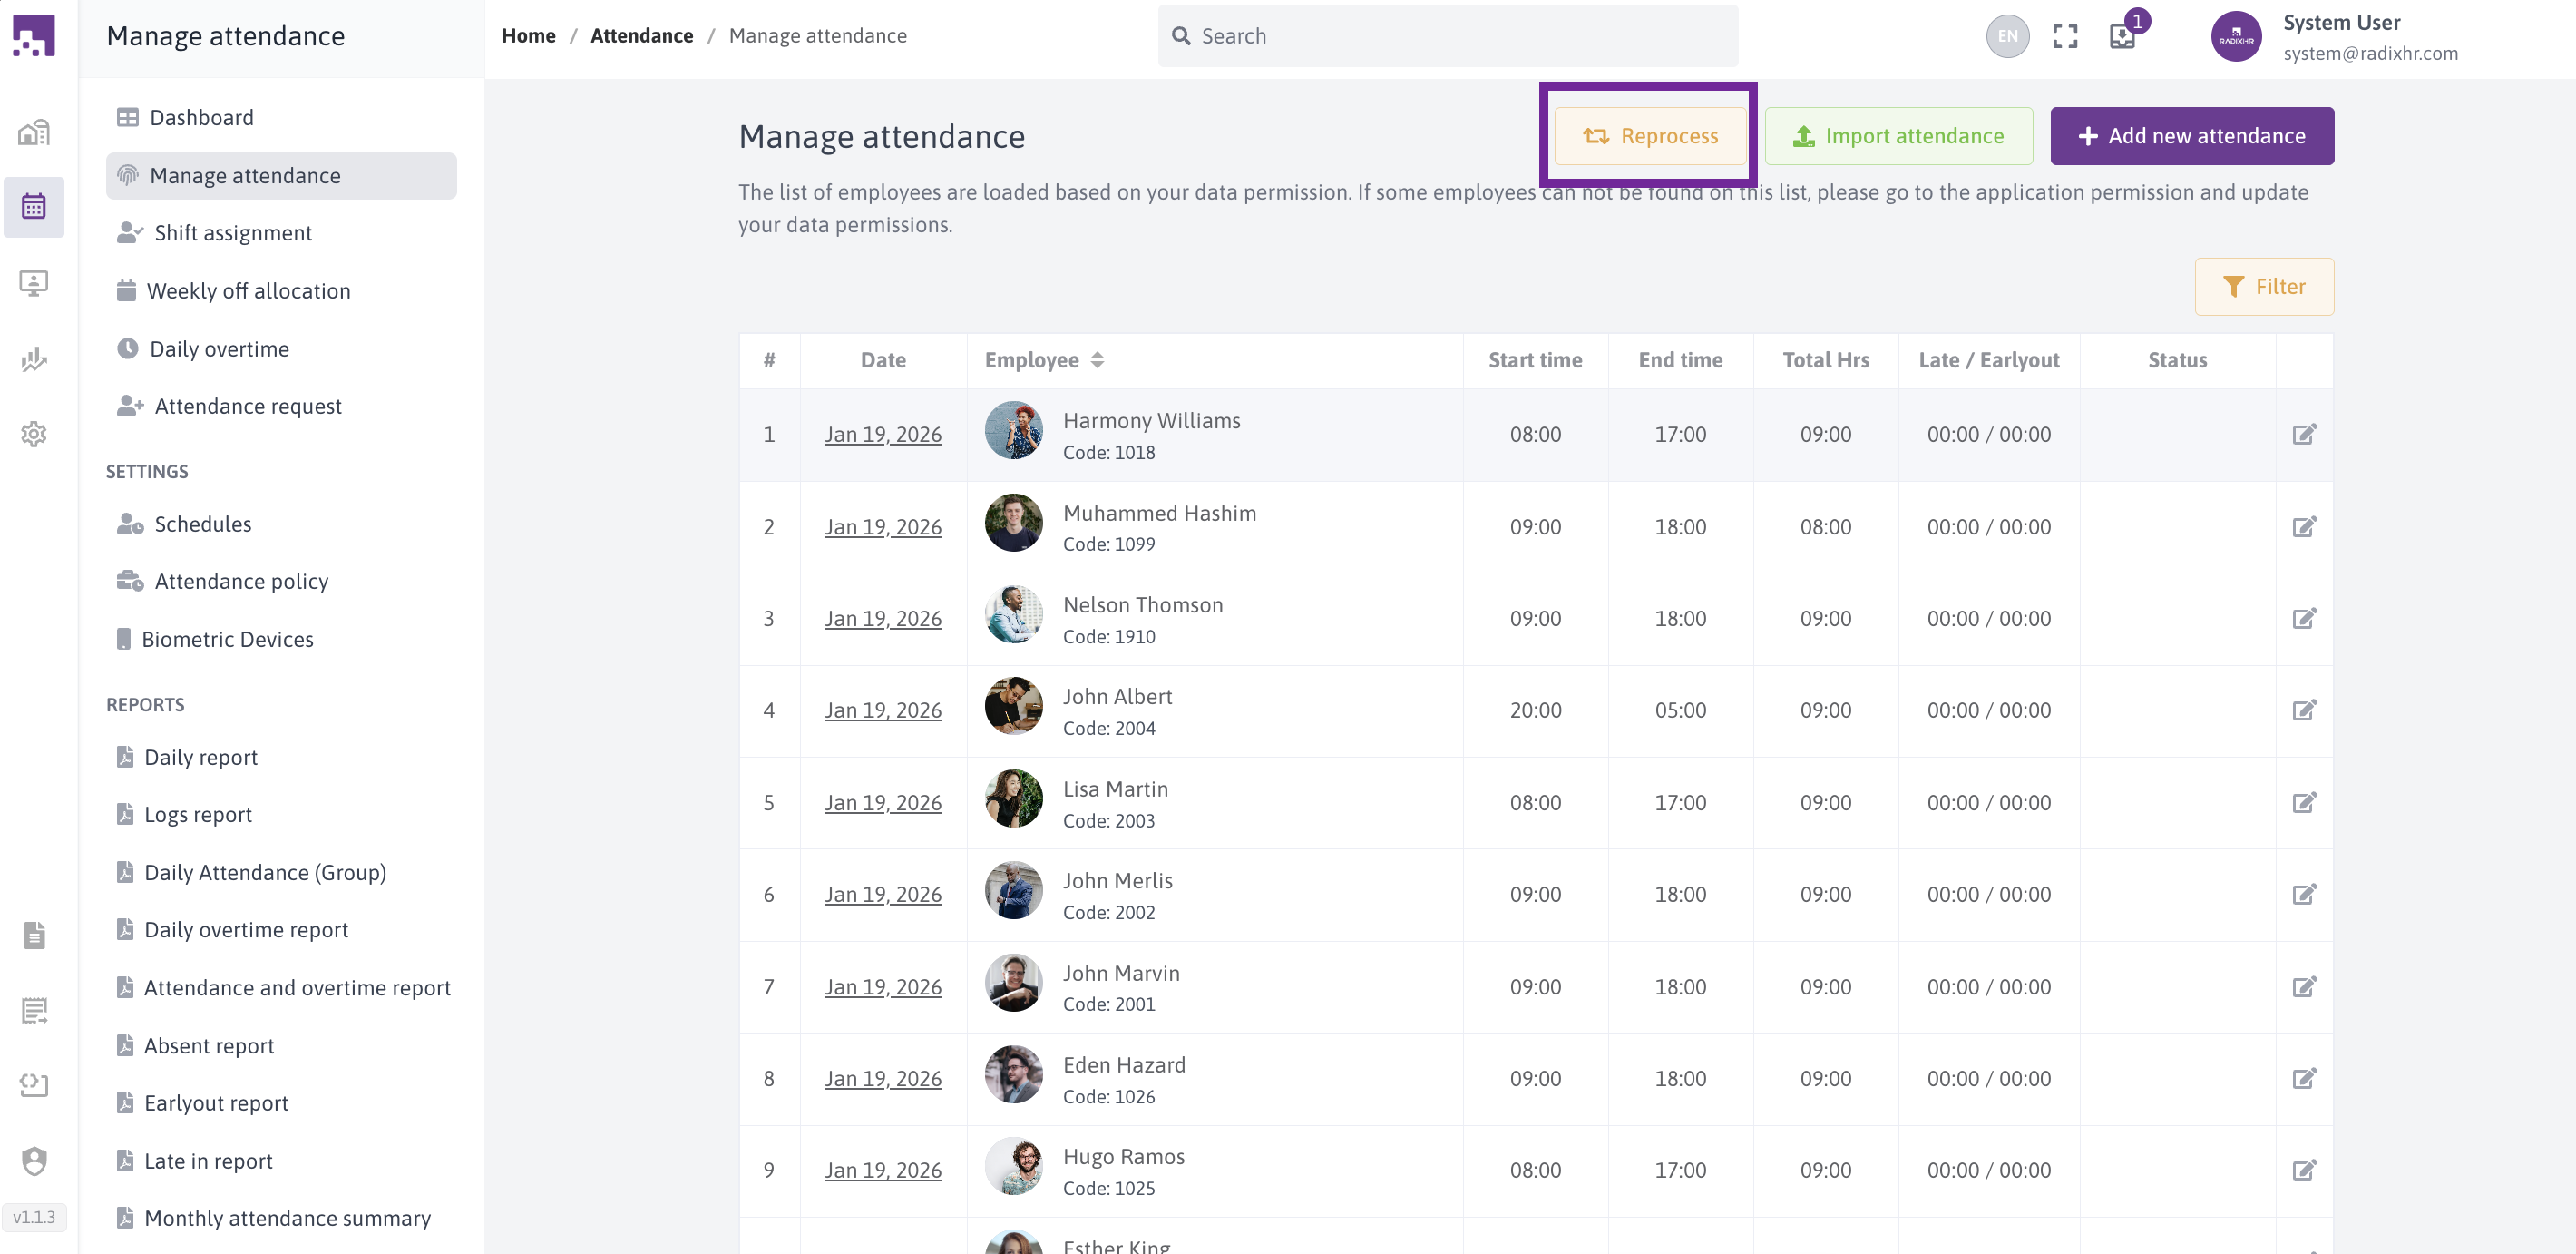
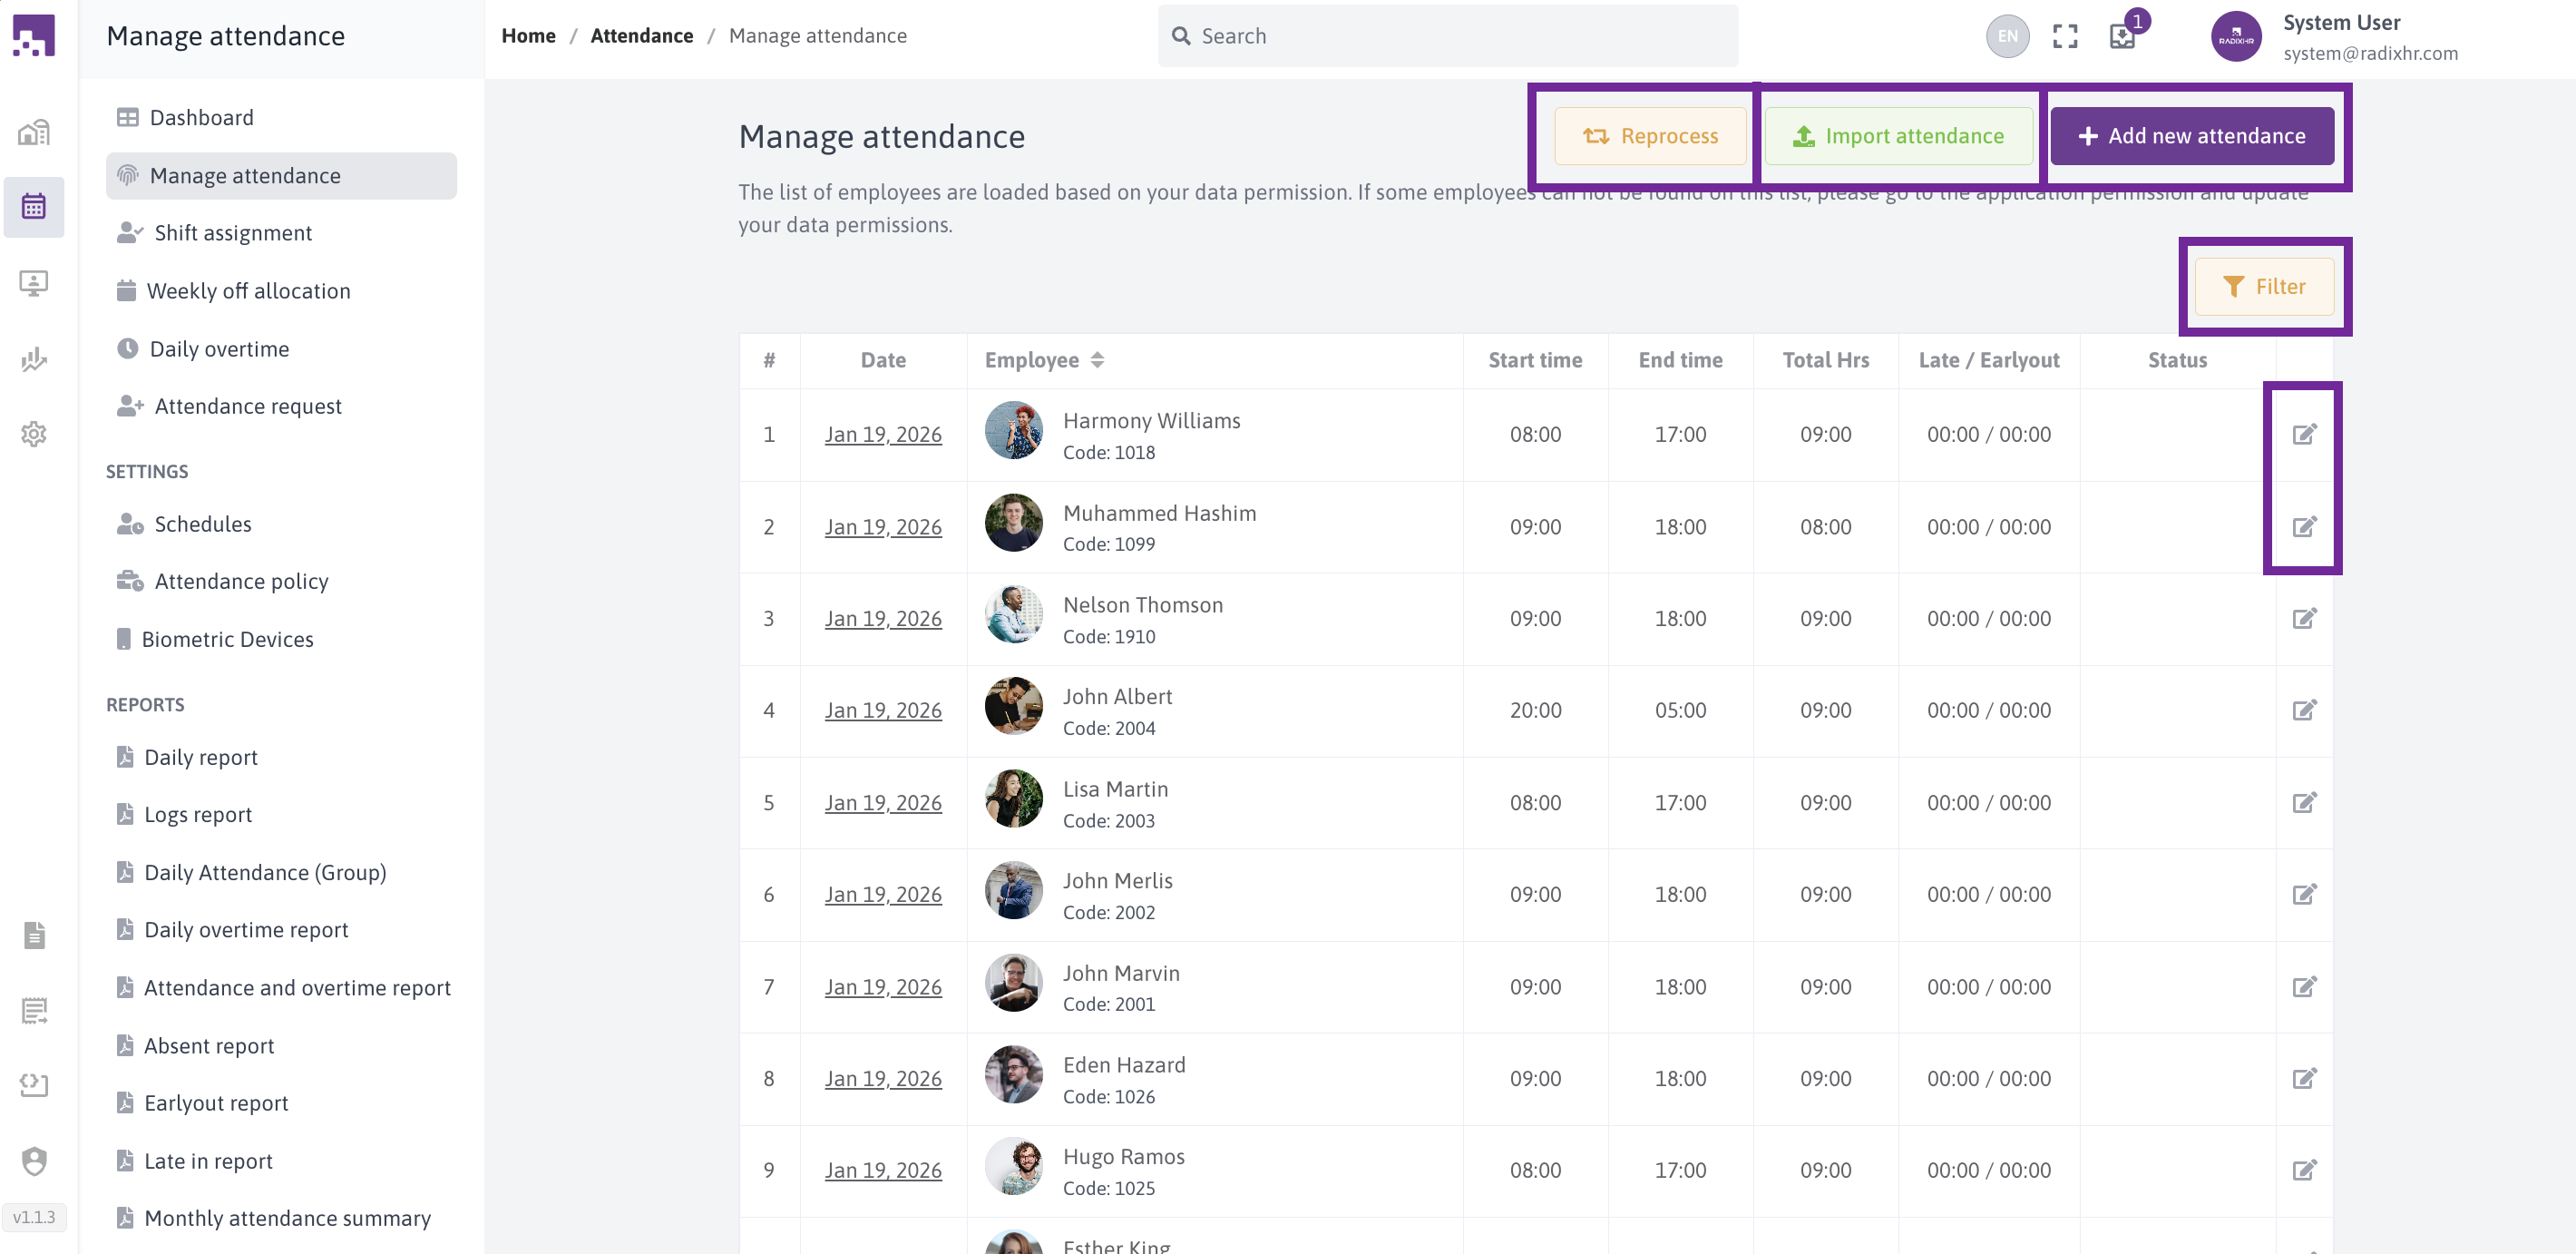
# Manage attendance
# Introduction
The Attendance Management module is your central hub for tracking, managing, and processing employee attendance records. Whether you need to manually add attendance entries, import bulk data, filter records for specific periods, or reprocess attendance after making corrections, this module provides all the tools you need in one place.
# Primary info
In this page we can add new attendance, import attendance, reprocess attendance, filter attendance, Edit attendandance ,Delete Records ,View Attendance
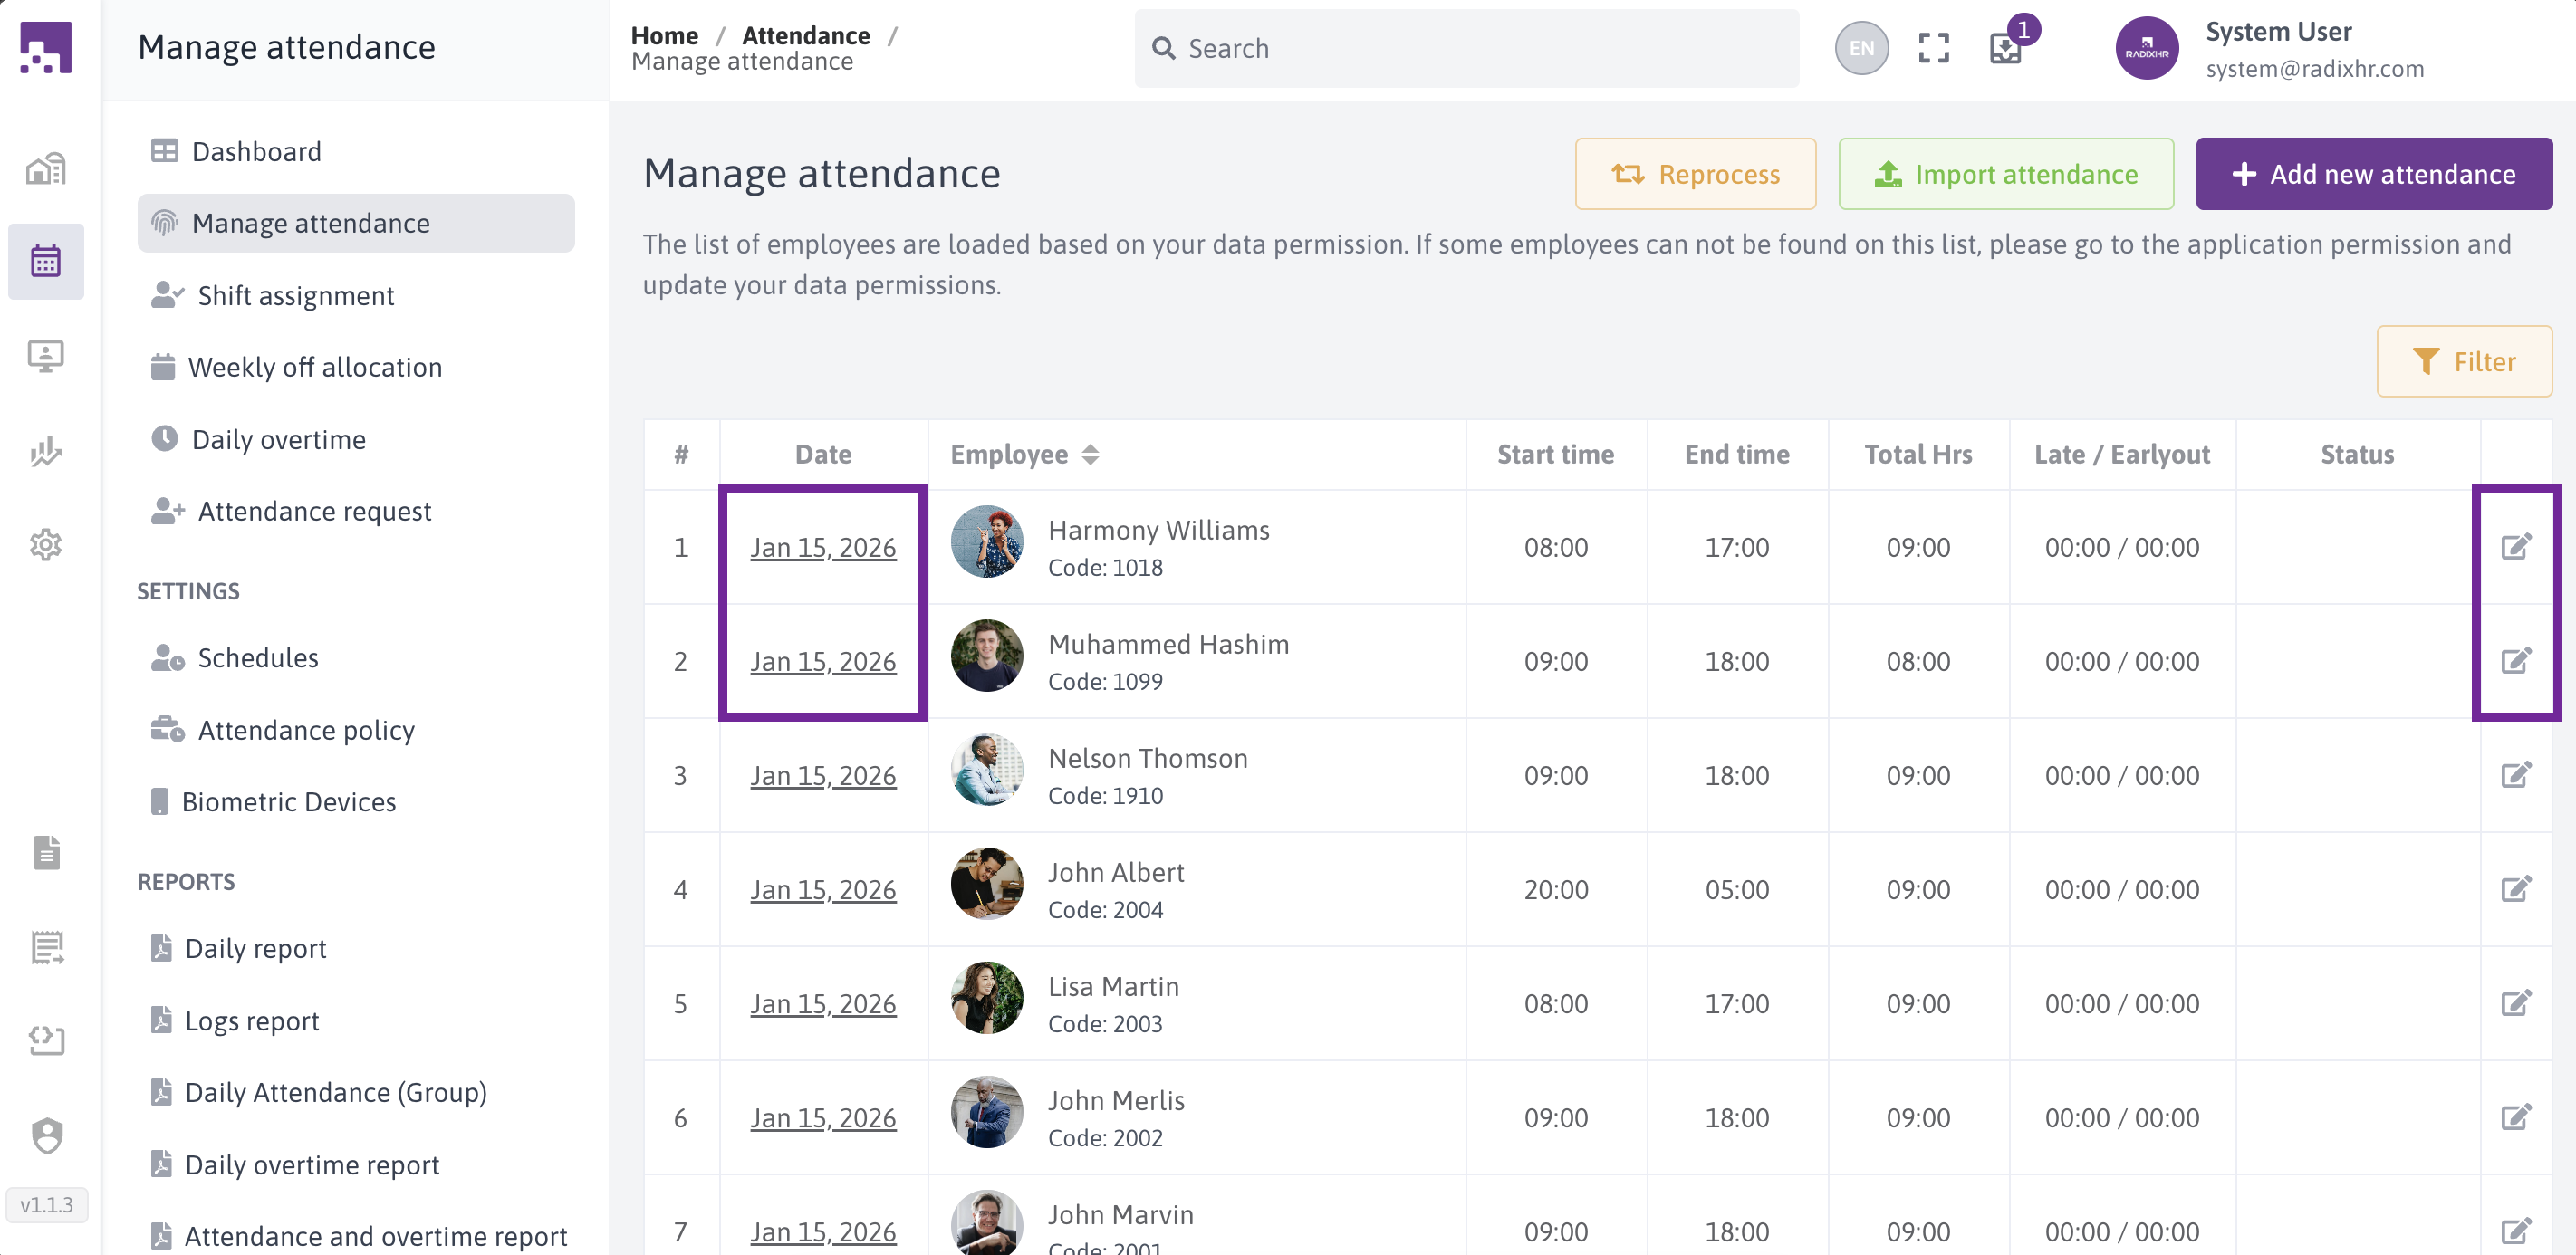
# Viewing Your Own Attendance
To view attendance, Click on the date link in the table or click the edit icon on respective row.
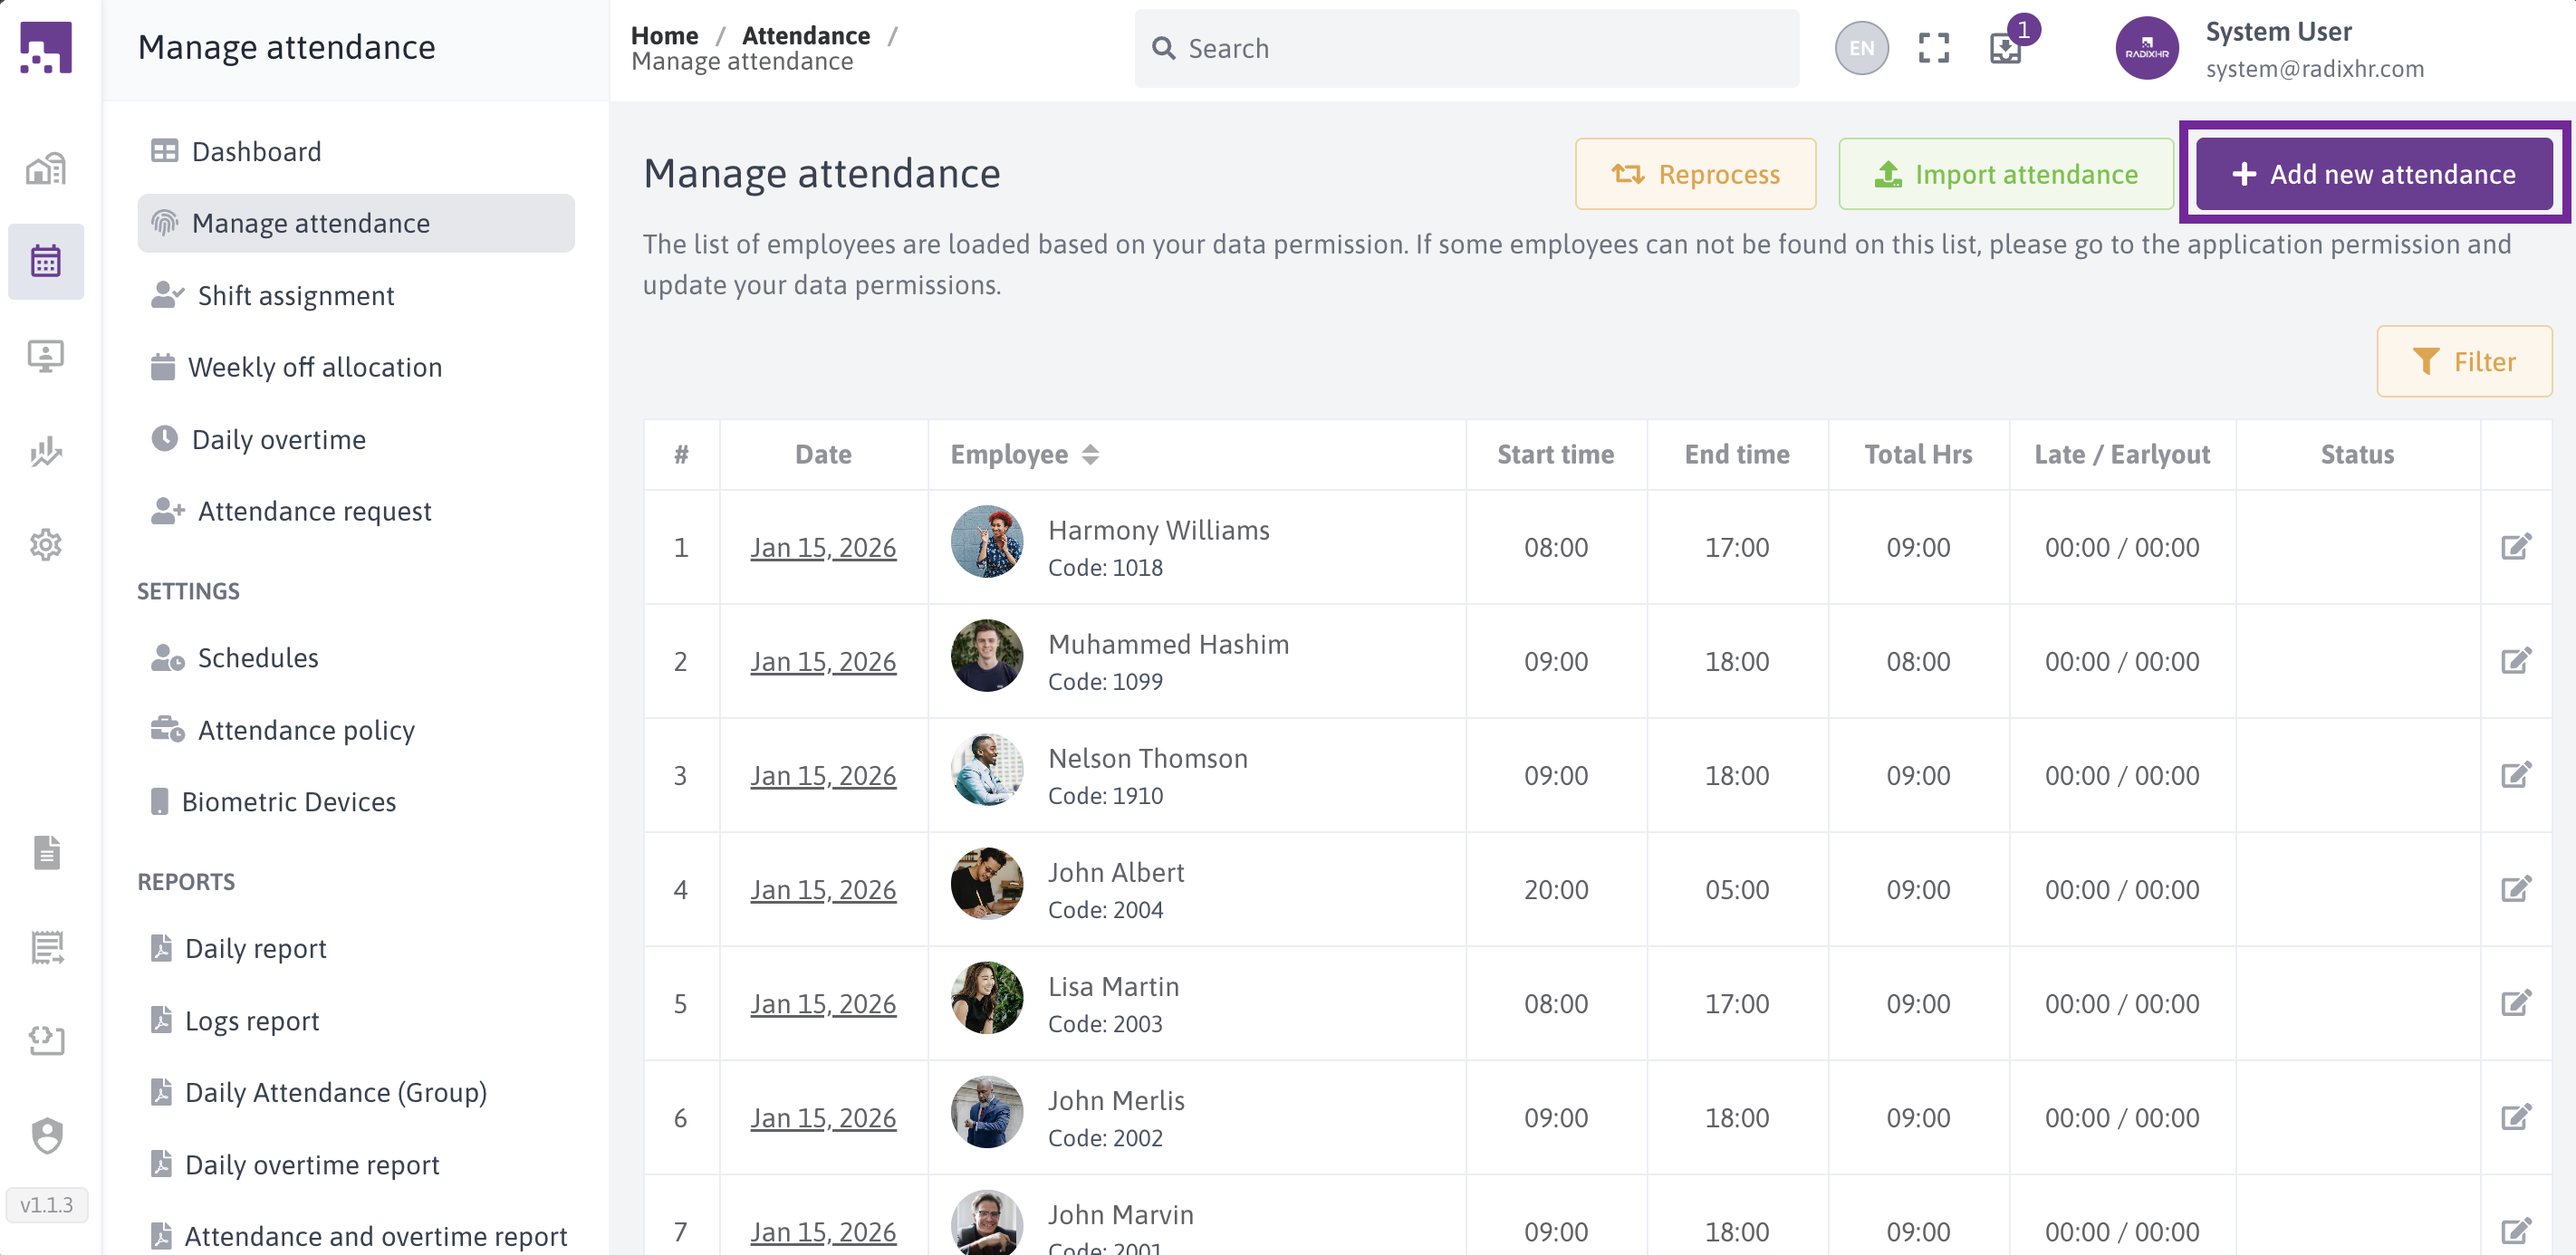
# Adding New Attendance Records
Use this feature when employees forget to punch in/out or when you need to manually record attendance for any reason.
# Step-by-Step Guide
Step 1: Access the Add Attendance Screen
Click the "Add New Attendance" button from the main attendance screen.
Step 2: Fill in the Basic Information
You'll see a form with the following fields:
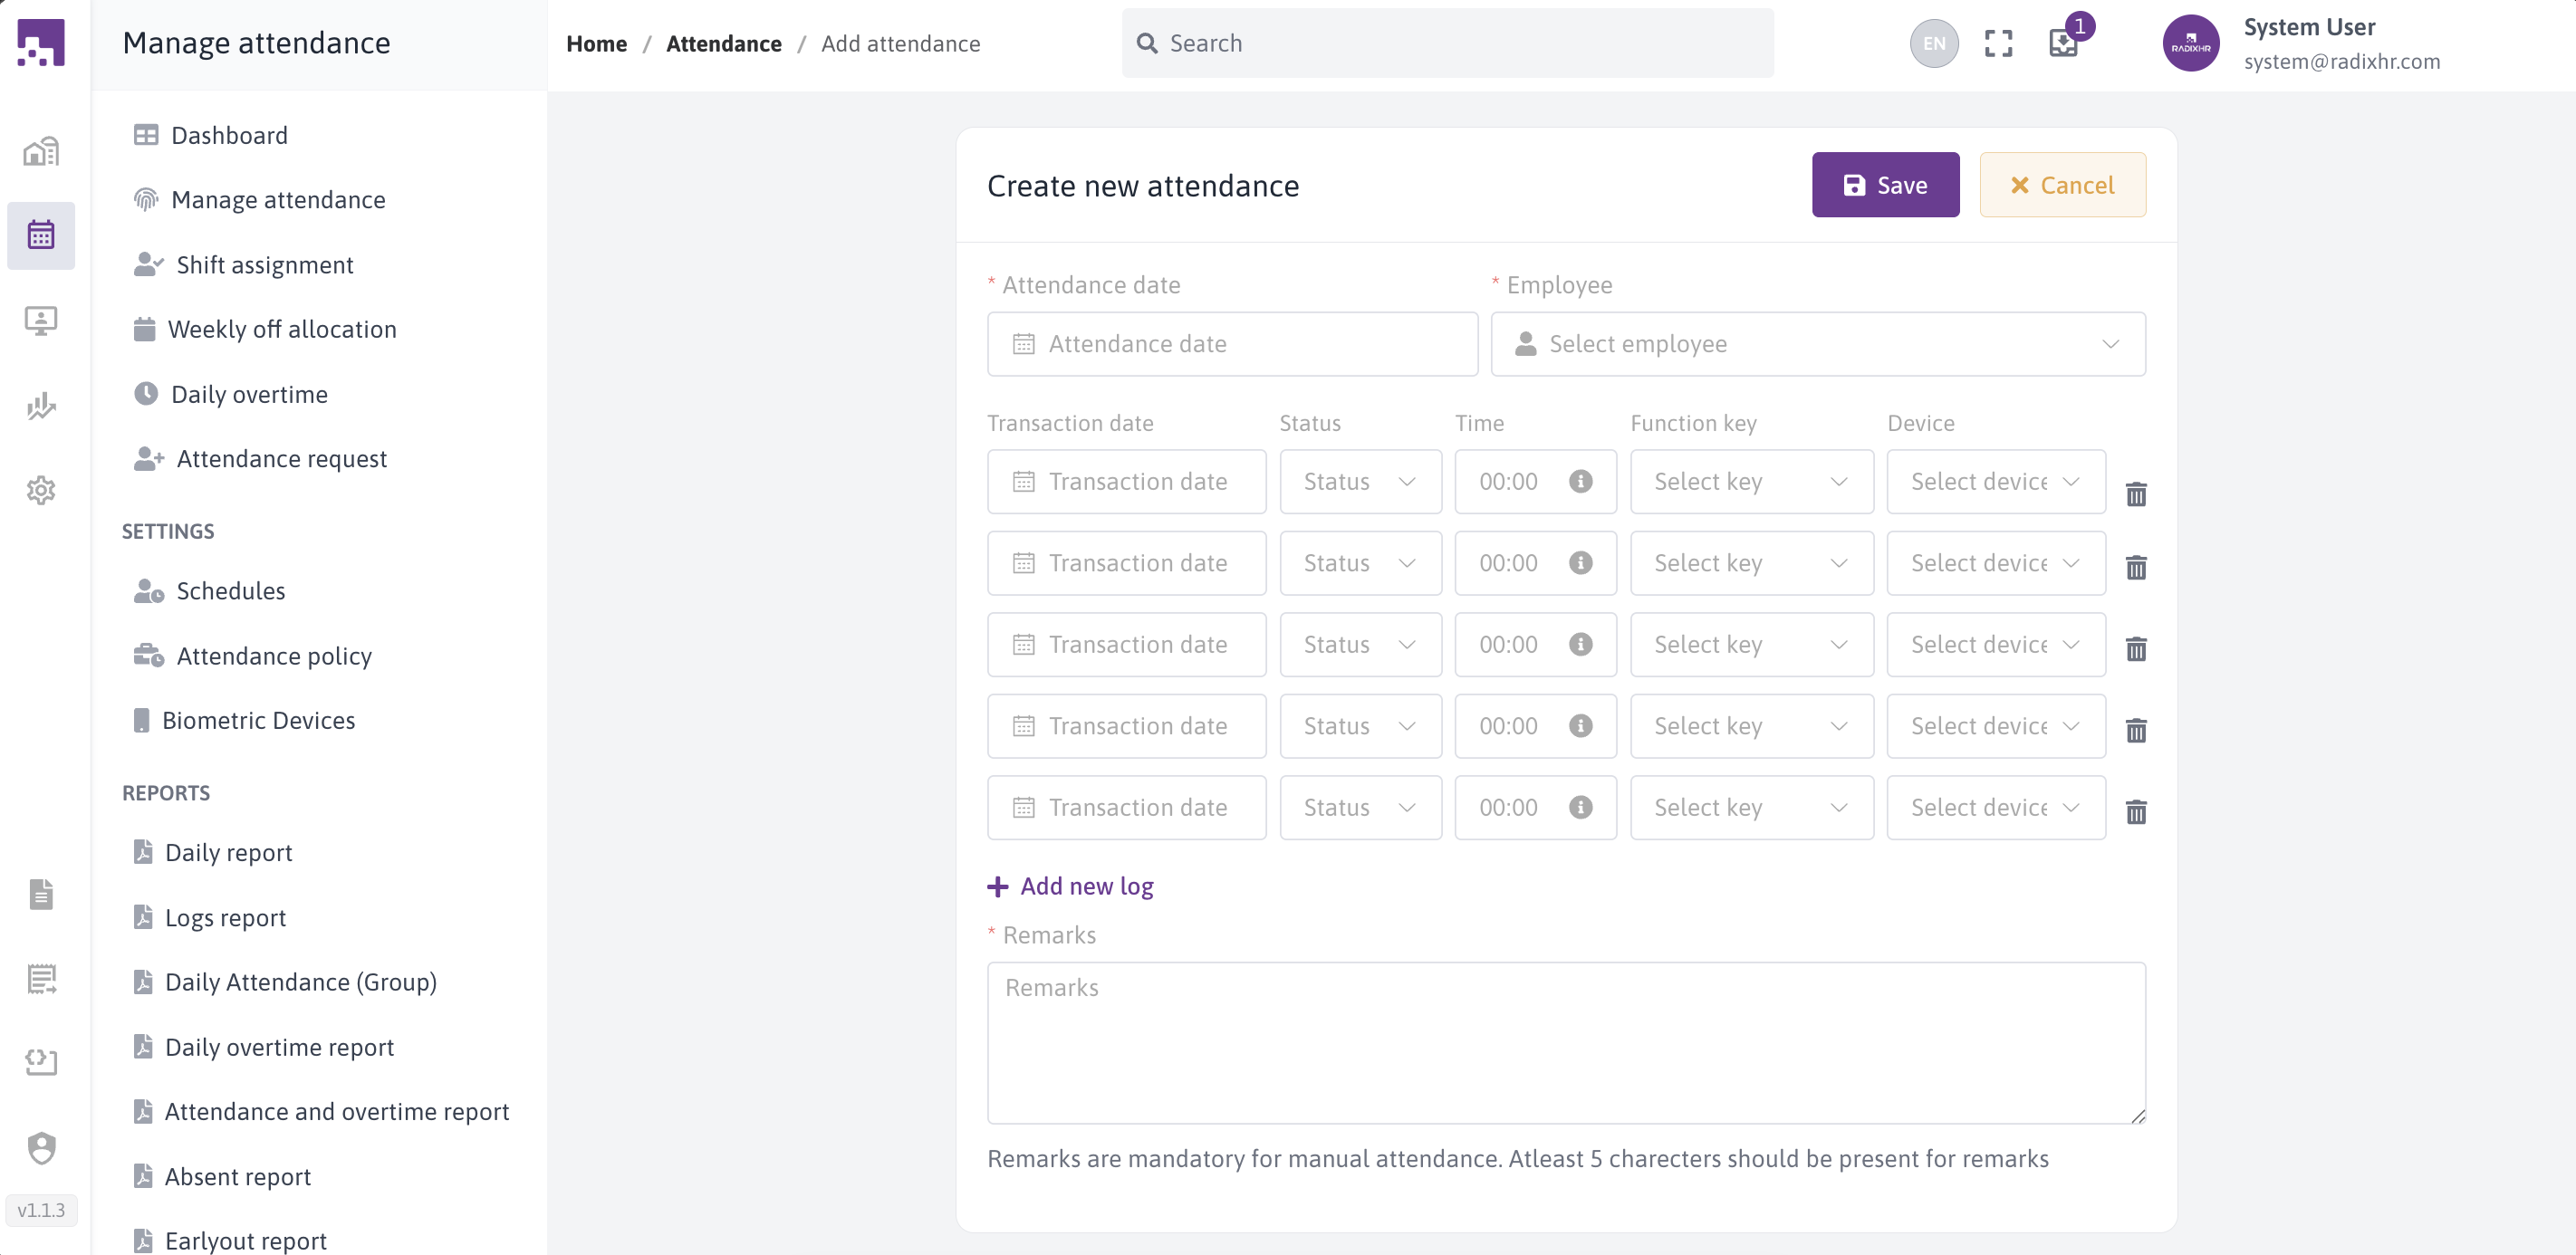
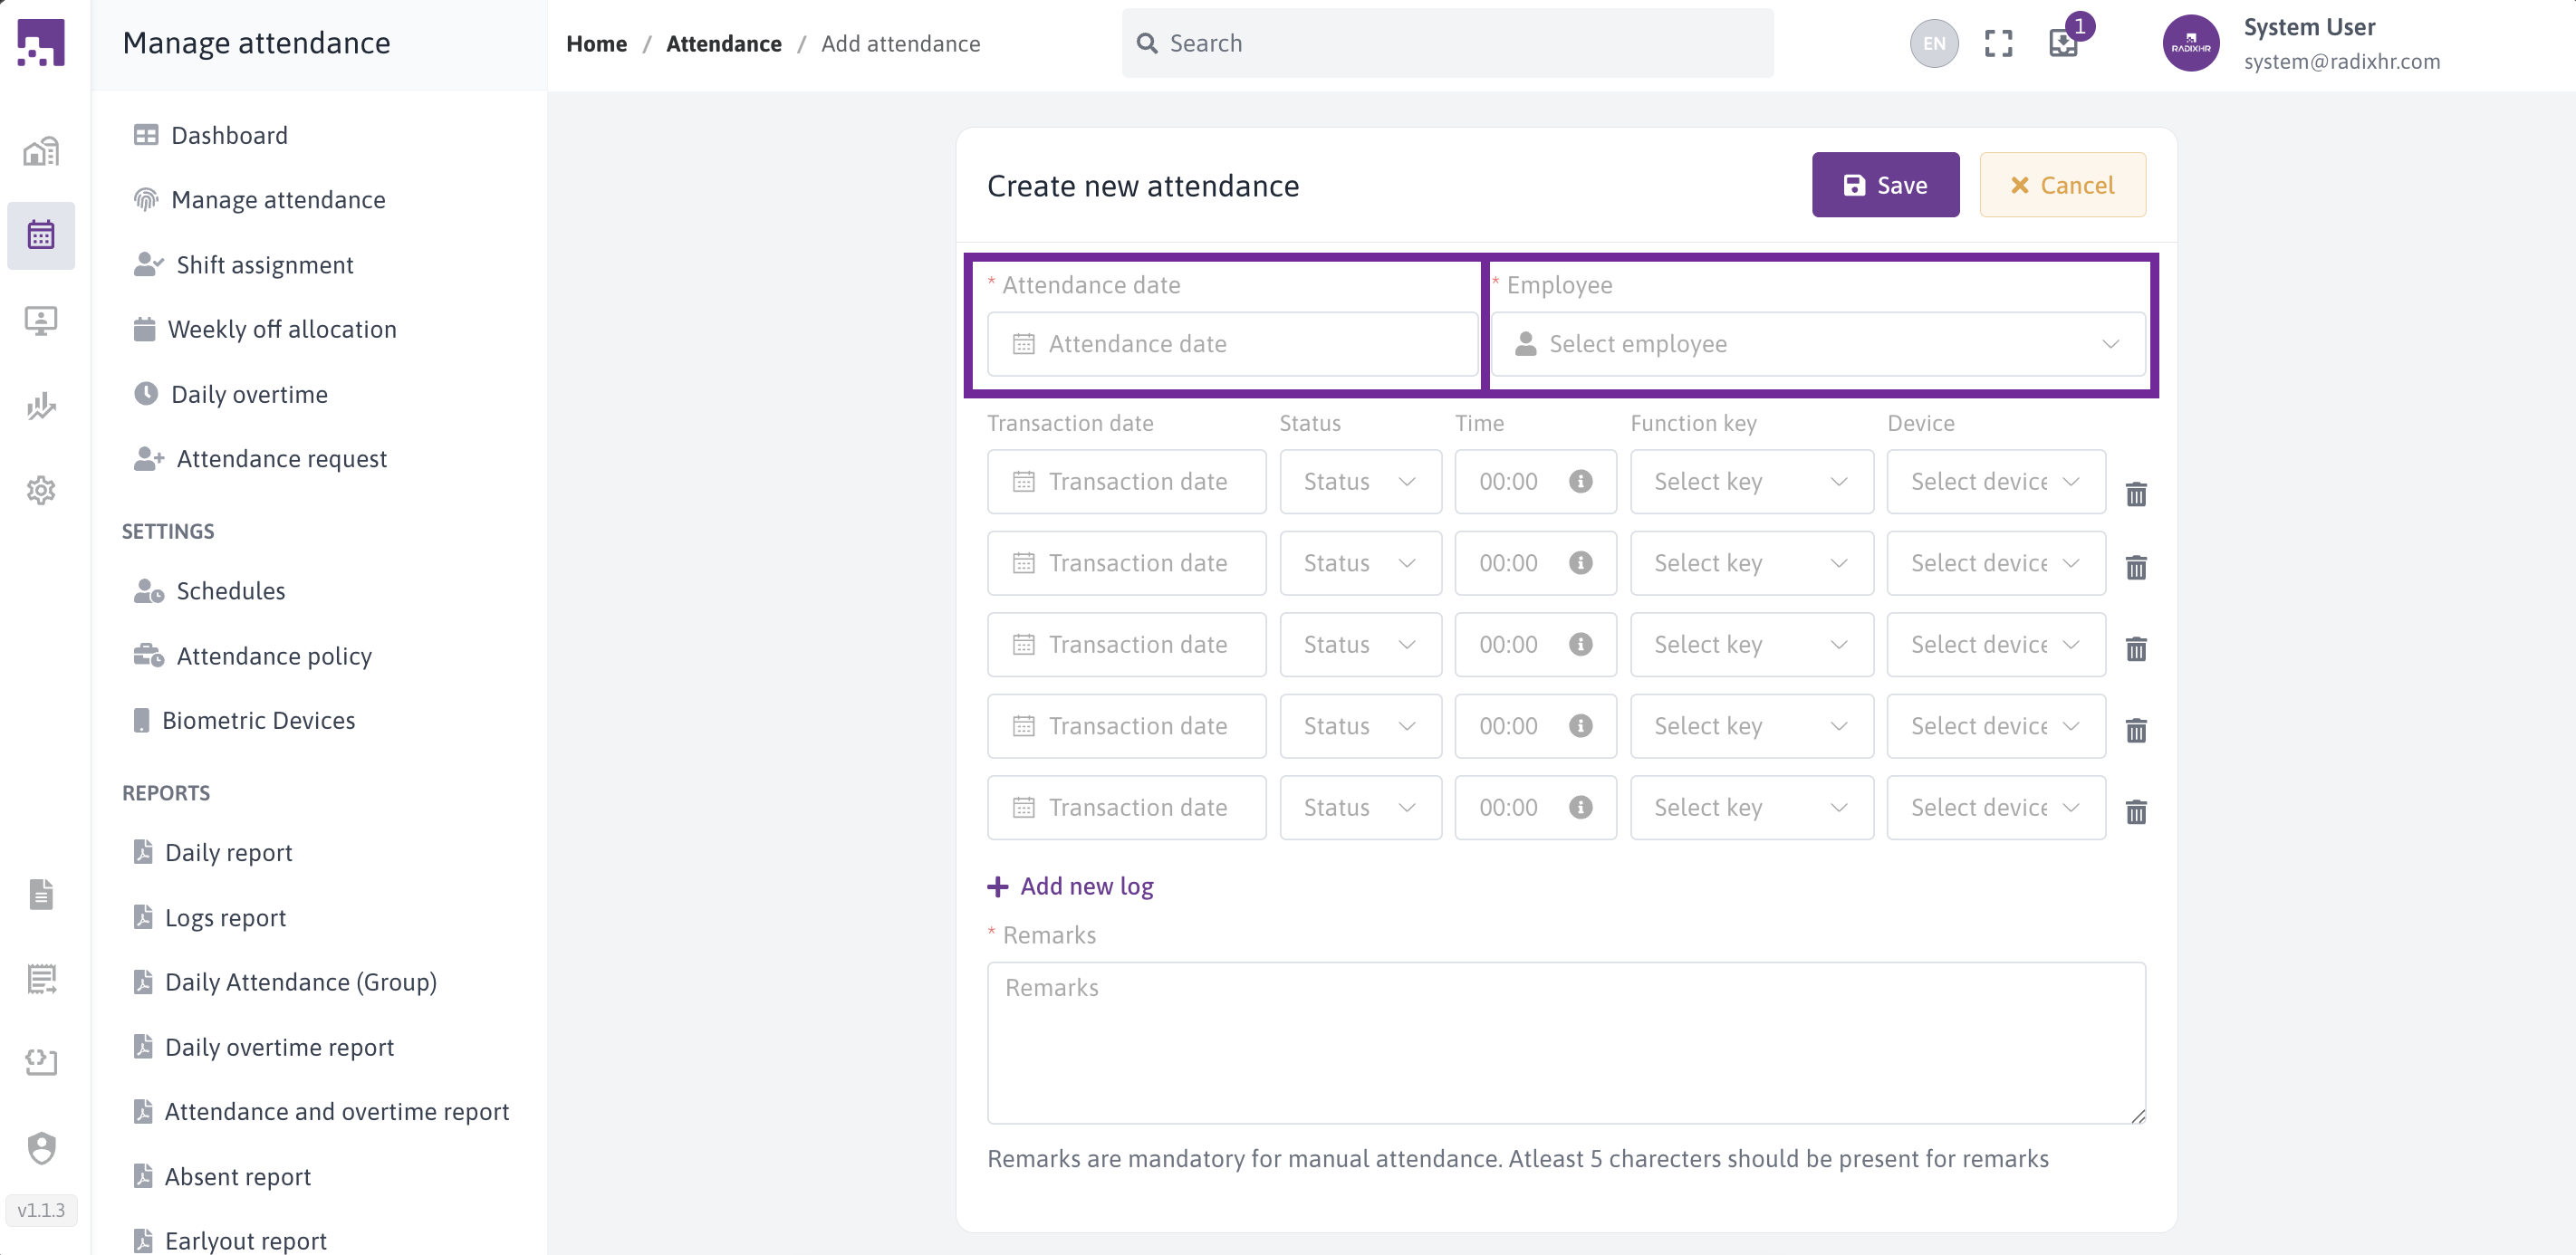
# Required Fields:
Attendance Date (Required)
- Select the date for which you're recording attendance
- Future dates are disabled
- Format: DD/MM/YYYY
Employee (Required)
- Start typing the employee name or code
- Select from the dropdown list
- Only active employees appear in the list
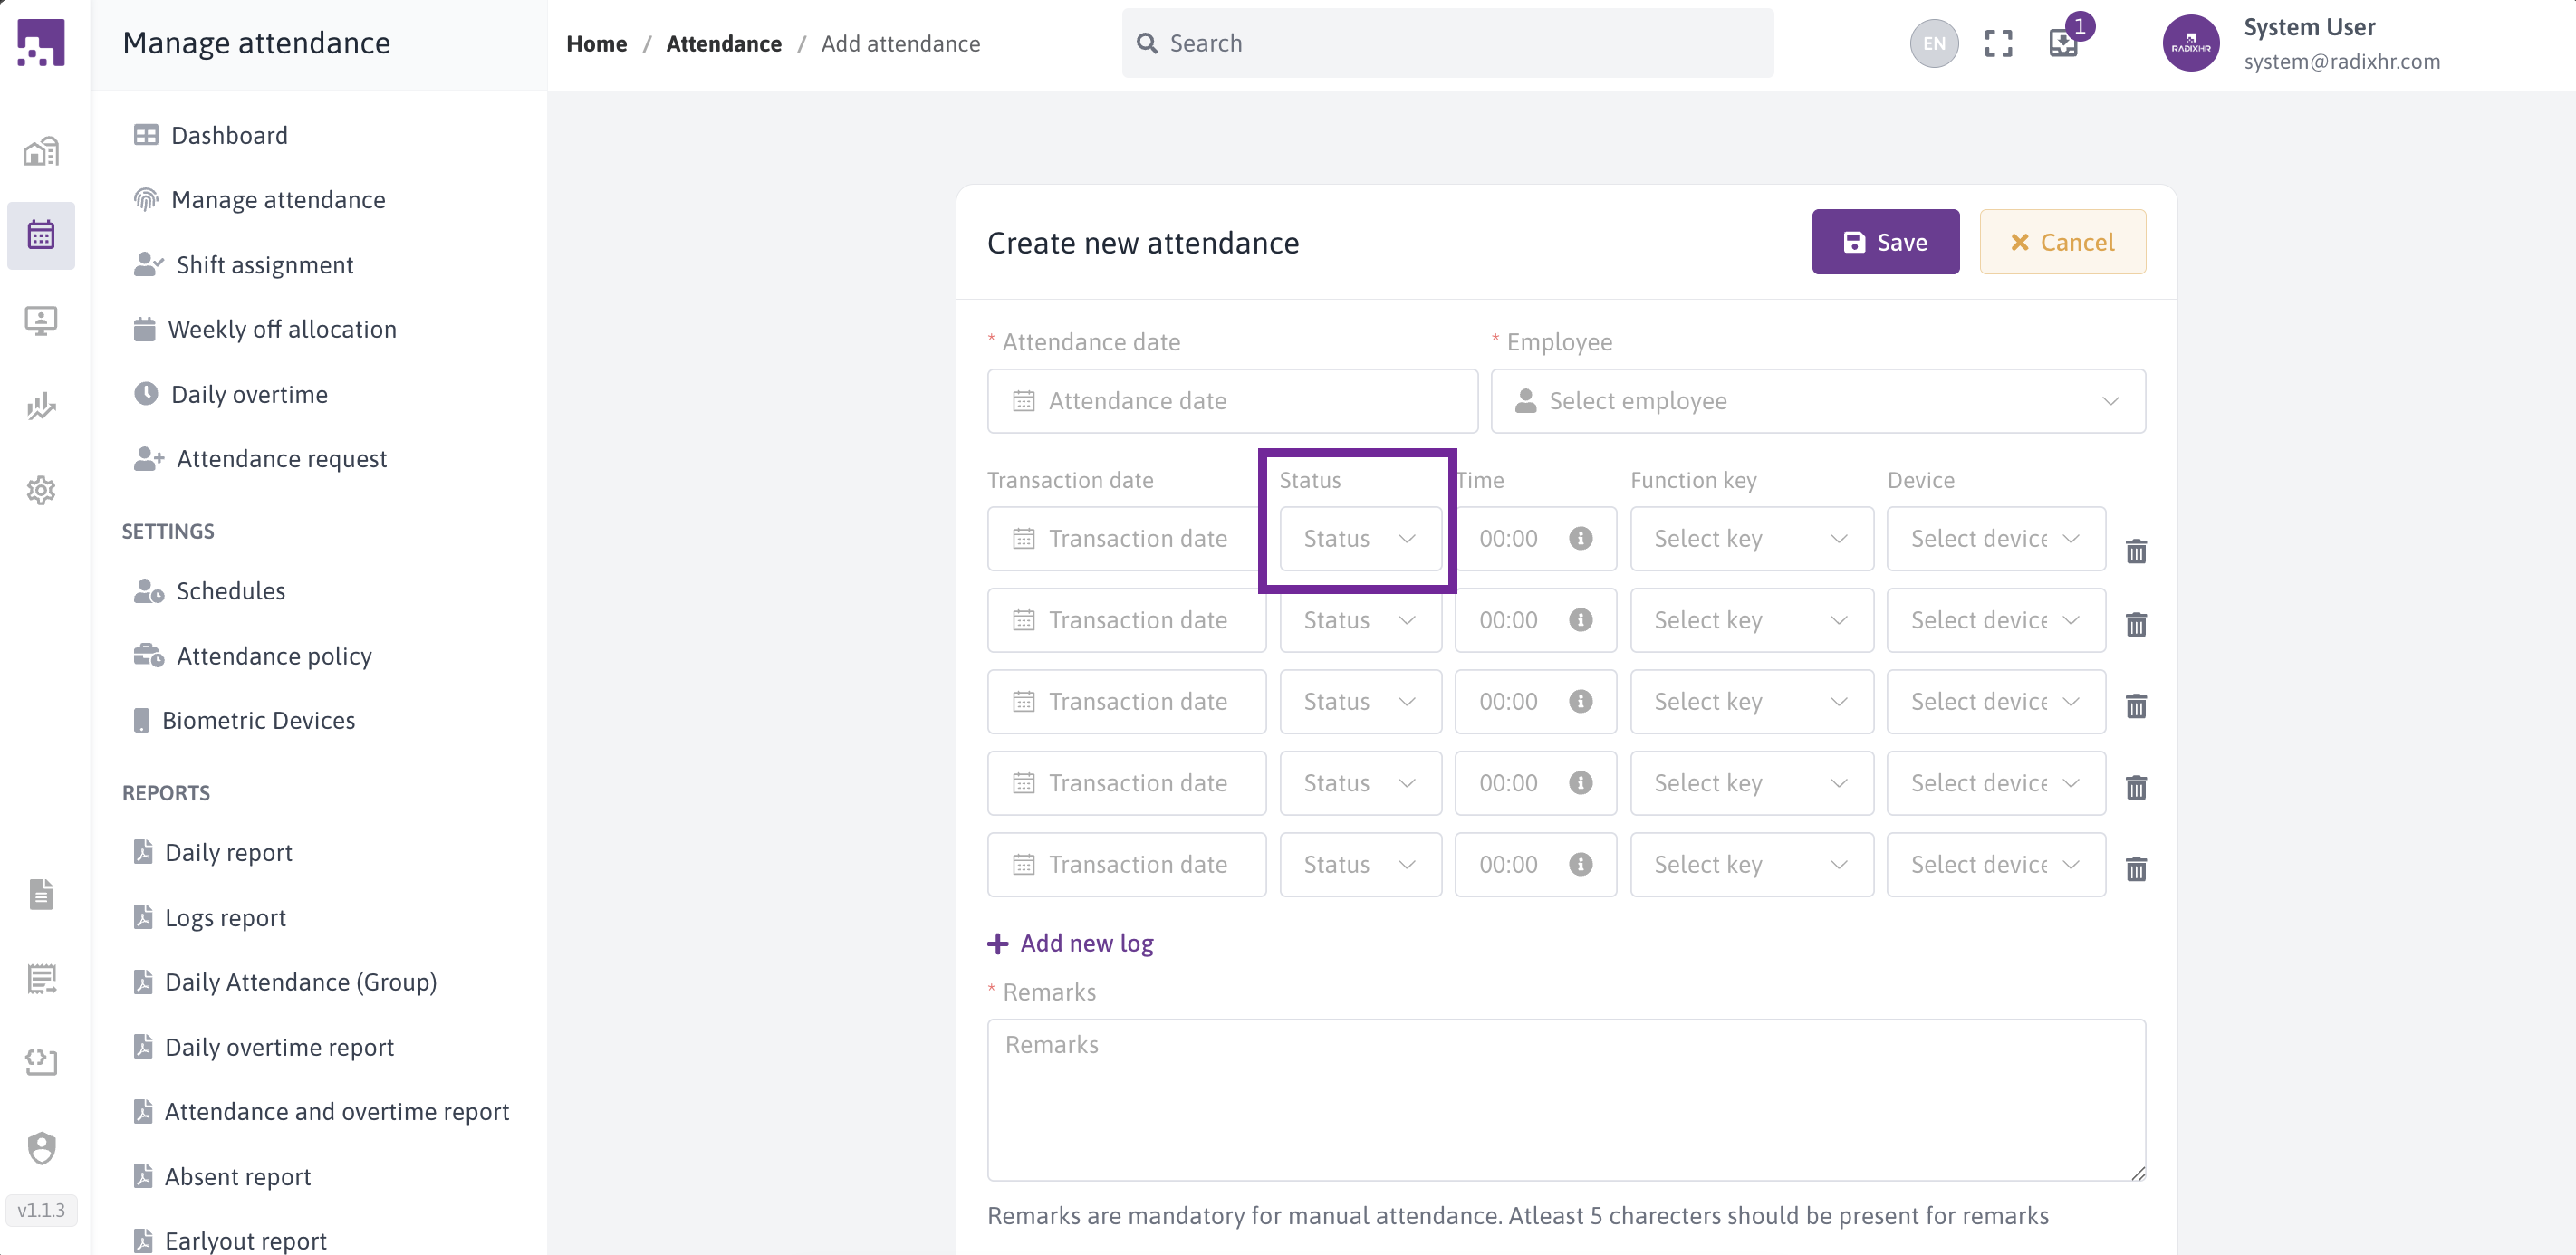
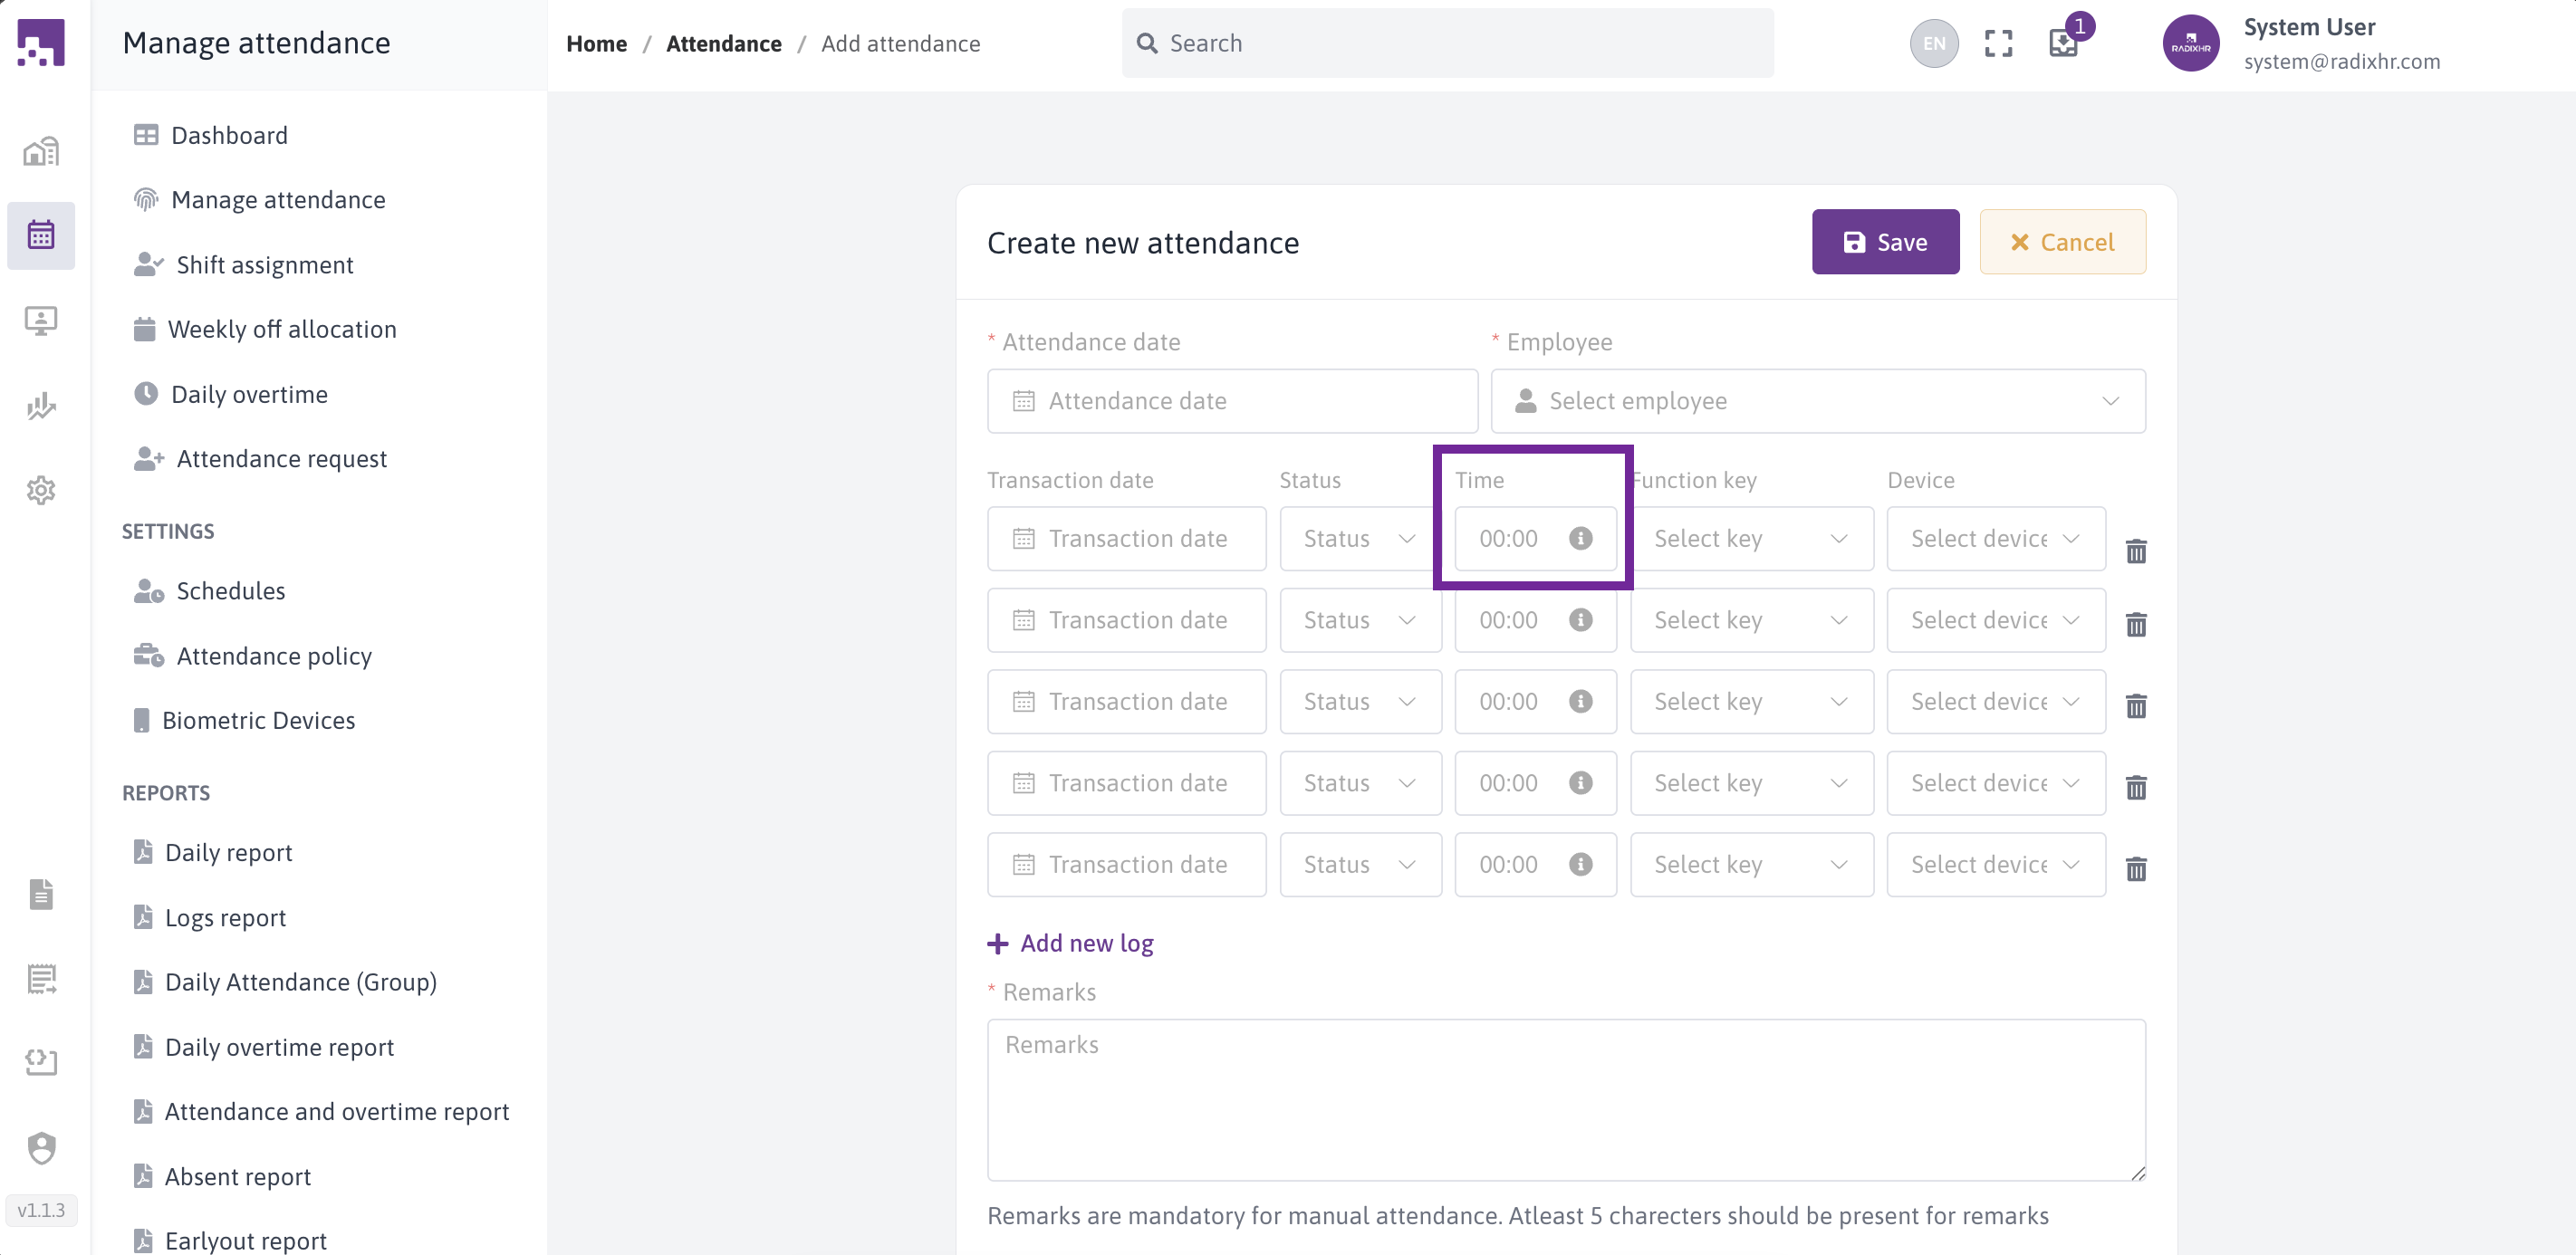
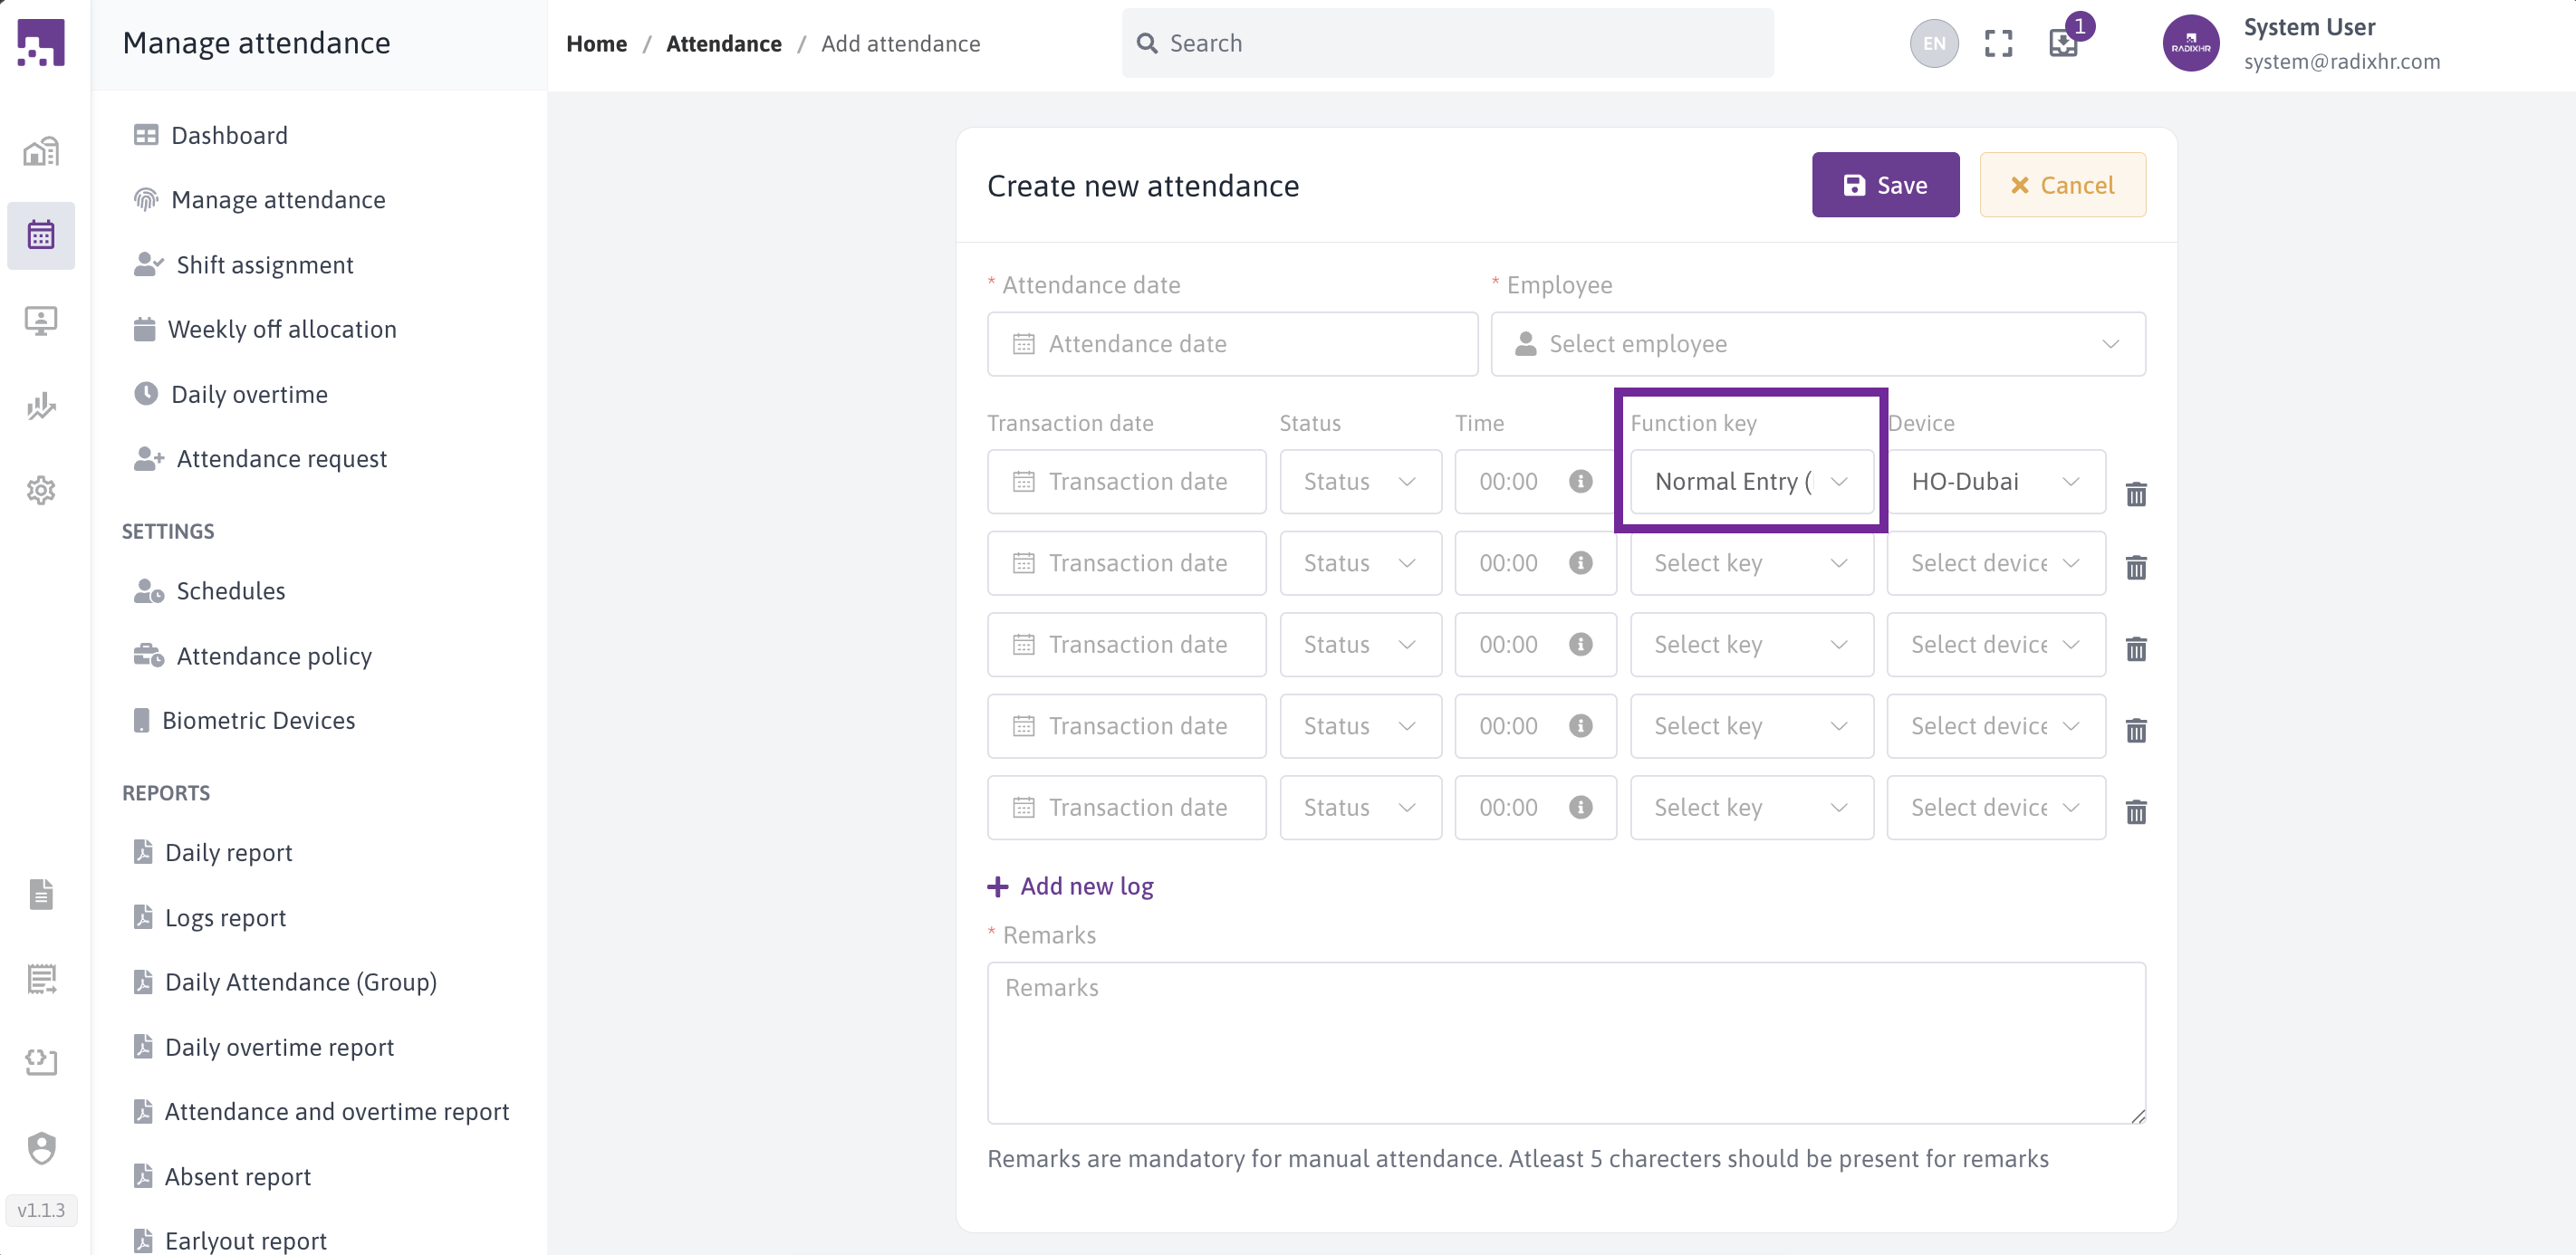
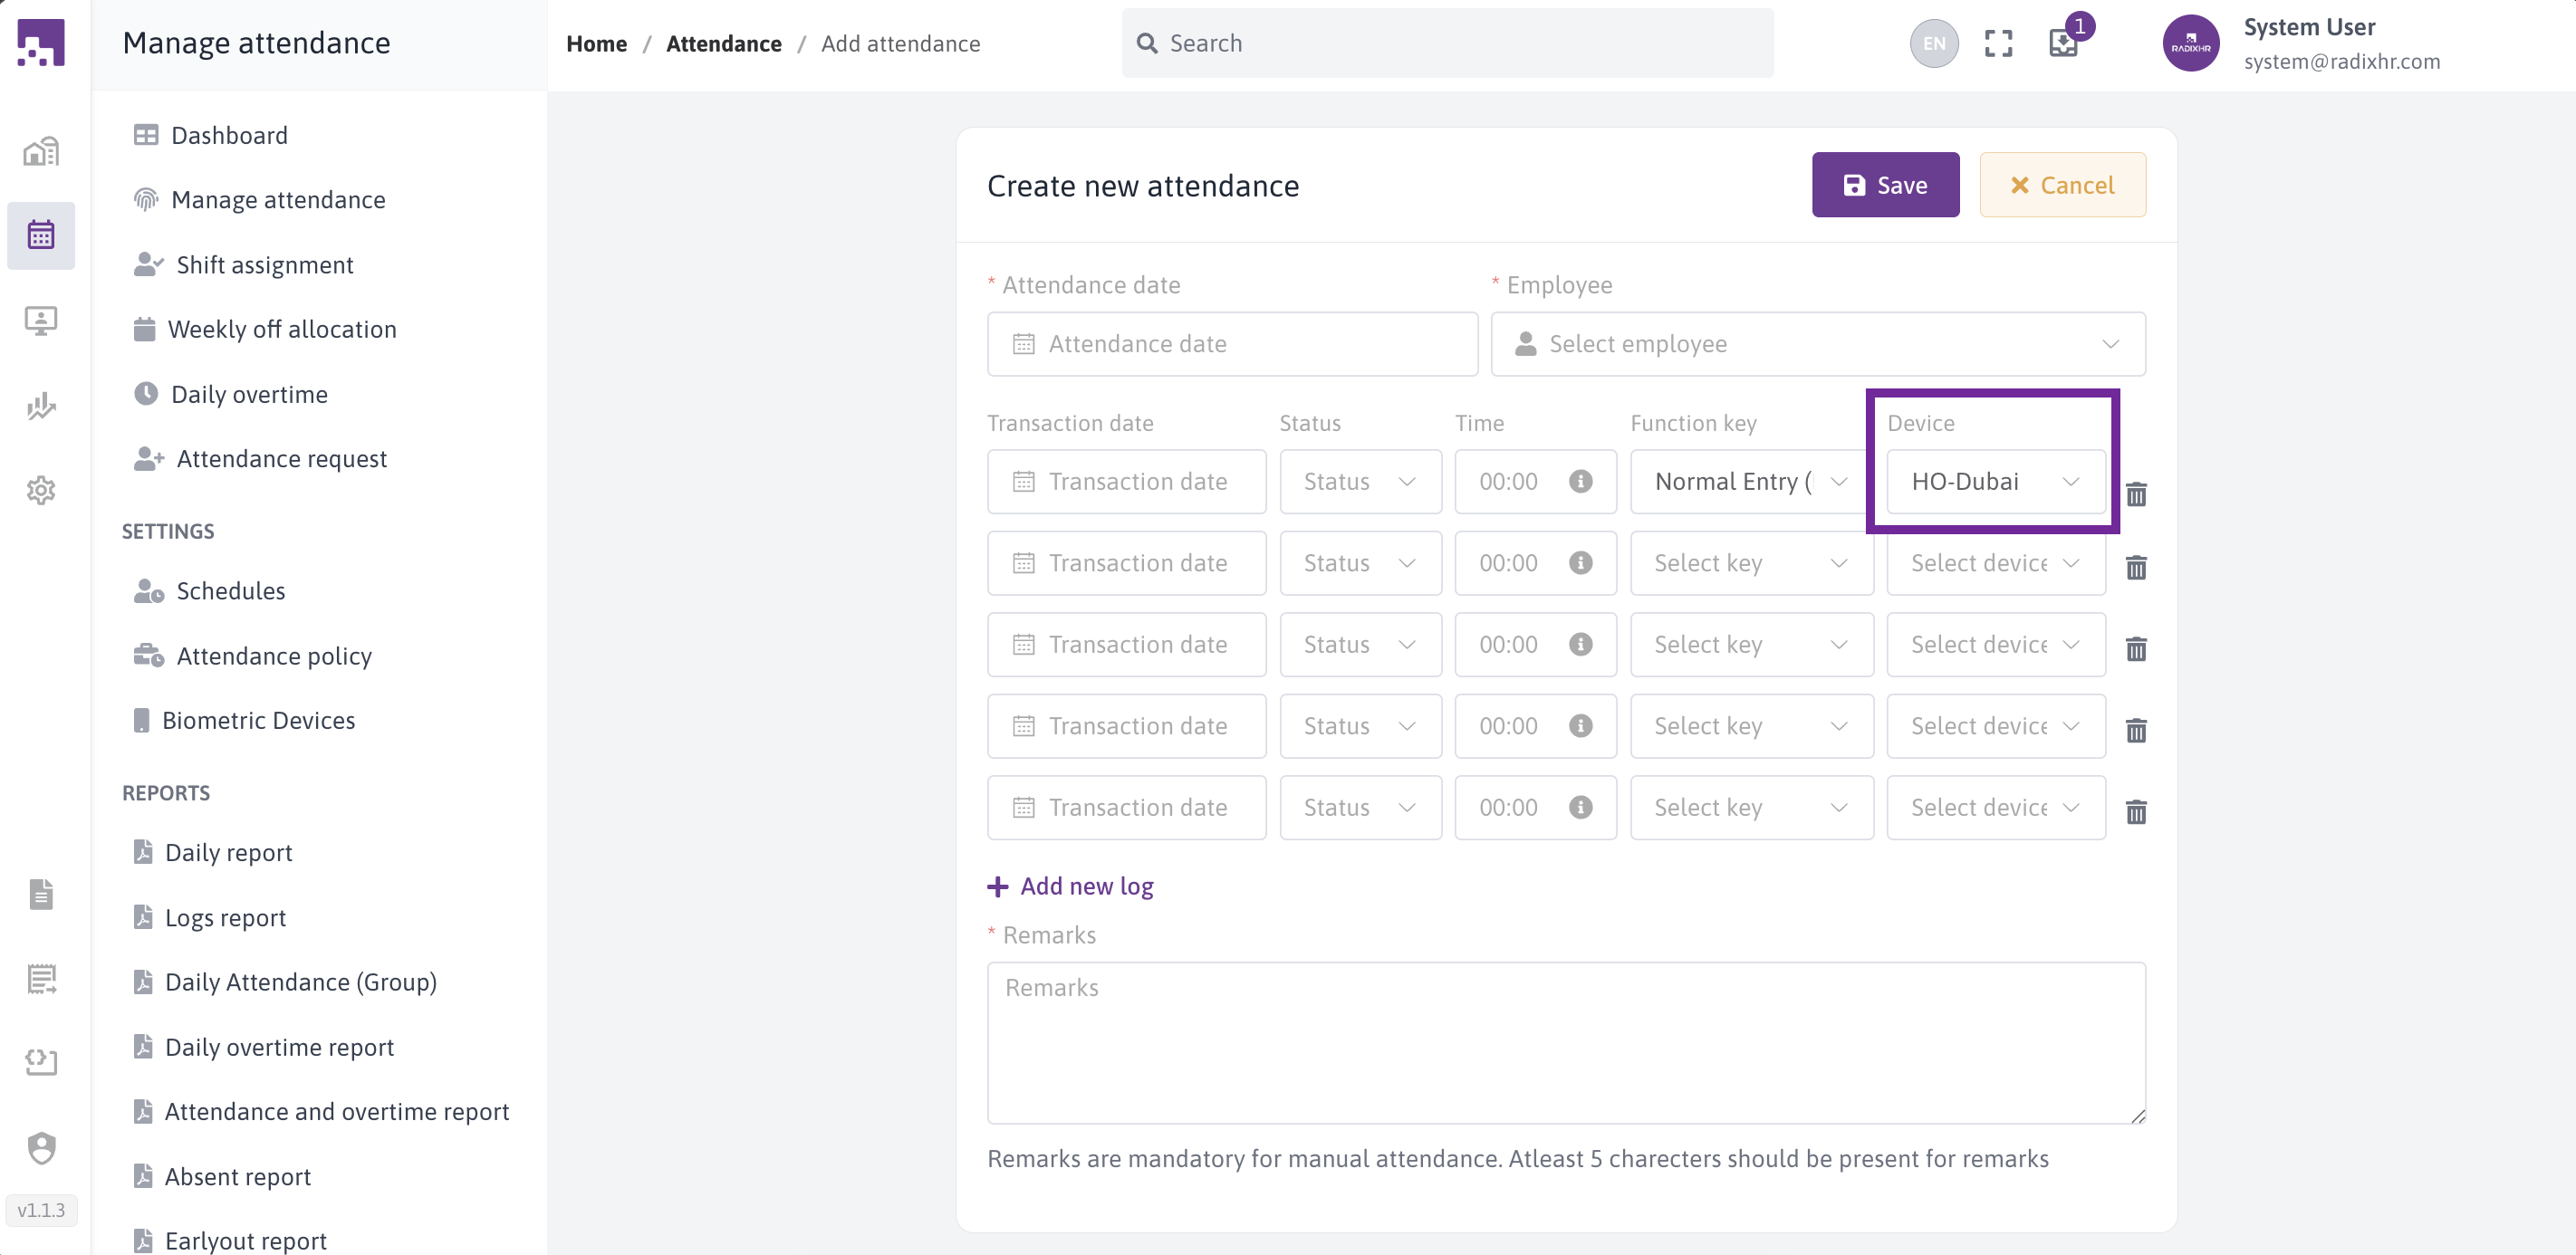
Step 3: Add Attendance Logs
The system provides 5 empty log rows by default. Fill in the details for each punch in/out:
For each log entry, you can specify:
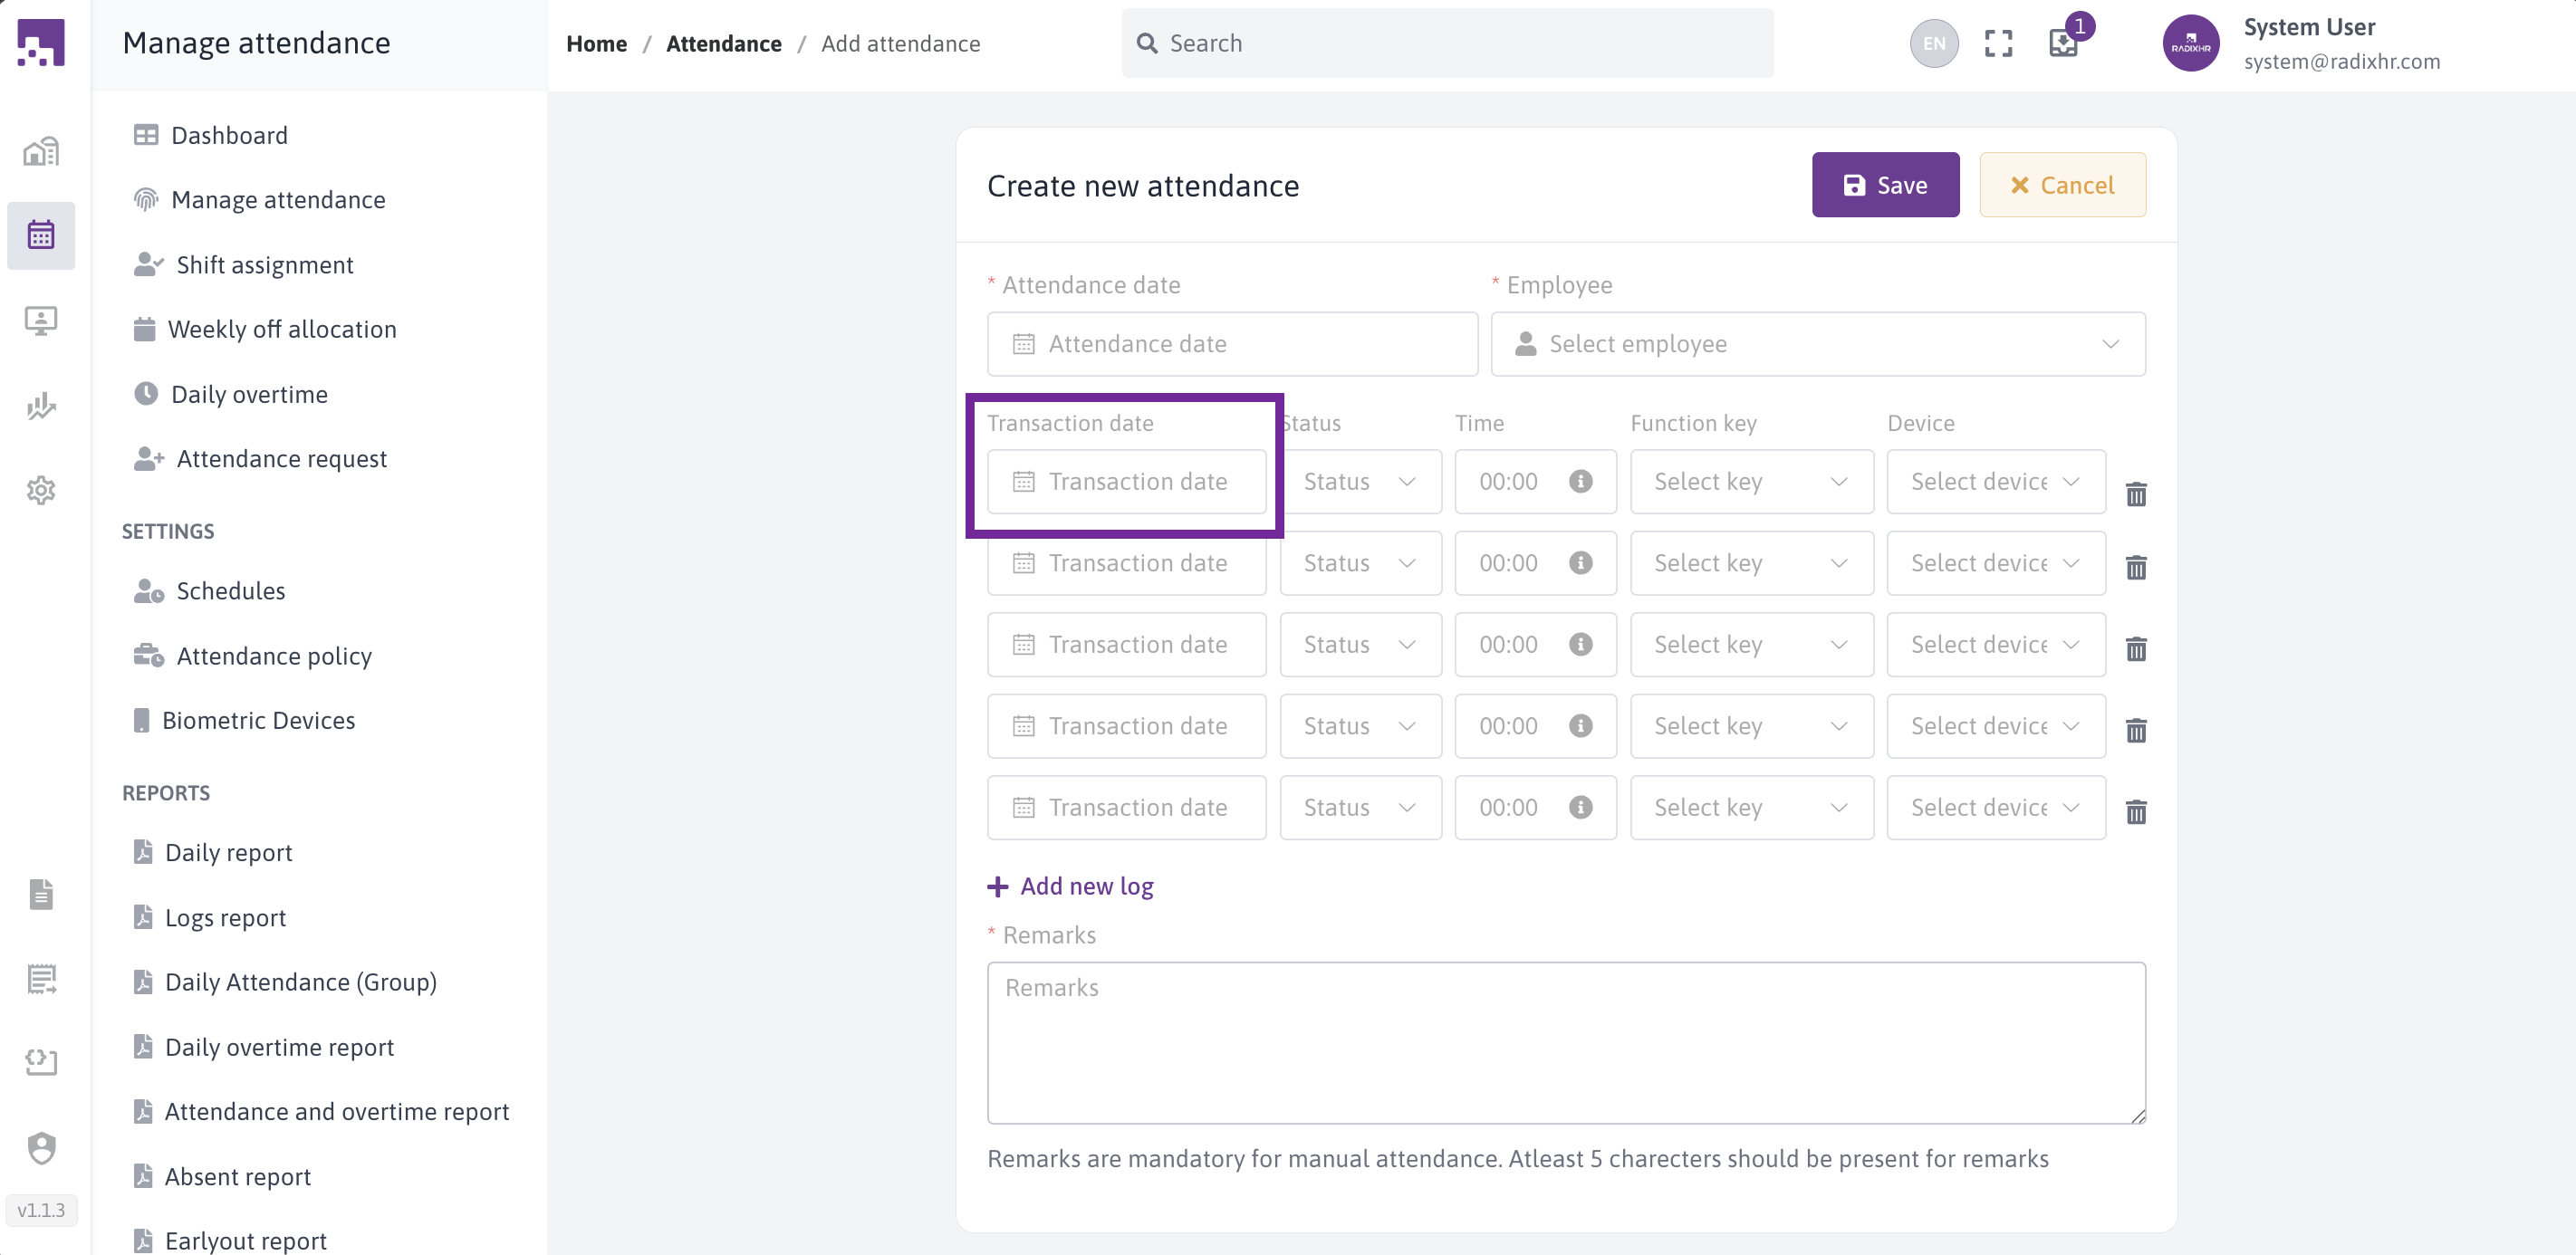
- Transaction Date
- The actual date of the punch
- Auto-fills with the attendance date when you click the field
- Can be different from attendance date (for night shifts)
- Status (Required if log is filled)
- IN - Employee punch in
- OUT - Employee punch out
- Dropdown selection
- Time (Required if other fields are filled)
- Enter the punch time in 24-hour format
- Format: HH:MM (e.g., 09:00, 14:30)
- The system automatically adds the colon after you type two digits
- Invalid times (like 25:00 or 09:00 AM) will show an error
- Tooltip available with help information
- Function Key (Optional)
- F1 - Normal Entry (default)
- F2 - Lunch Break
- F3 - Business Out
- F4 - Personal Out
- Helps categorize different types of breaks or outings
- Device (Required if log is filled)
- Select the device used for punching
- Dropdown lists all configured attendance devices
- Defaults to the first device when focused
Step 4: Add More Logs (If Needed)
Click the "Add New Log" link to add additional rows if you need more than 5 entries.
Step 5: Remove Unwanted Logs
Click the trash icon next to any log row to remove it.
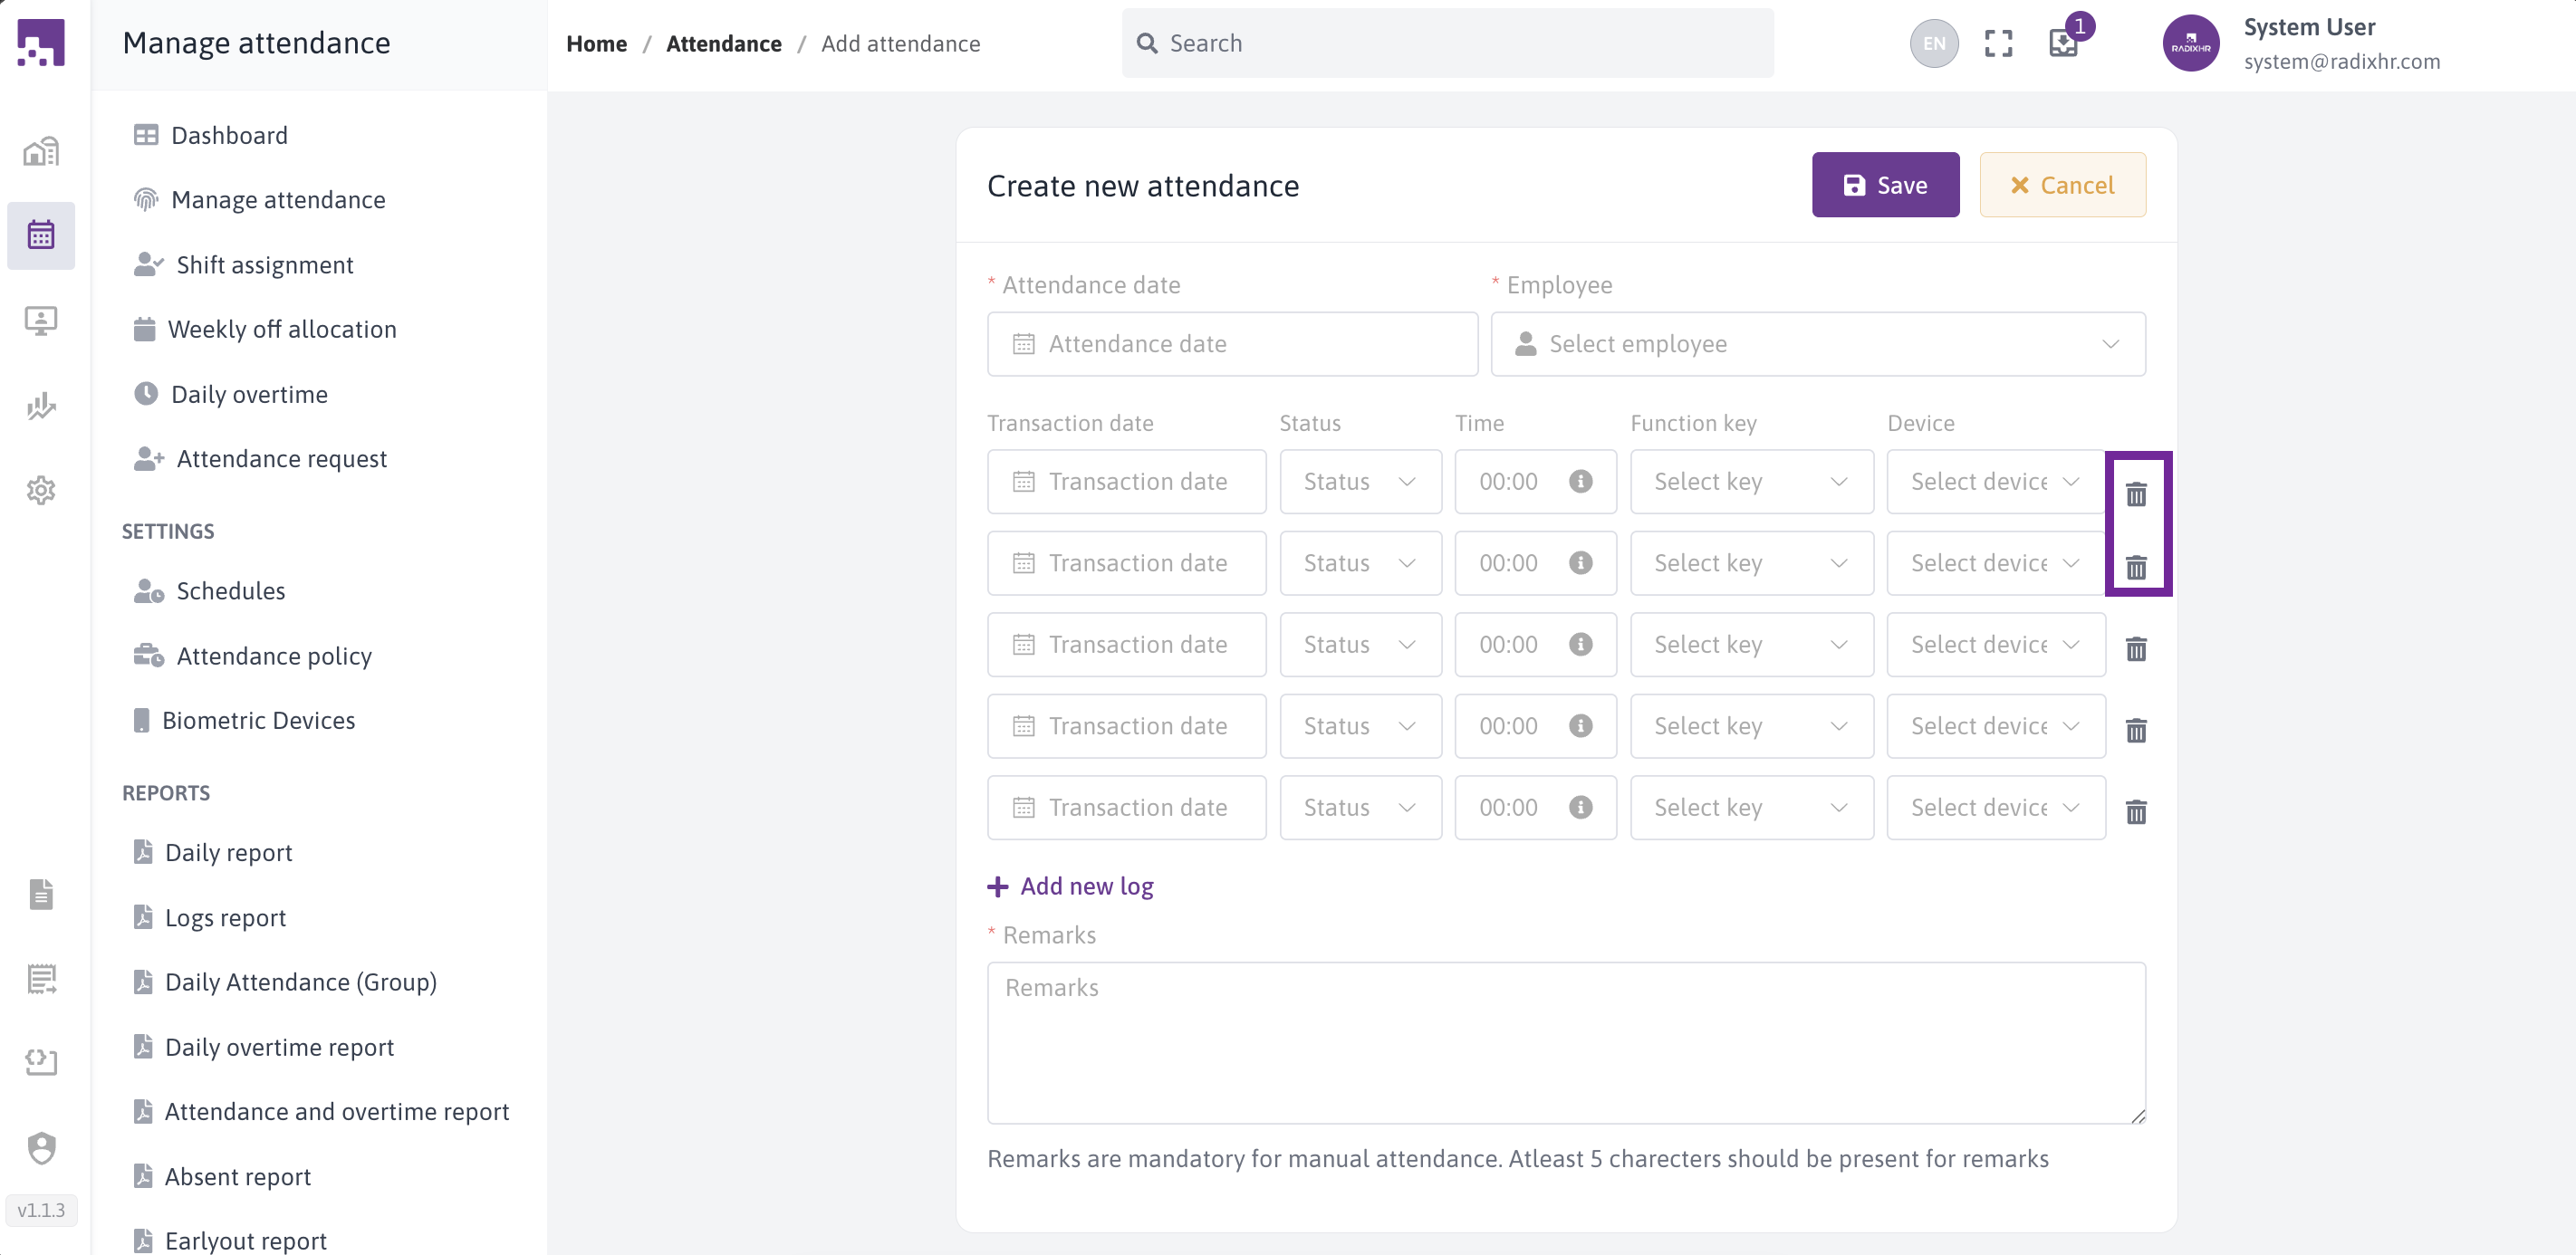
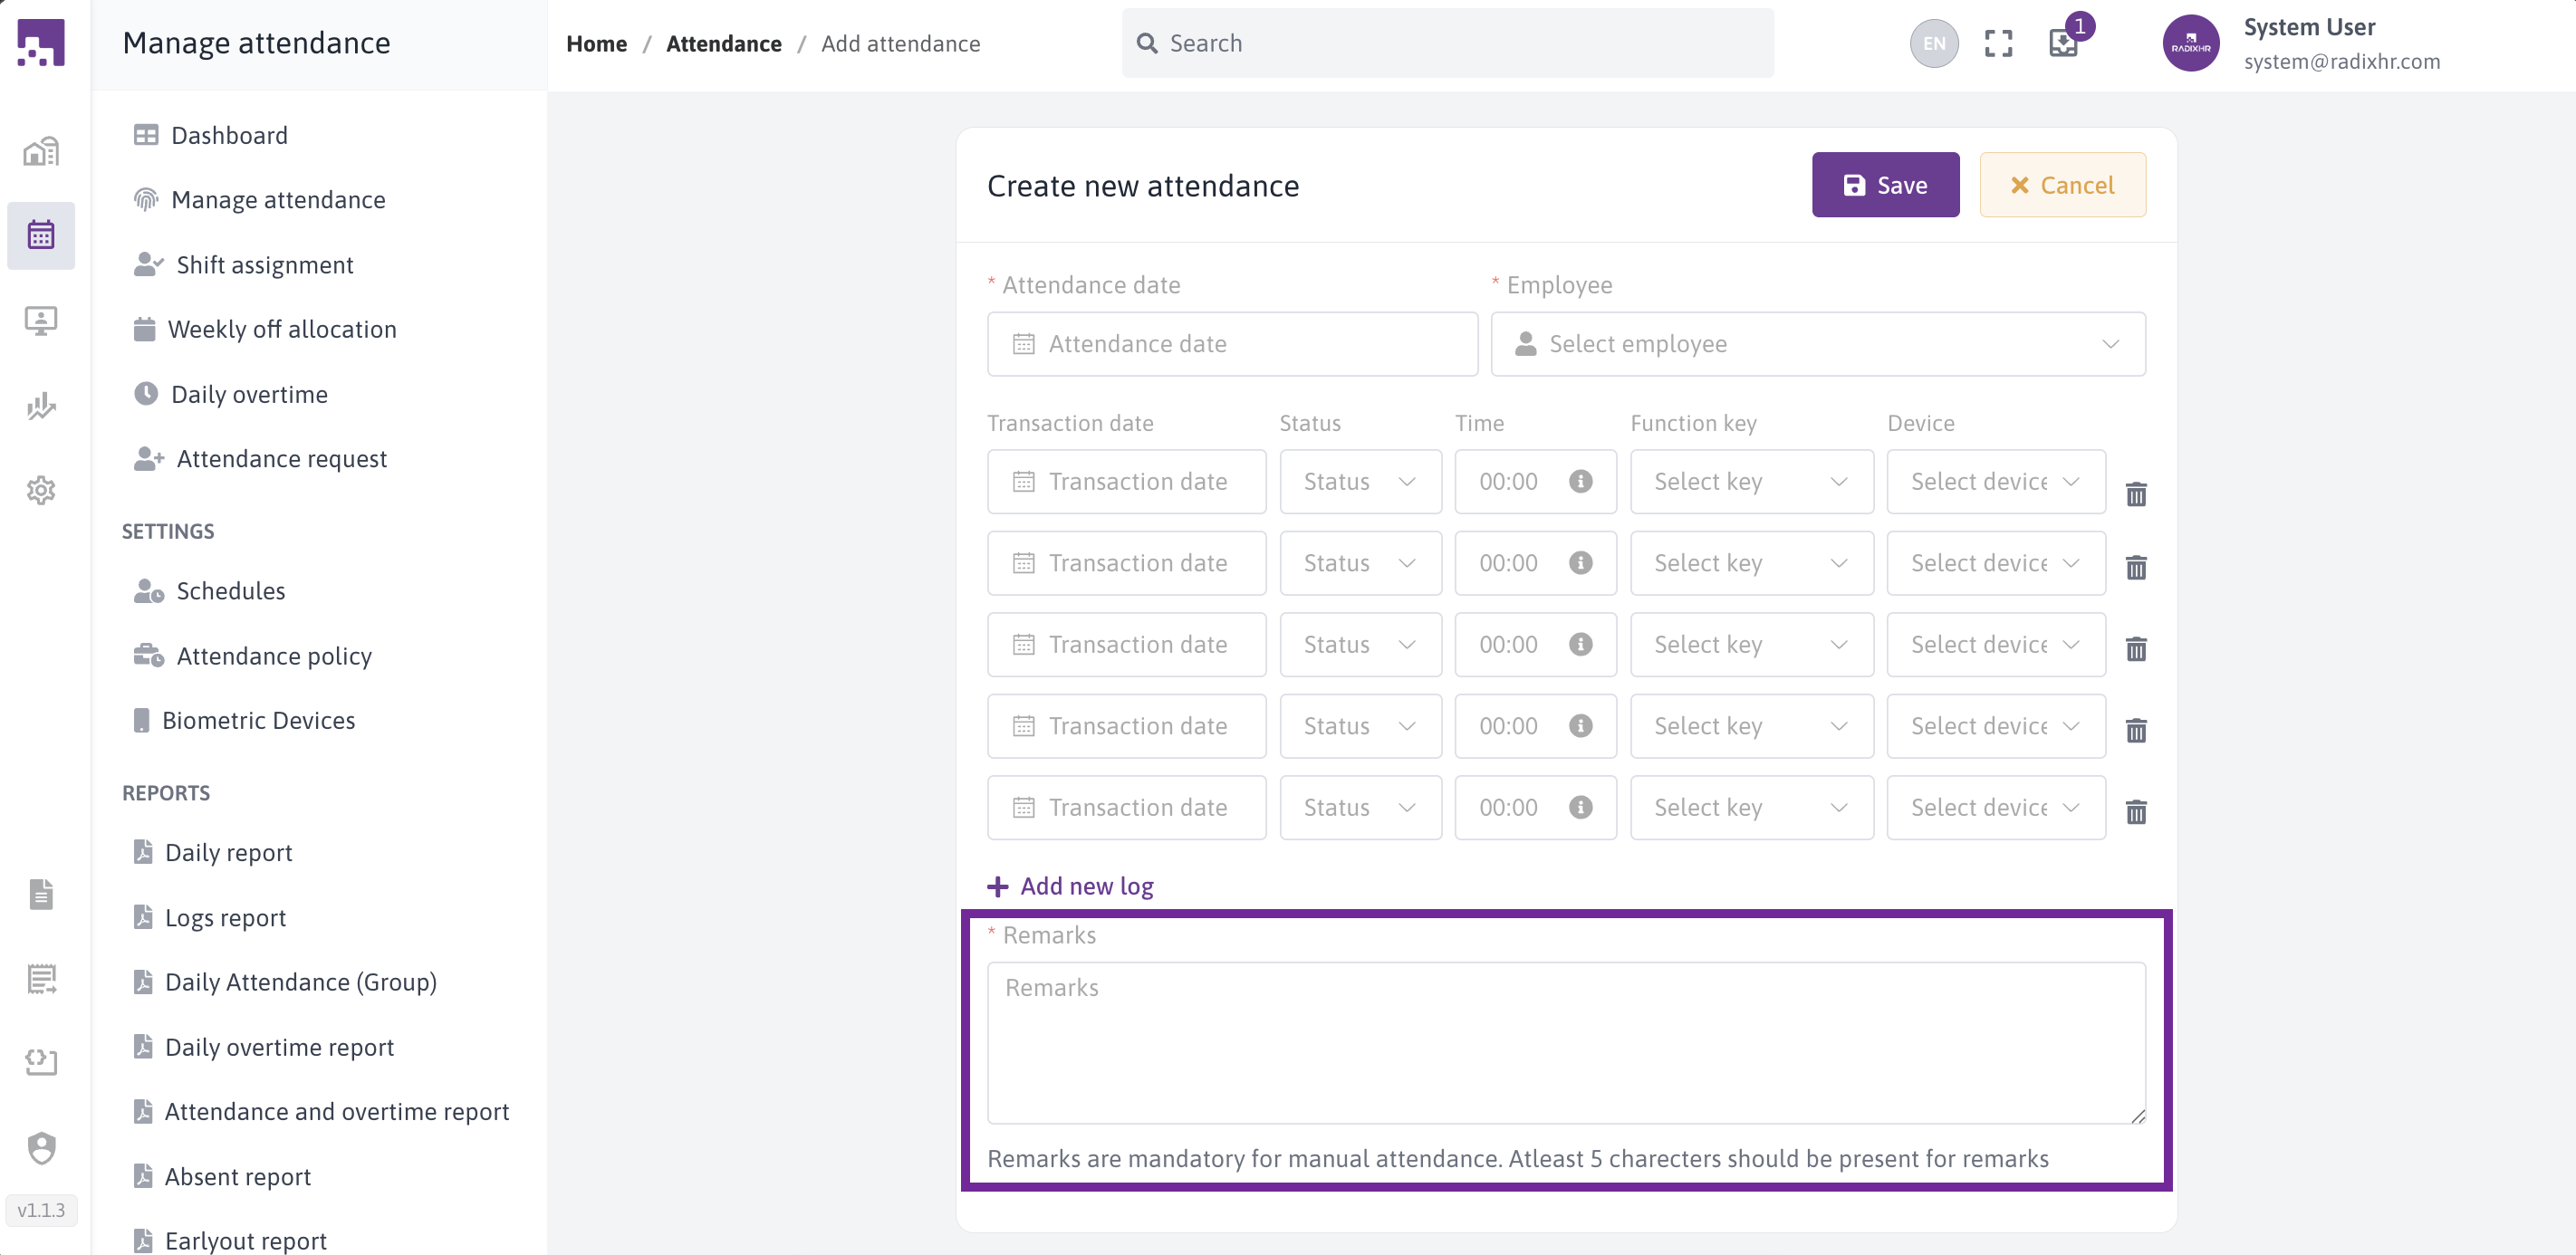
Step 6: Add Remarks
- Remarks (Required, minimum 5 characters)
- Type a detailed explanation for the manual entry
- Must be at least 5 characters long
- Examples: "Employee forgot to punch in", "Manual correction for system error"
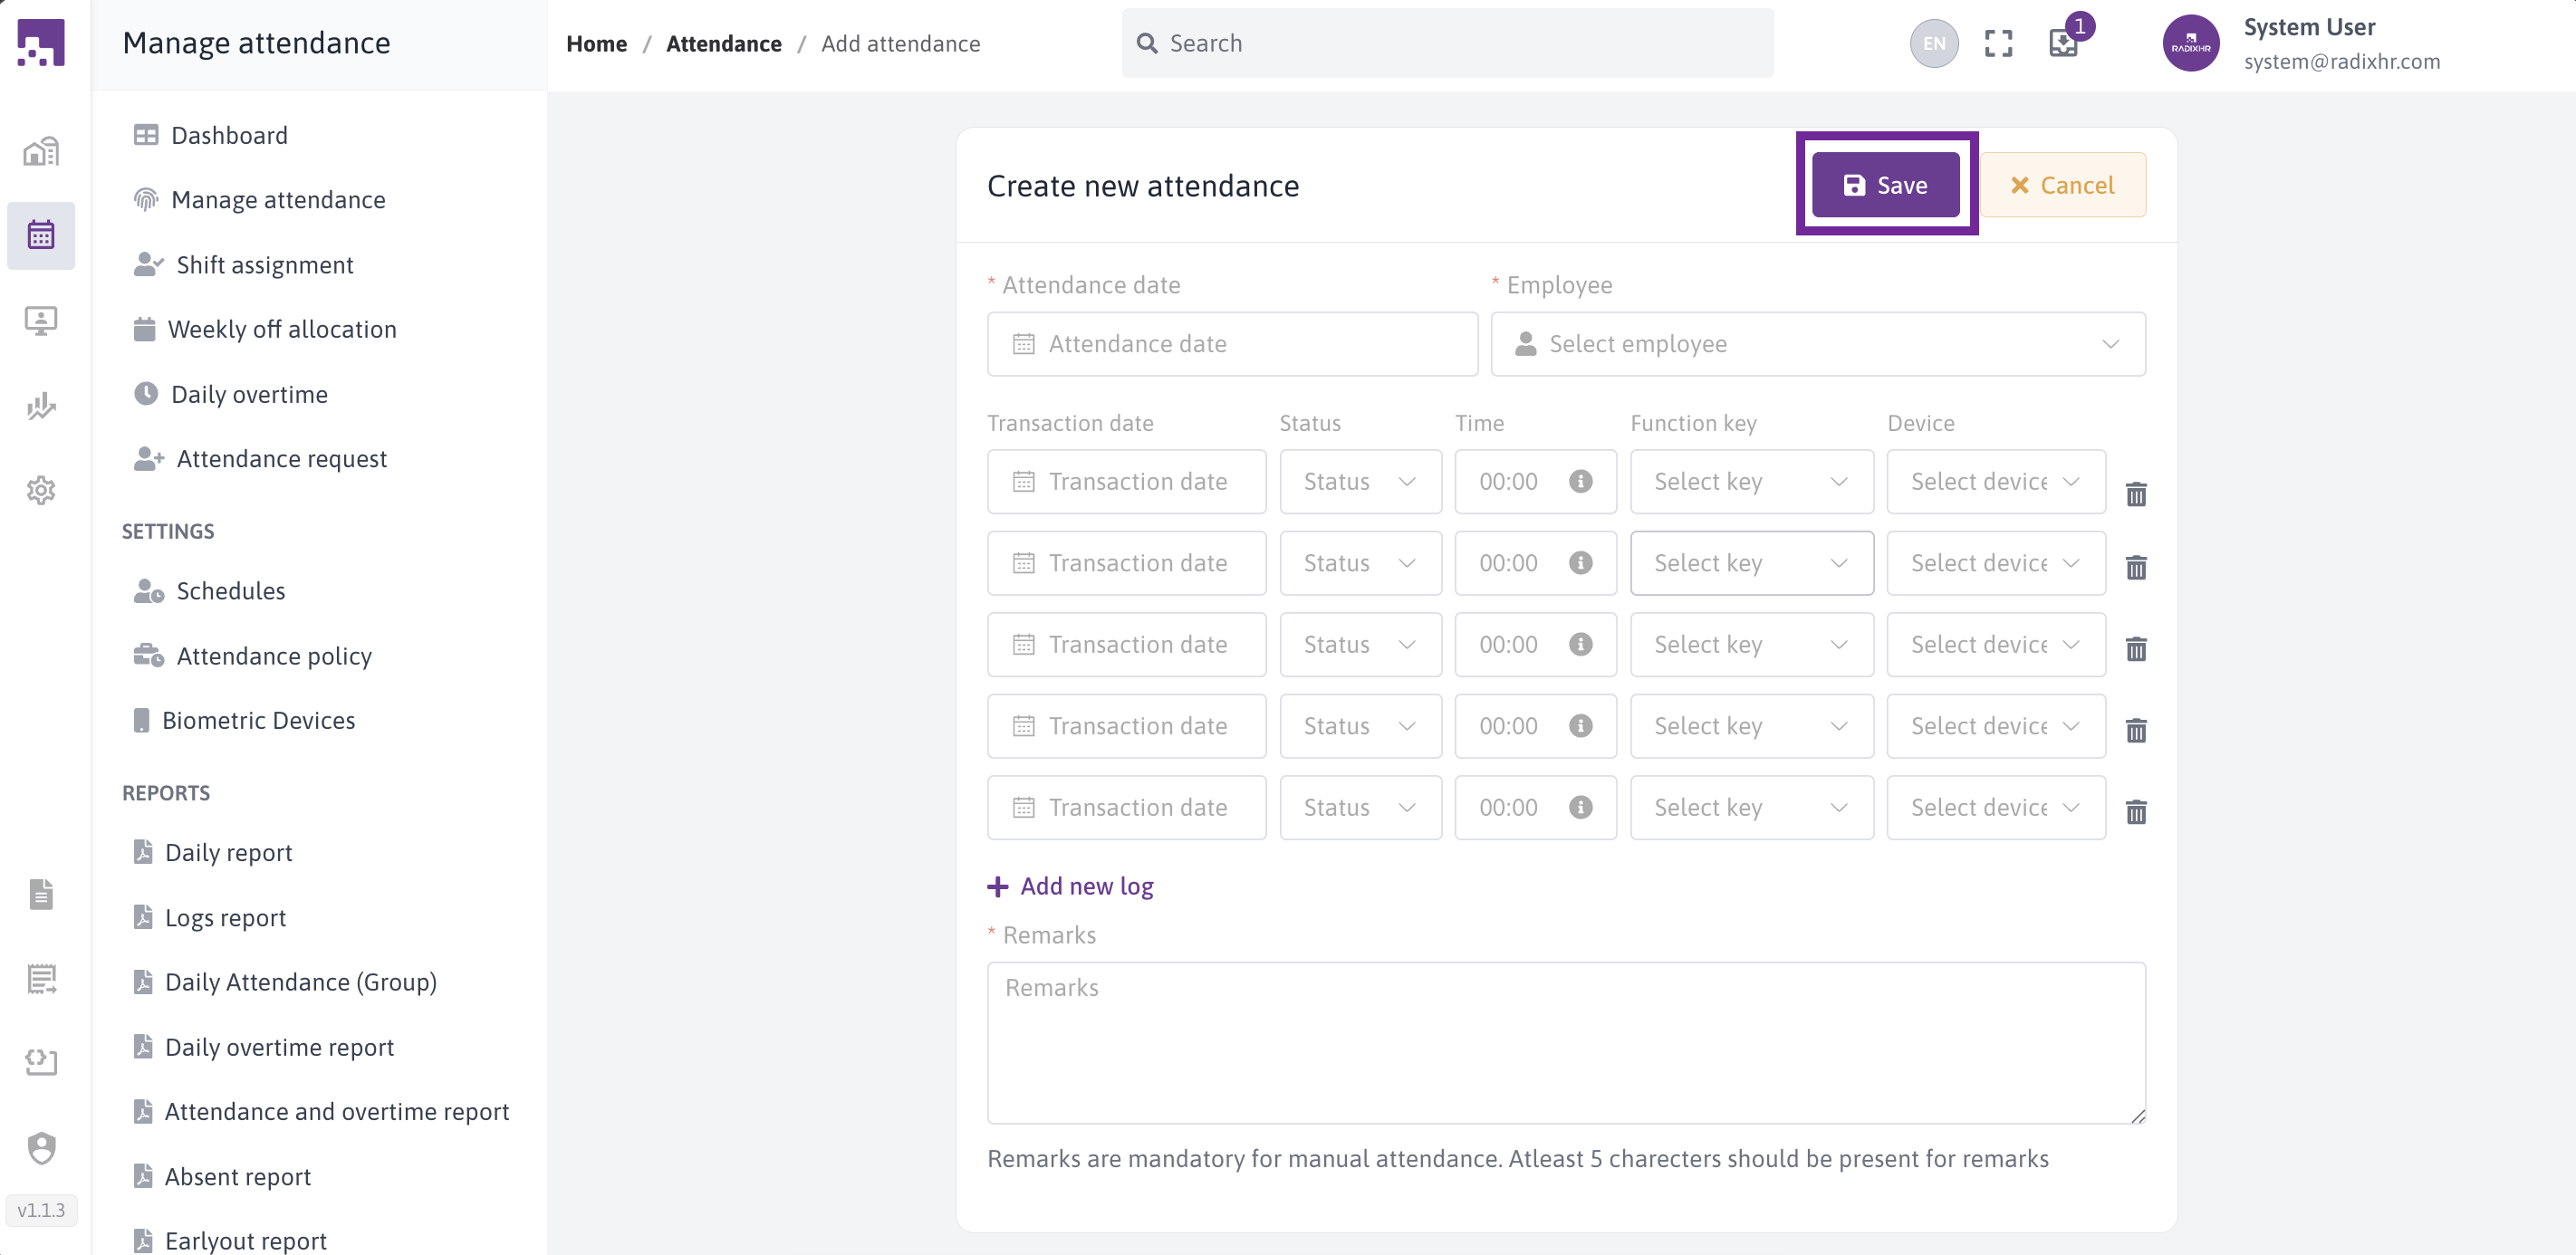
Step 7: Save
Click the Save button to create the attendance record.
The system will:
- Validate all required fields
- Check for duplicate entries
- Create the attendance logs
- Process the attendance automatically
- Show a success message
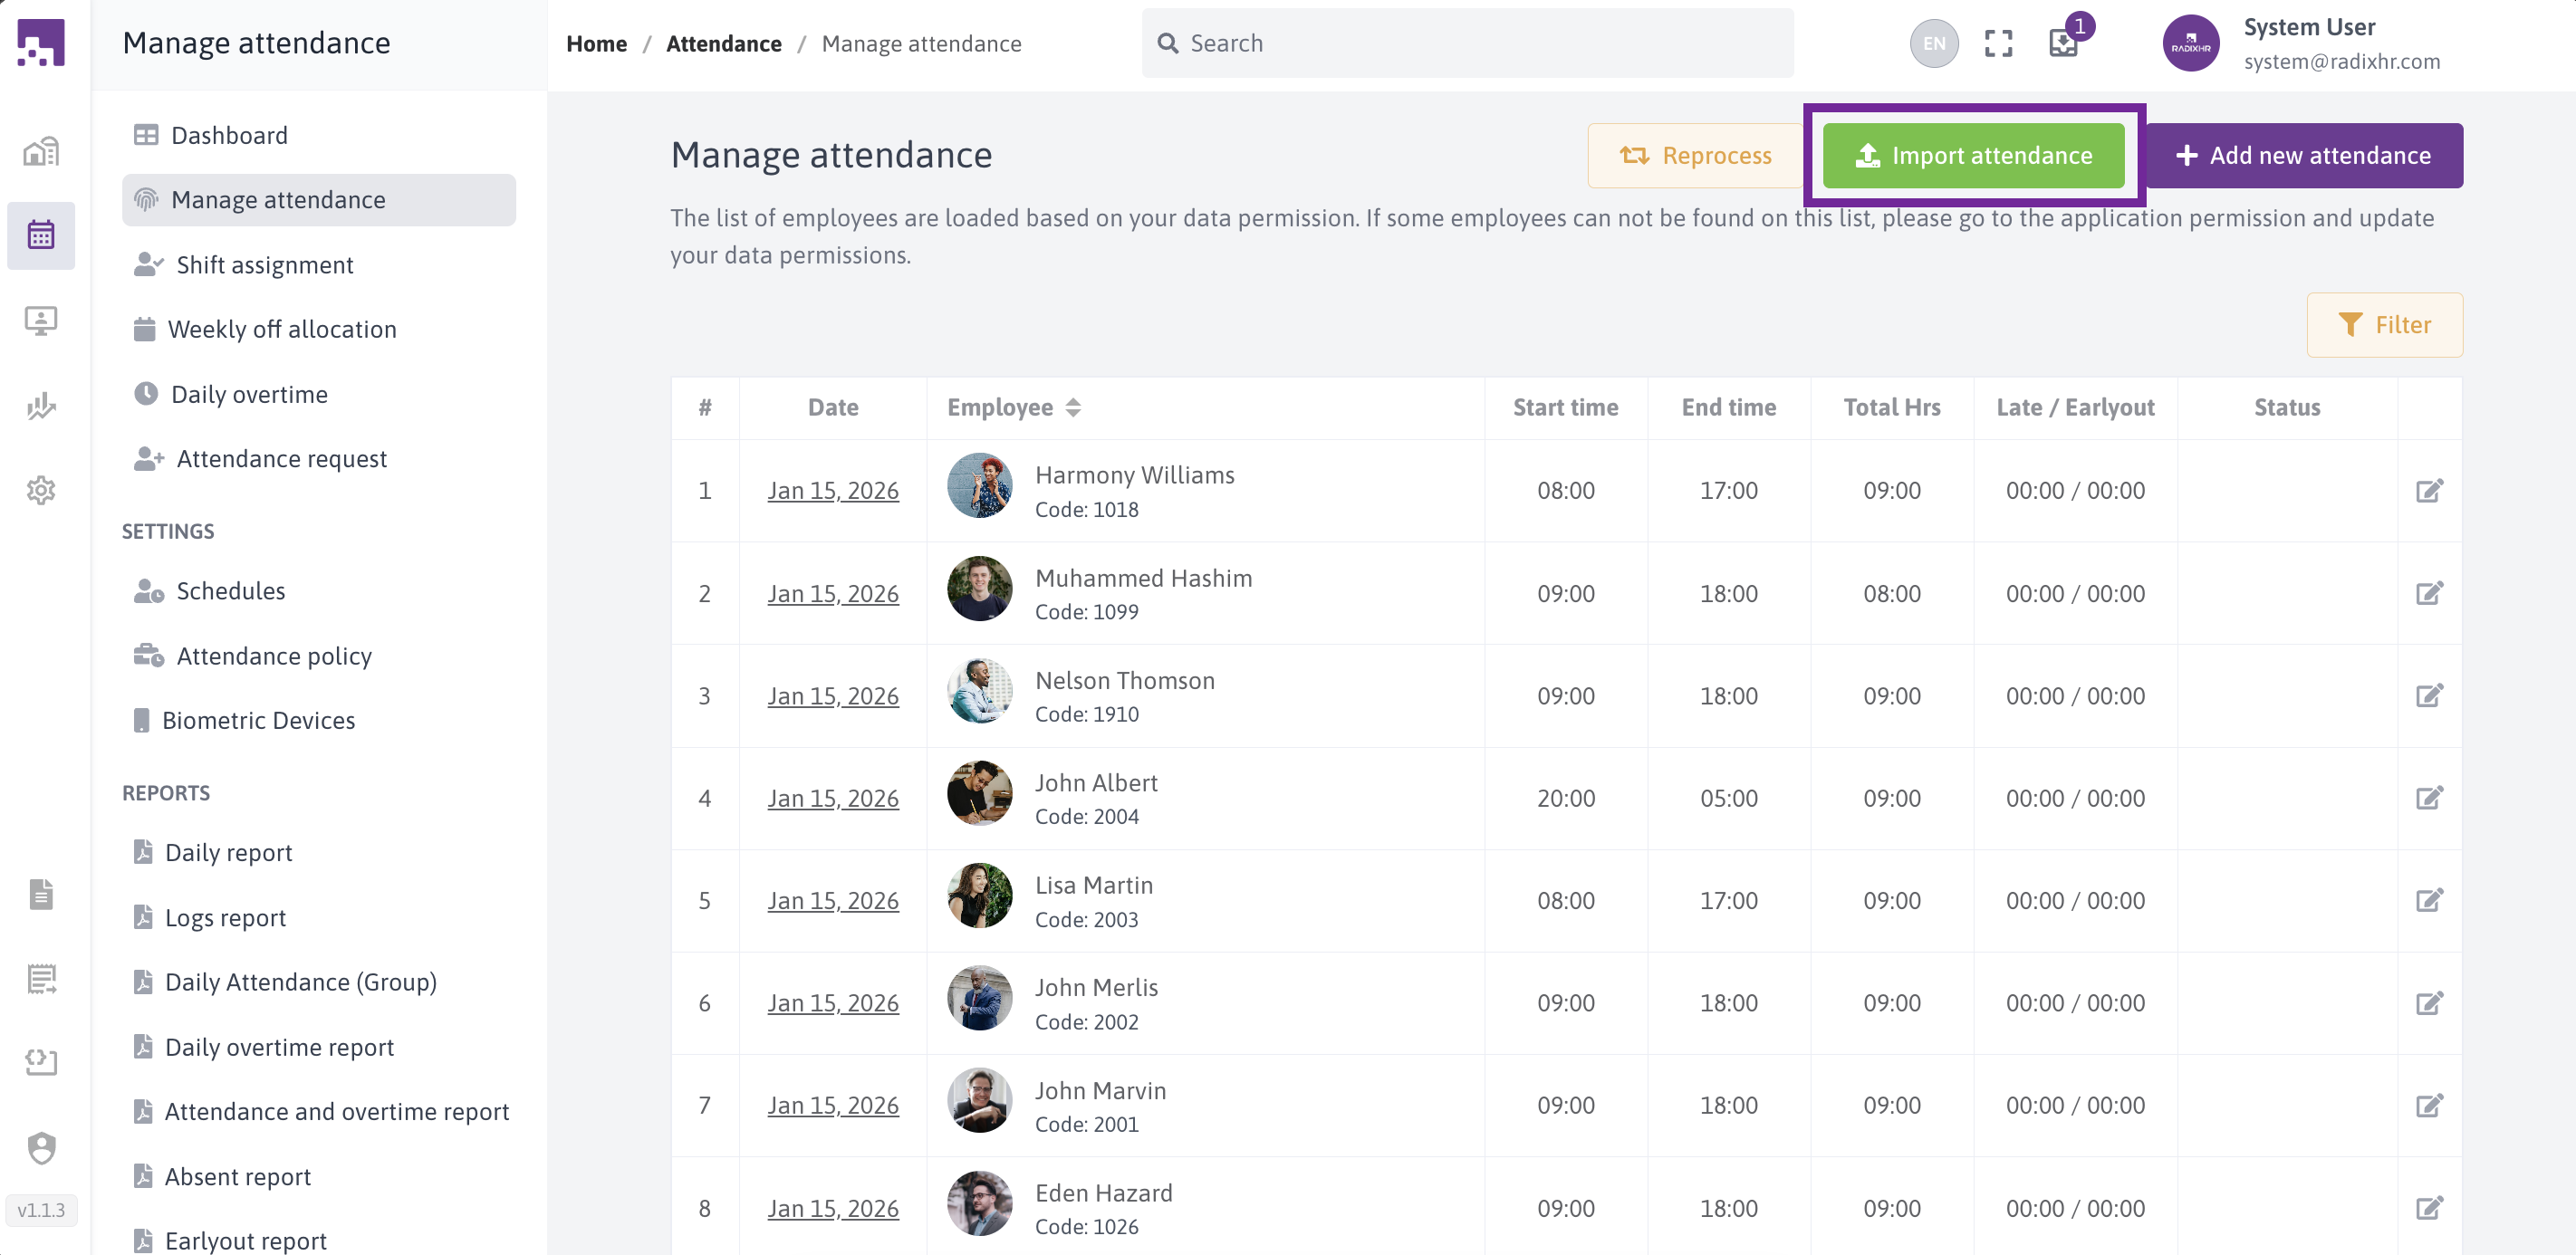
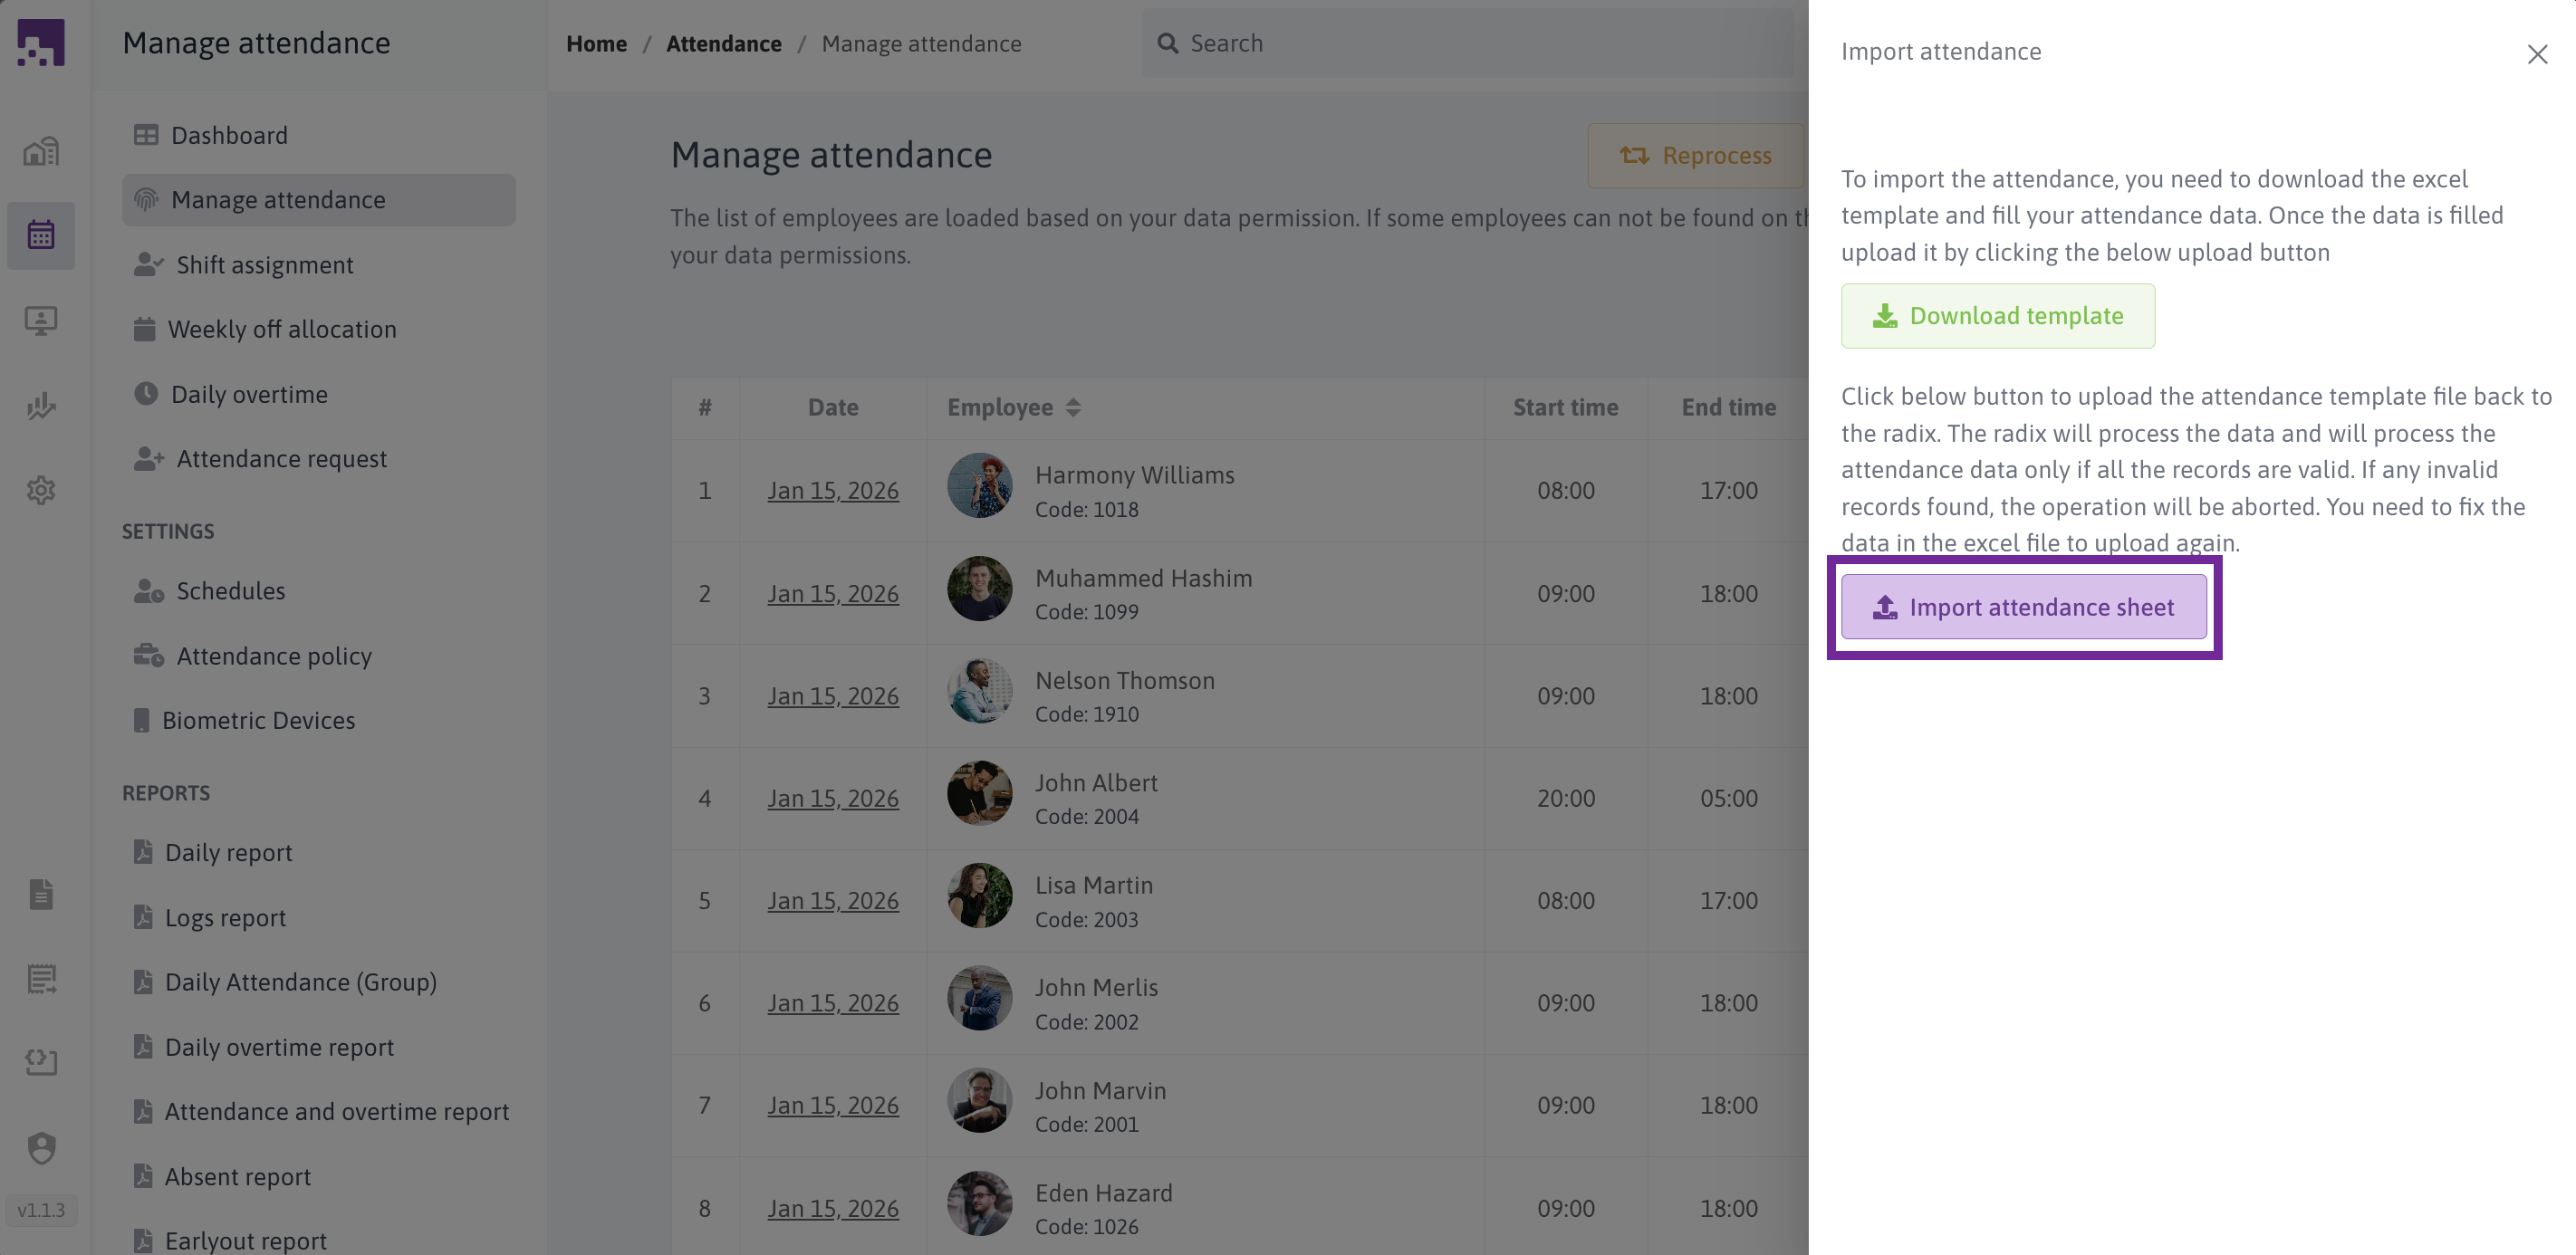
# Importing Attendance Records
The import feature allows you to bulk upload attendance data from an Excel file, perfect for updating multiple records at once.
# Step-by-Step Guide
Step 1: Open Import Screen
Click the "Import Attendance" button from the main attendance screen.
Step 2: Download the Template
- Click the Download Template button
- The system downloads a pre-formatted Excel template
- Save the template to your computer
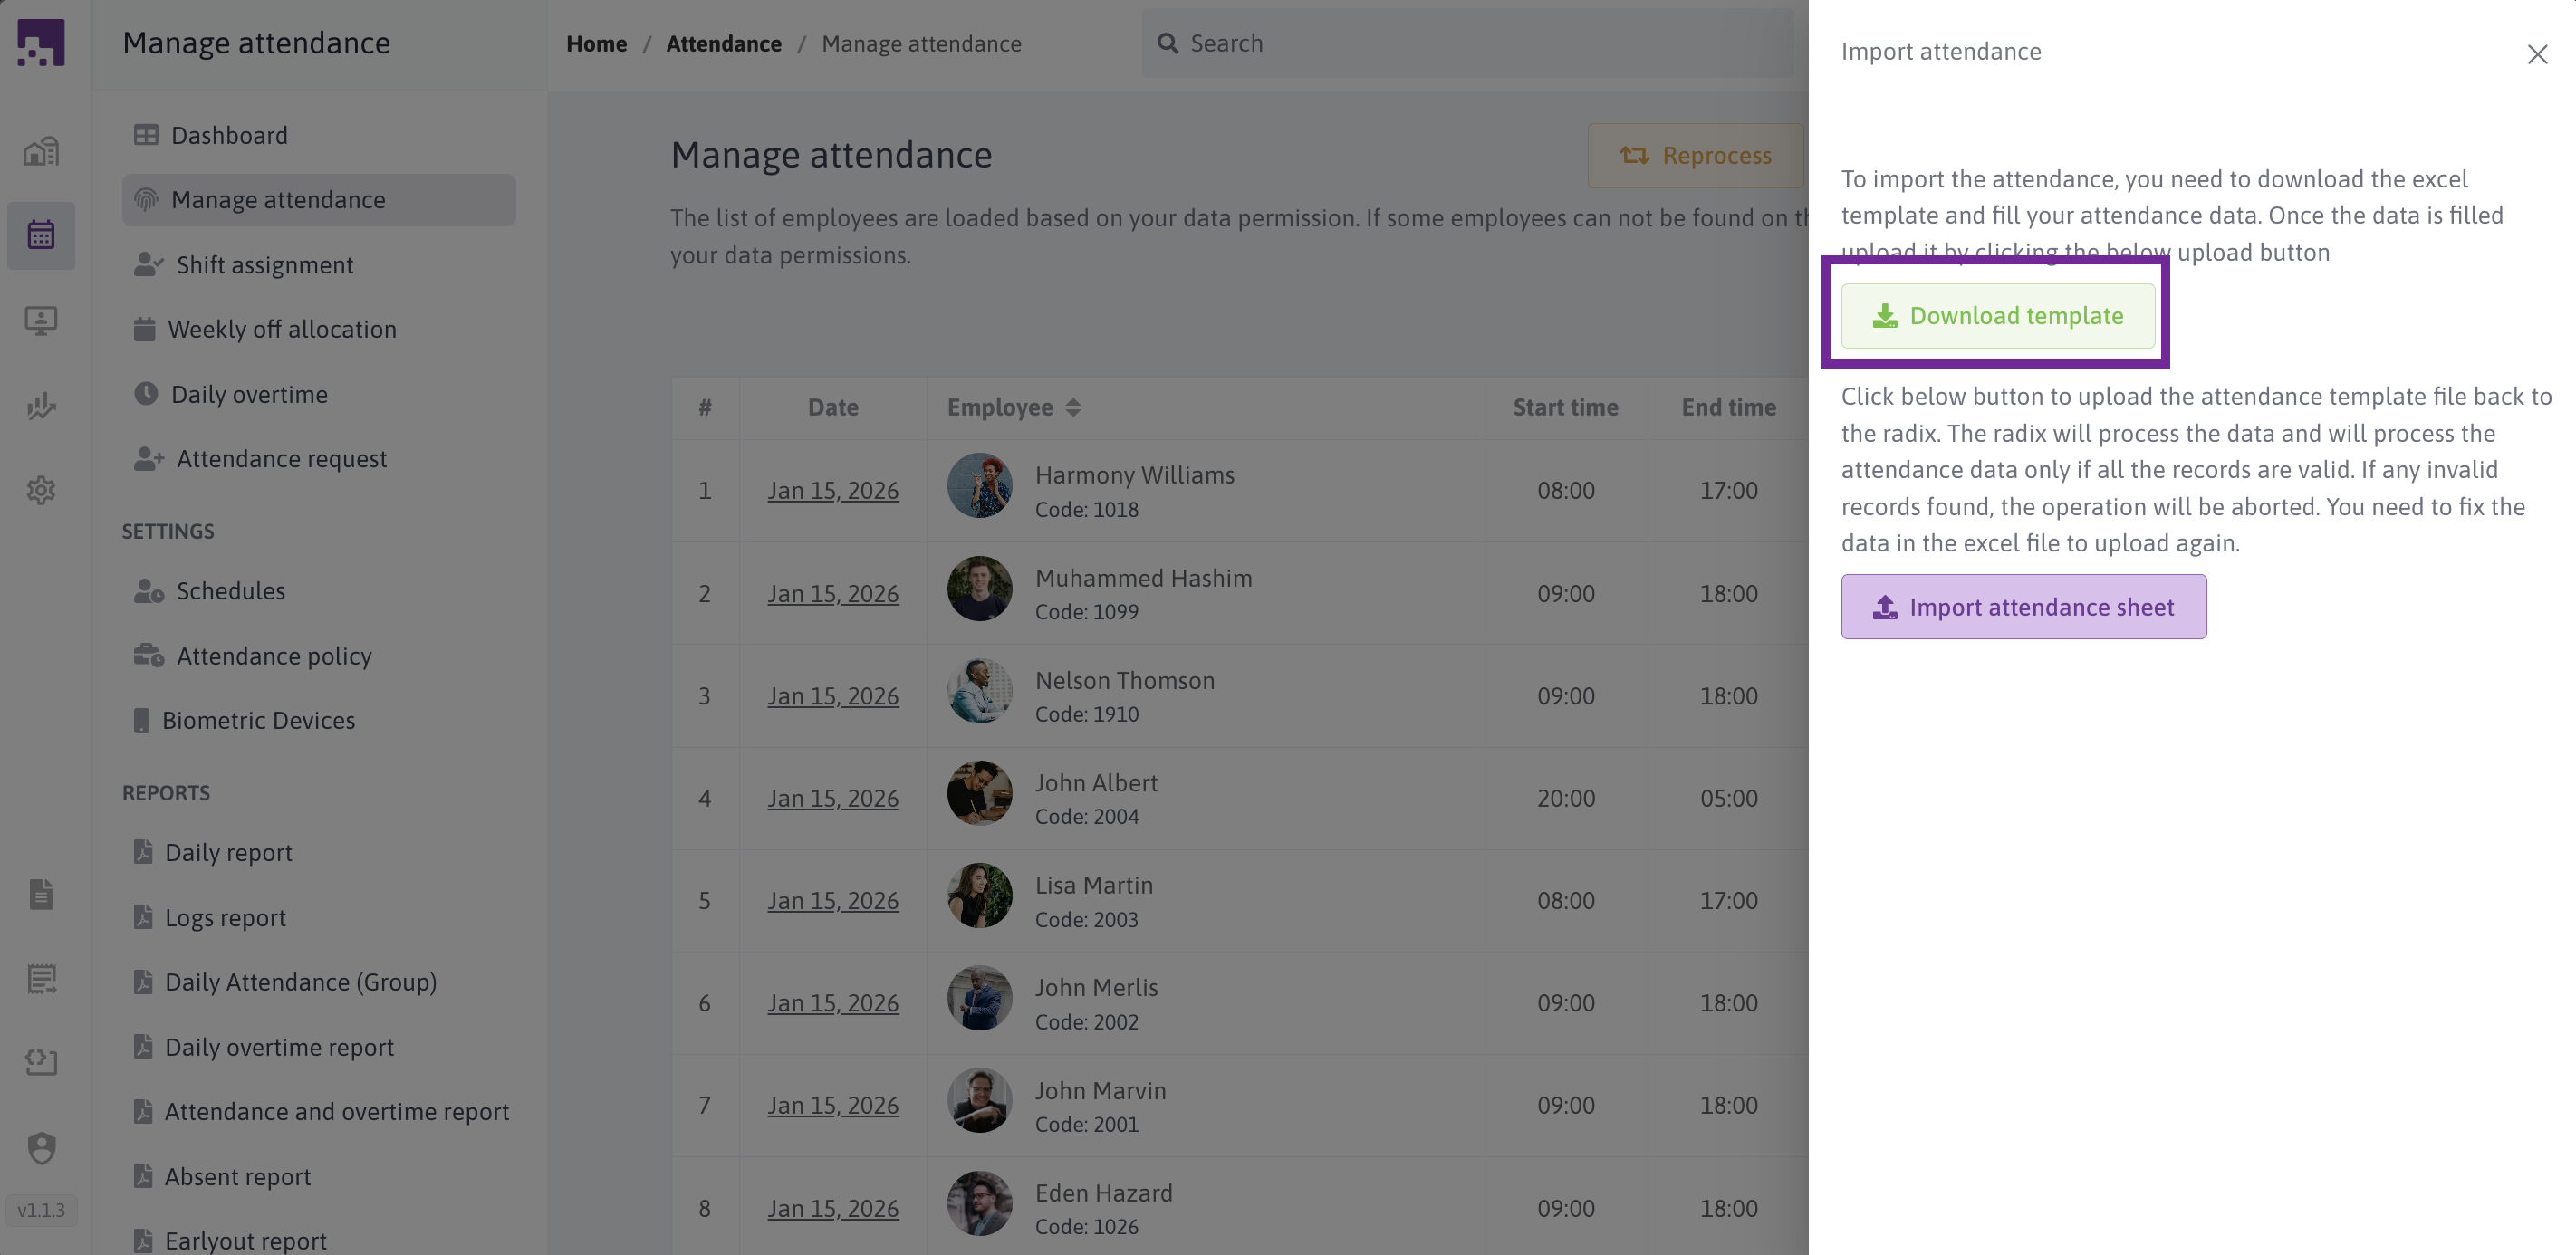
Step 3: Upload the Filled Template
- Click the Import Attendance Sheet button
- Select your filled Excel file
- The system uploads and validates the data
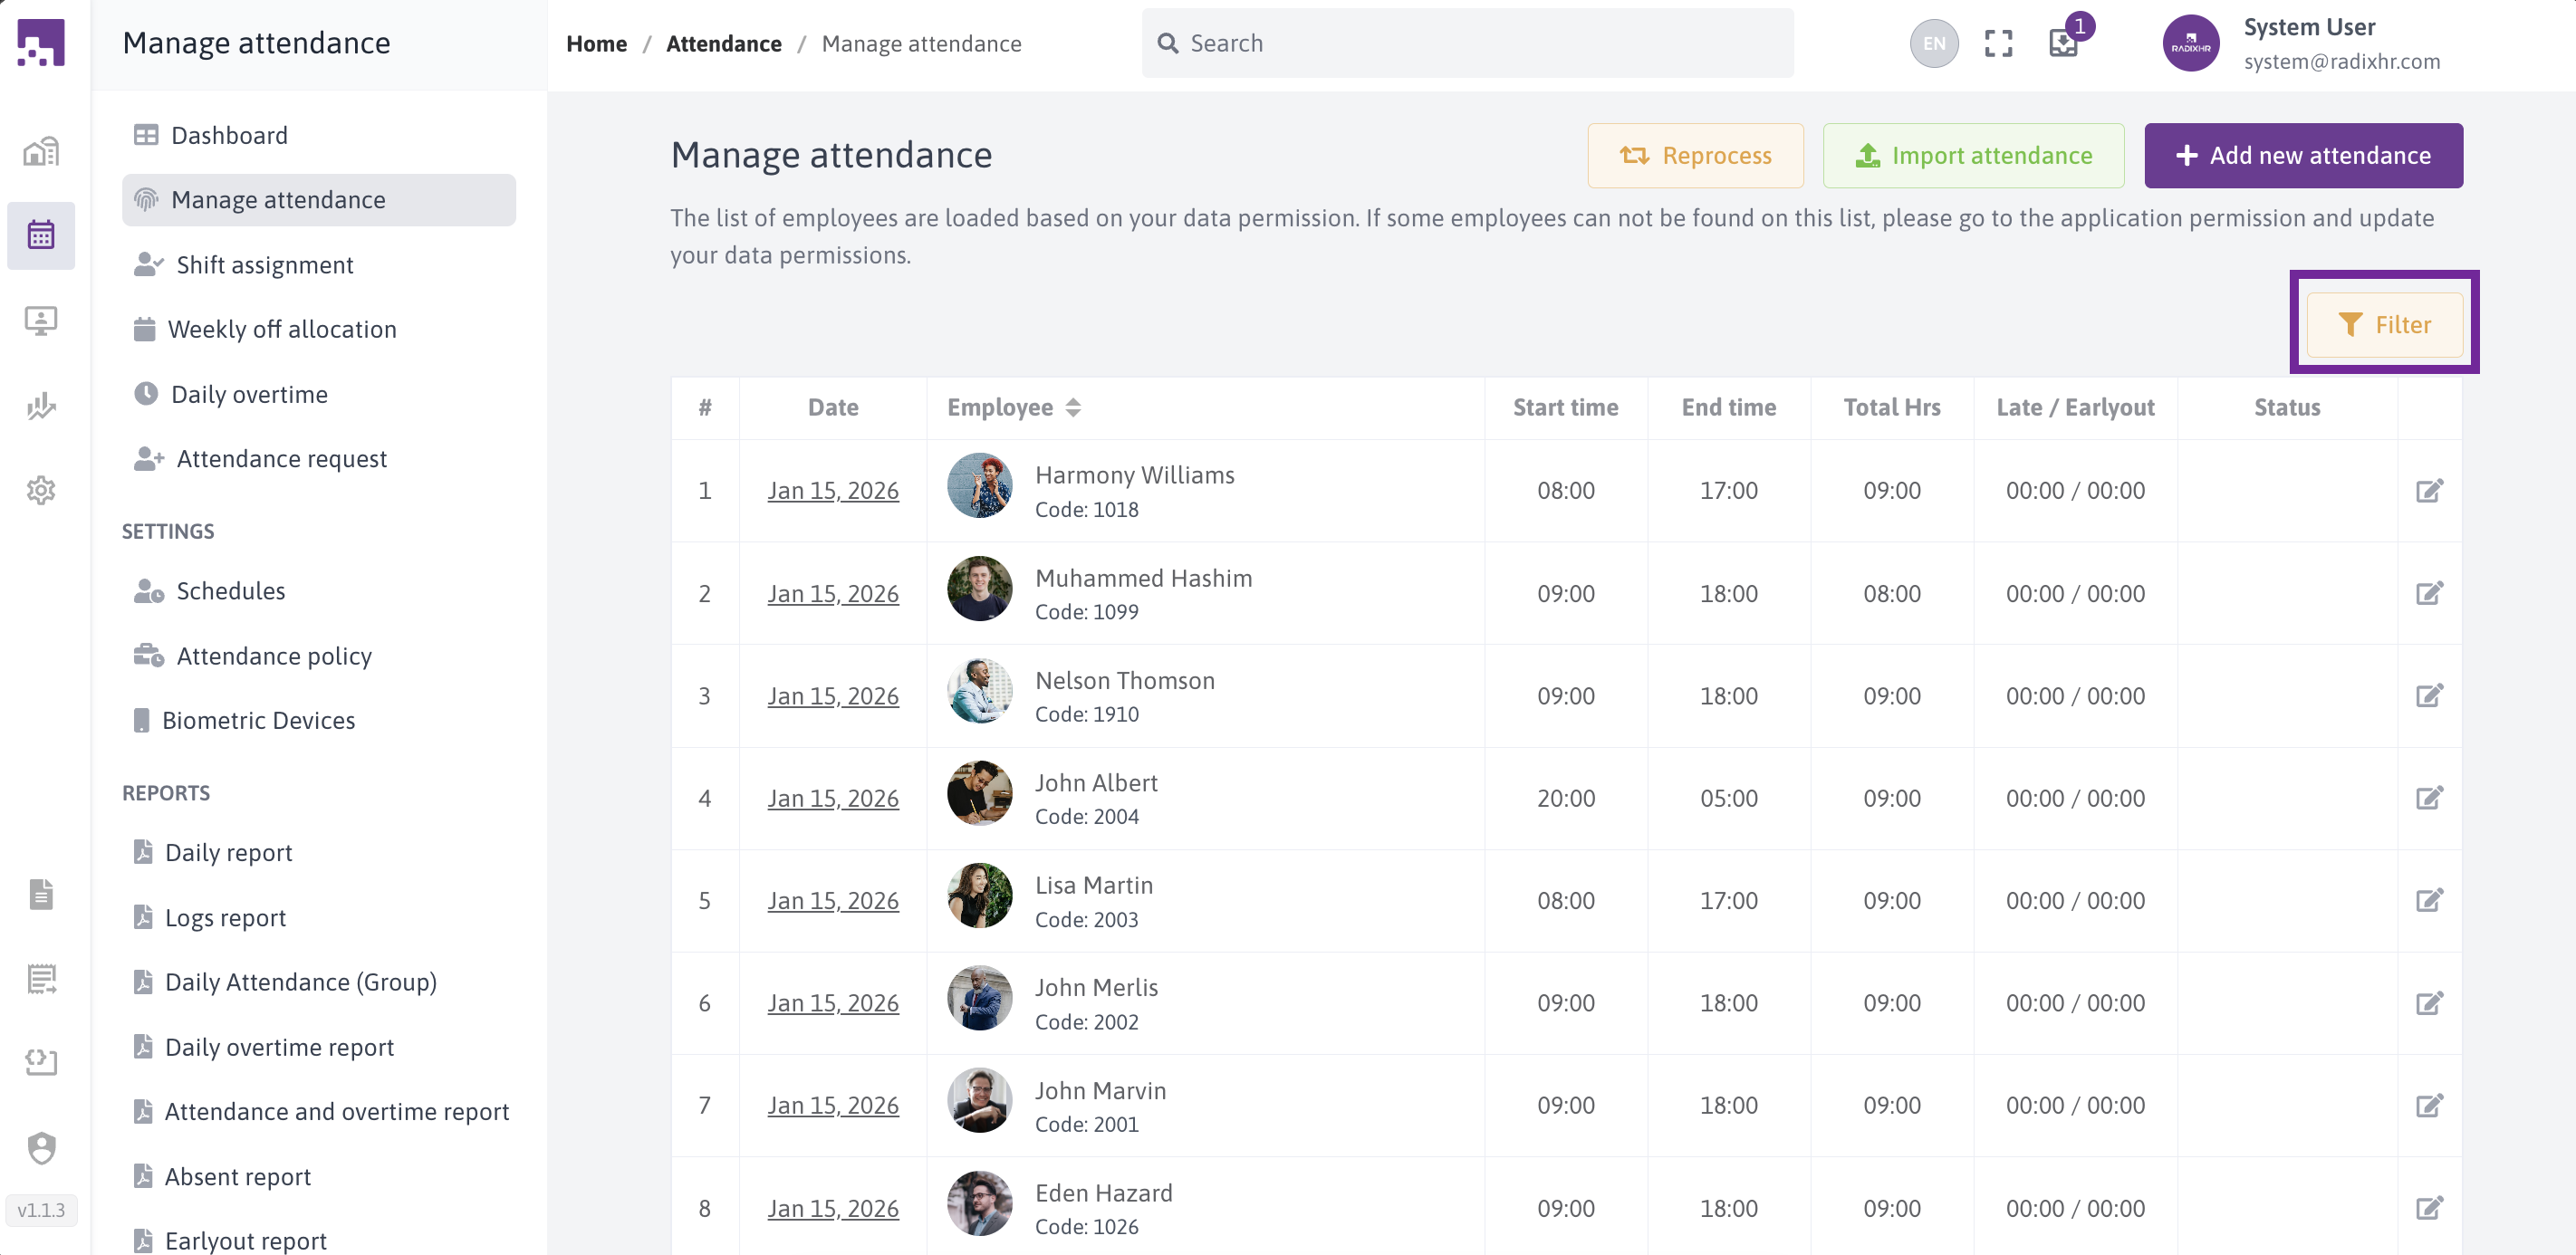
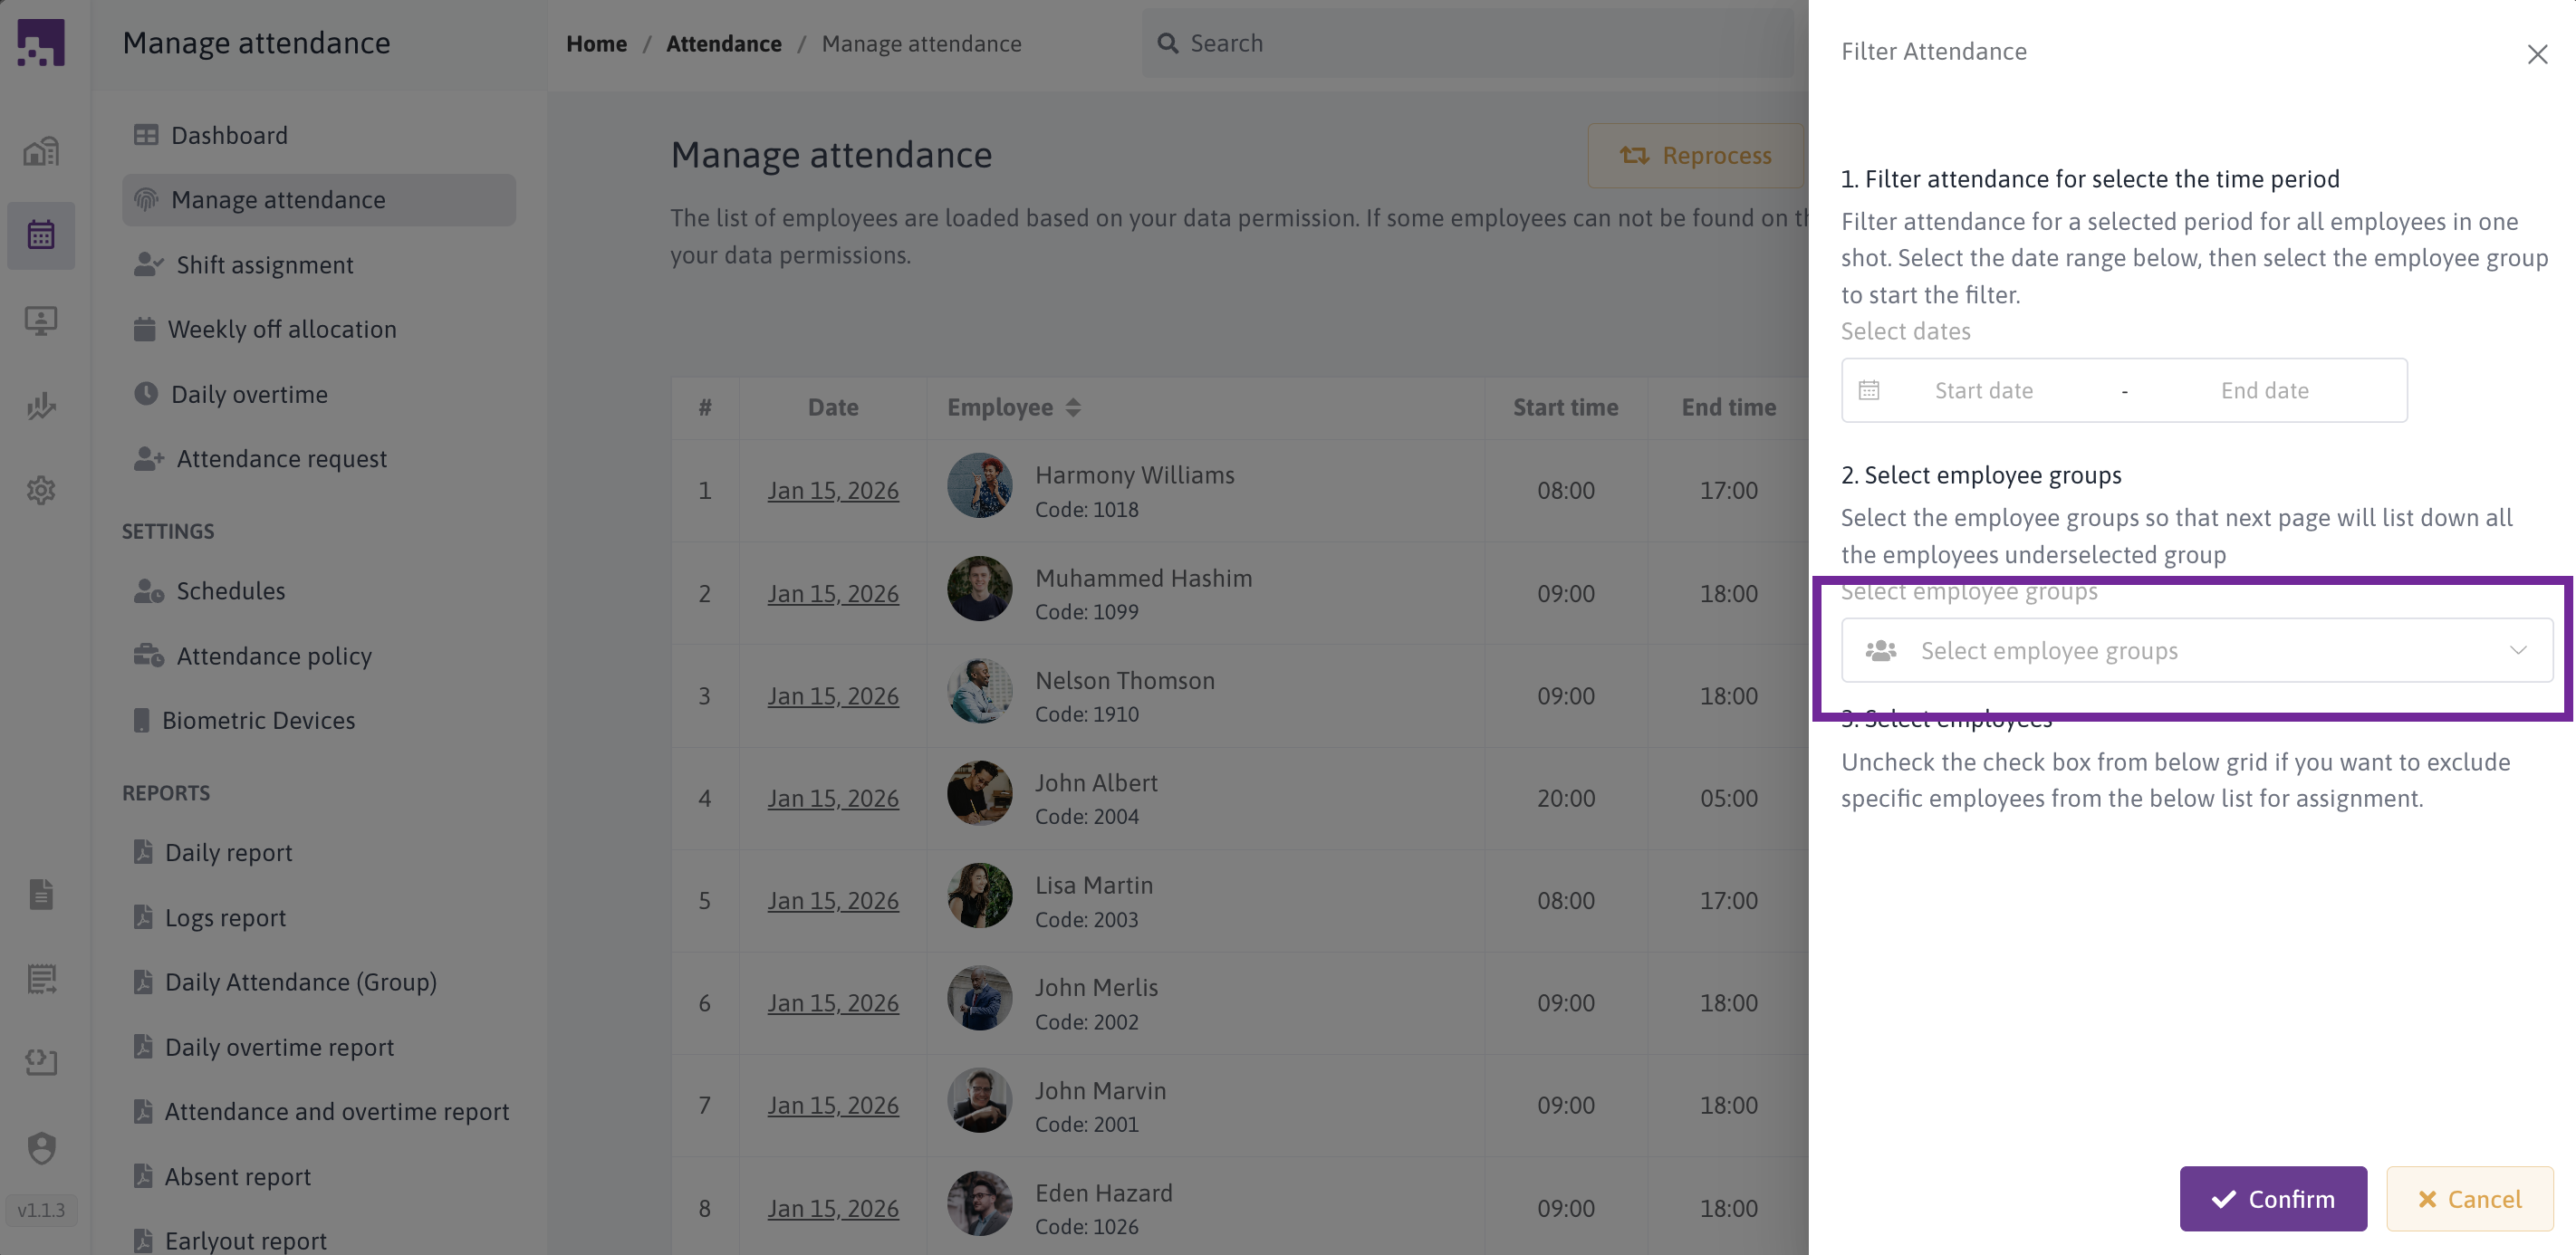
# Filtering Attendance Records
The filter feature helps you find specific attendance records by date range and employee groups.
# Step-by-Step Guide
Step 1: Open Filter Screen
Click the Filter button from the main attendance screen.
Step 2: Select Date Range
- Click on the "Select Dates" field
- Choose a start date and end date
- The range defaults to the last month
- Future dates are disabled
- Format: DD/MM/YYYY
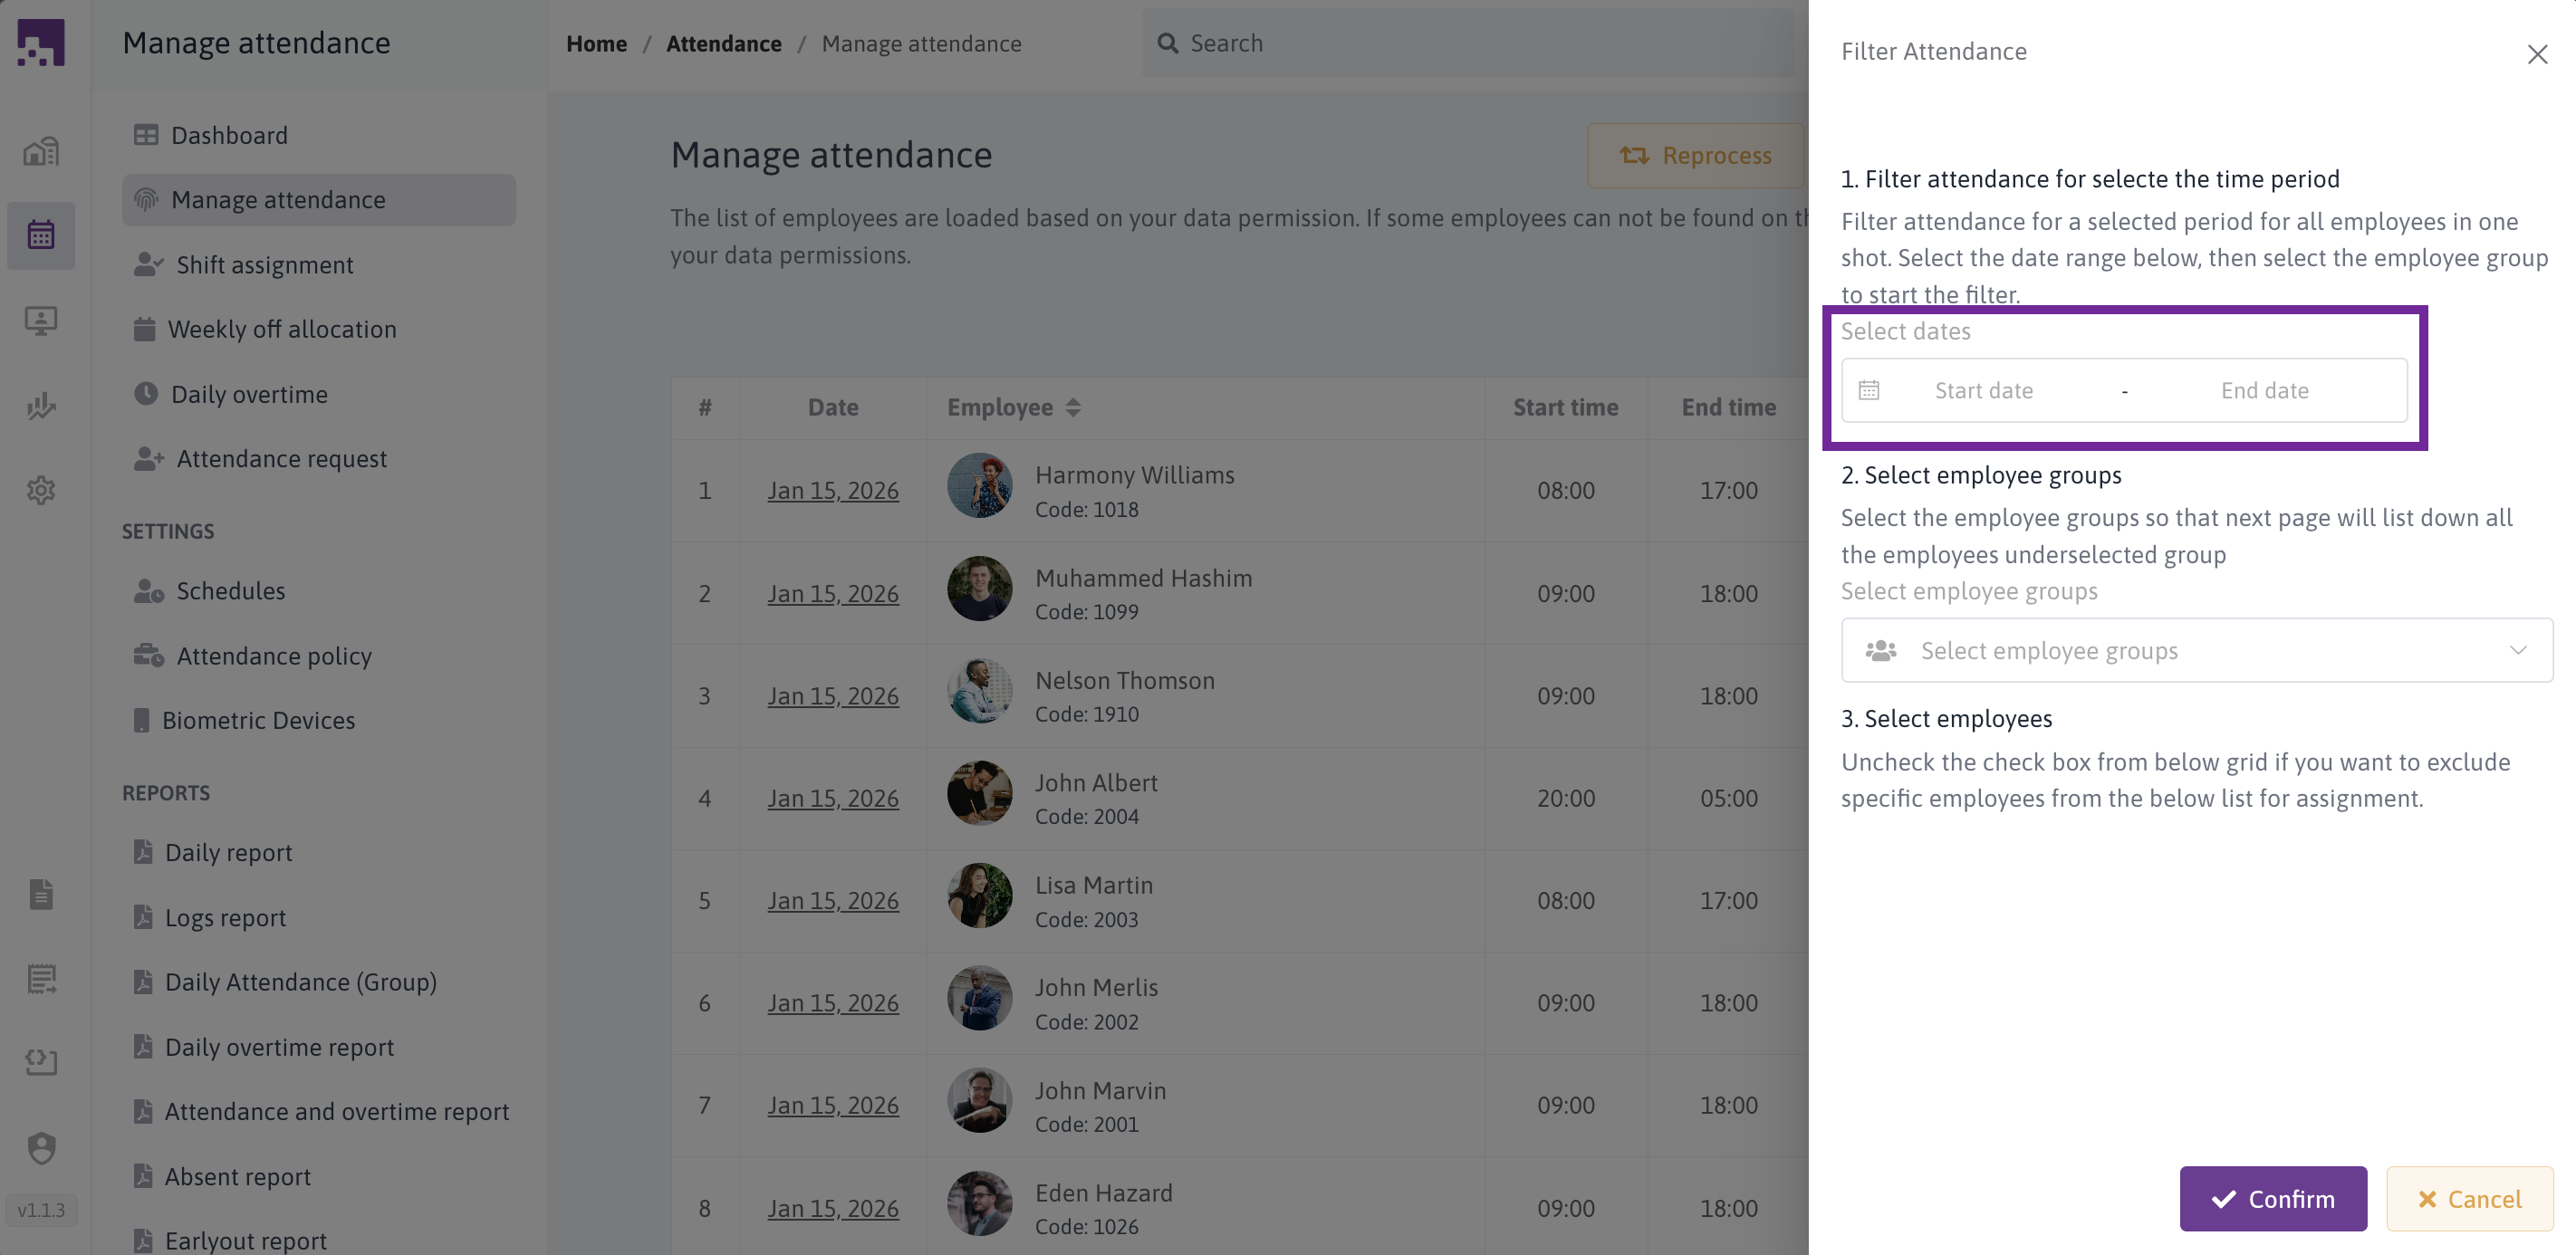
Step 3: Select Employee Groups
- Click the "Select Employee Groups" dropdown
- Choose one or more employee groups
- Options include:
- Employees Under Me - Your direct reports
- All Groups - Select specific employee groups
- You can select multiple groups
- Type to search for specific groups
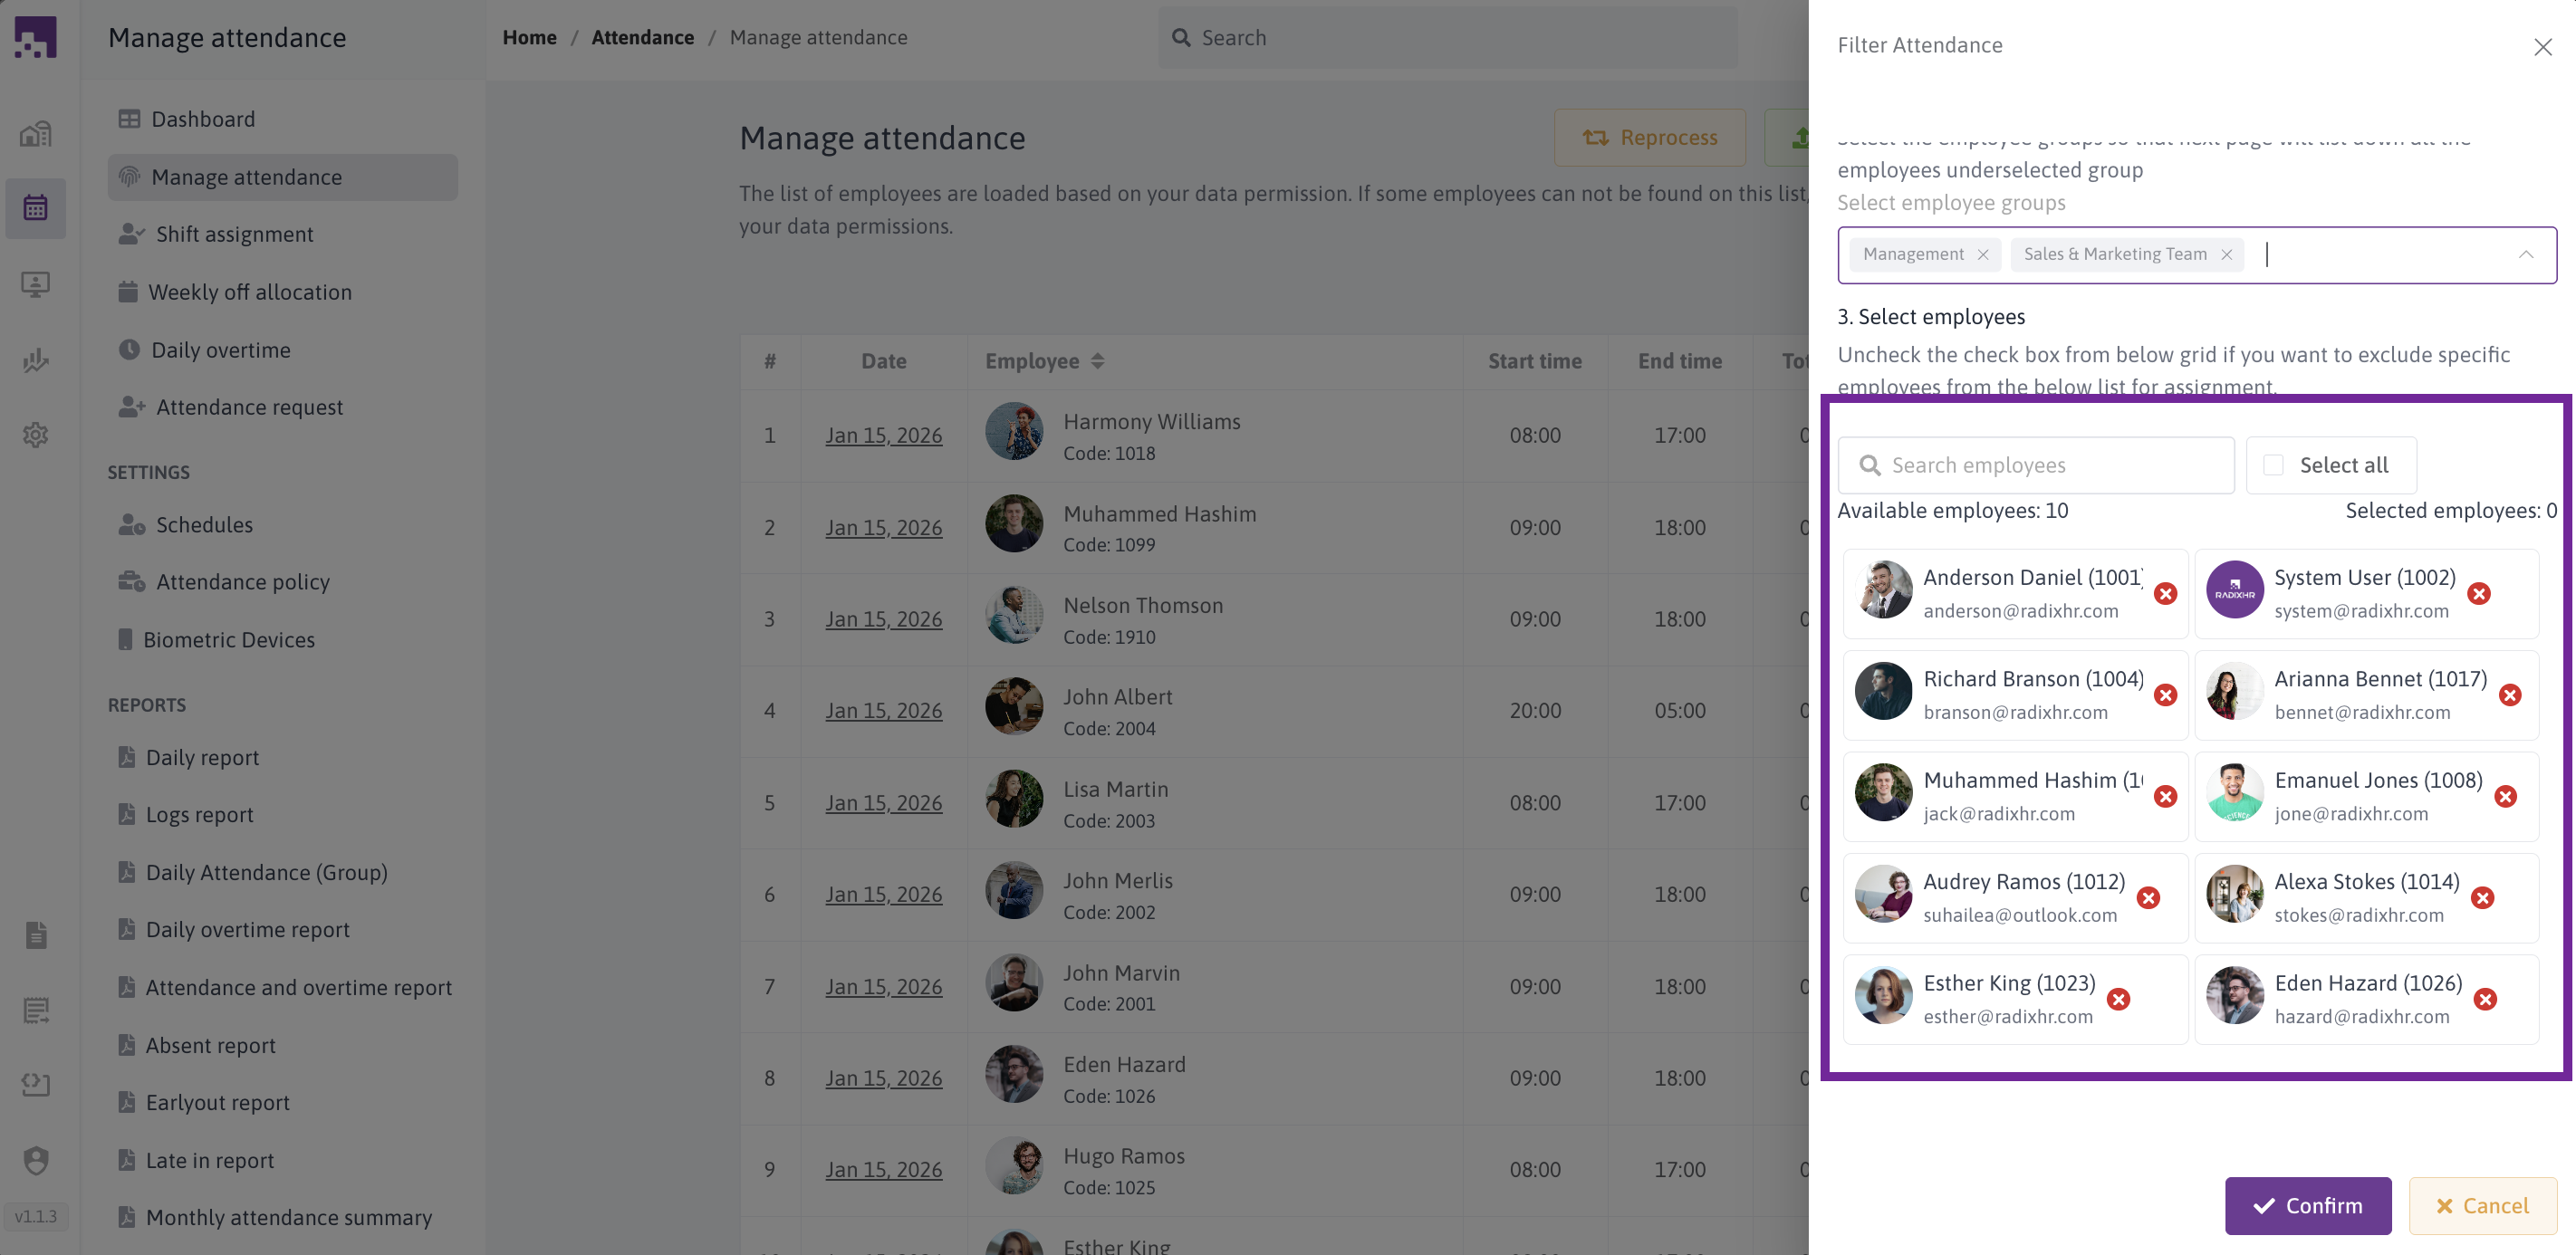
Step 4: Select Individual Employees
After selecting groups, the system shows all employees in those groups:
Employee Cards display:
- Profile photo or initials
- Full name and employee code
- Email address
- Selection status (checkmark or X)
Search Employees:
- Type in the search box to filter employees
- Searches by name and employee code
- Clear to show all employees again
Select All checkbox:
- Check to select all displayed employees
- Uncheck to deselect all
Click individual cards to toggle selection:
- Selected cards show blue background with checkmark
- Unselected cards show white background with X
Counters show:
- Available Employees: Total in the list
- Selected Employees: Number selected
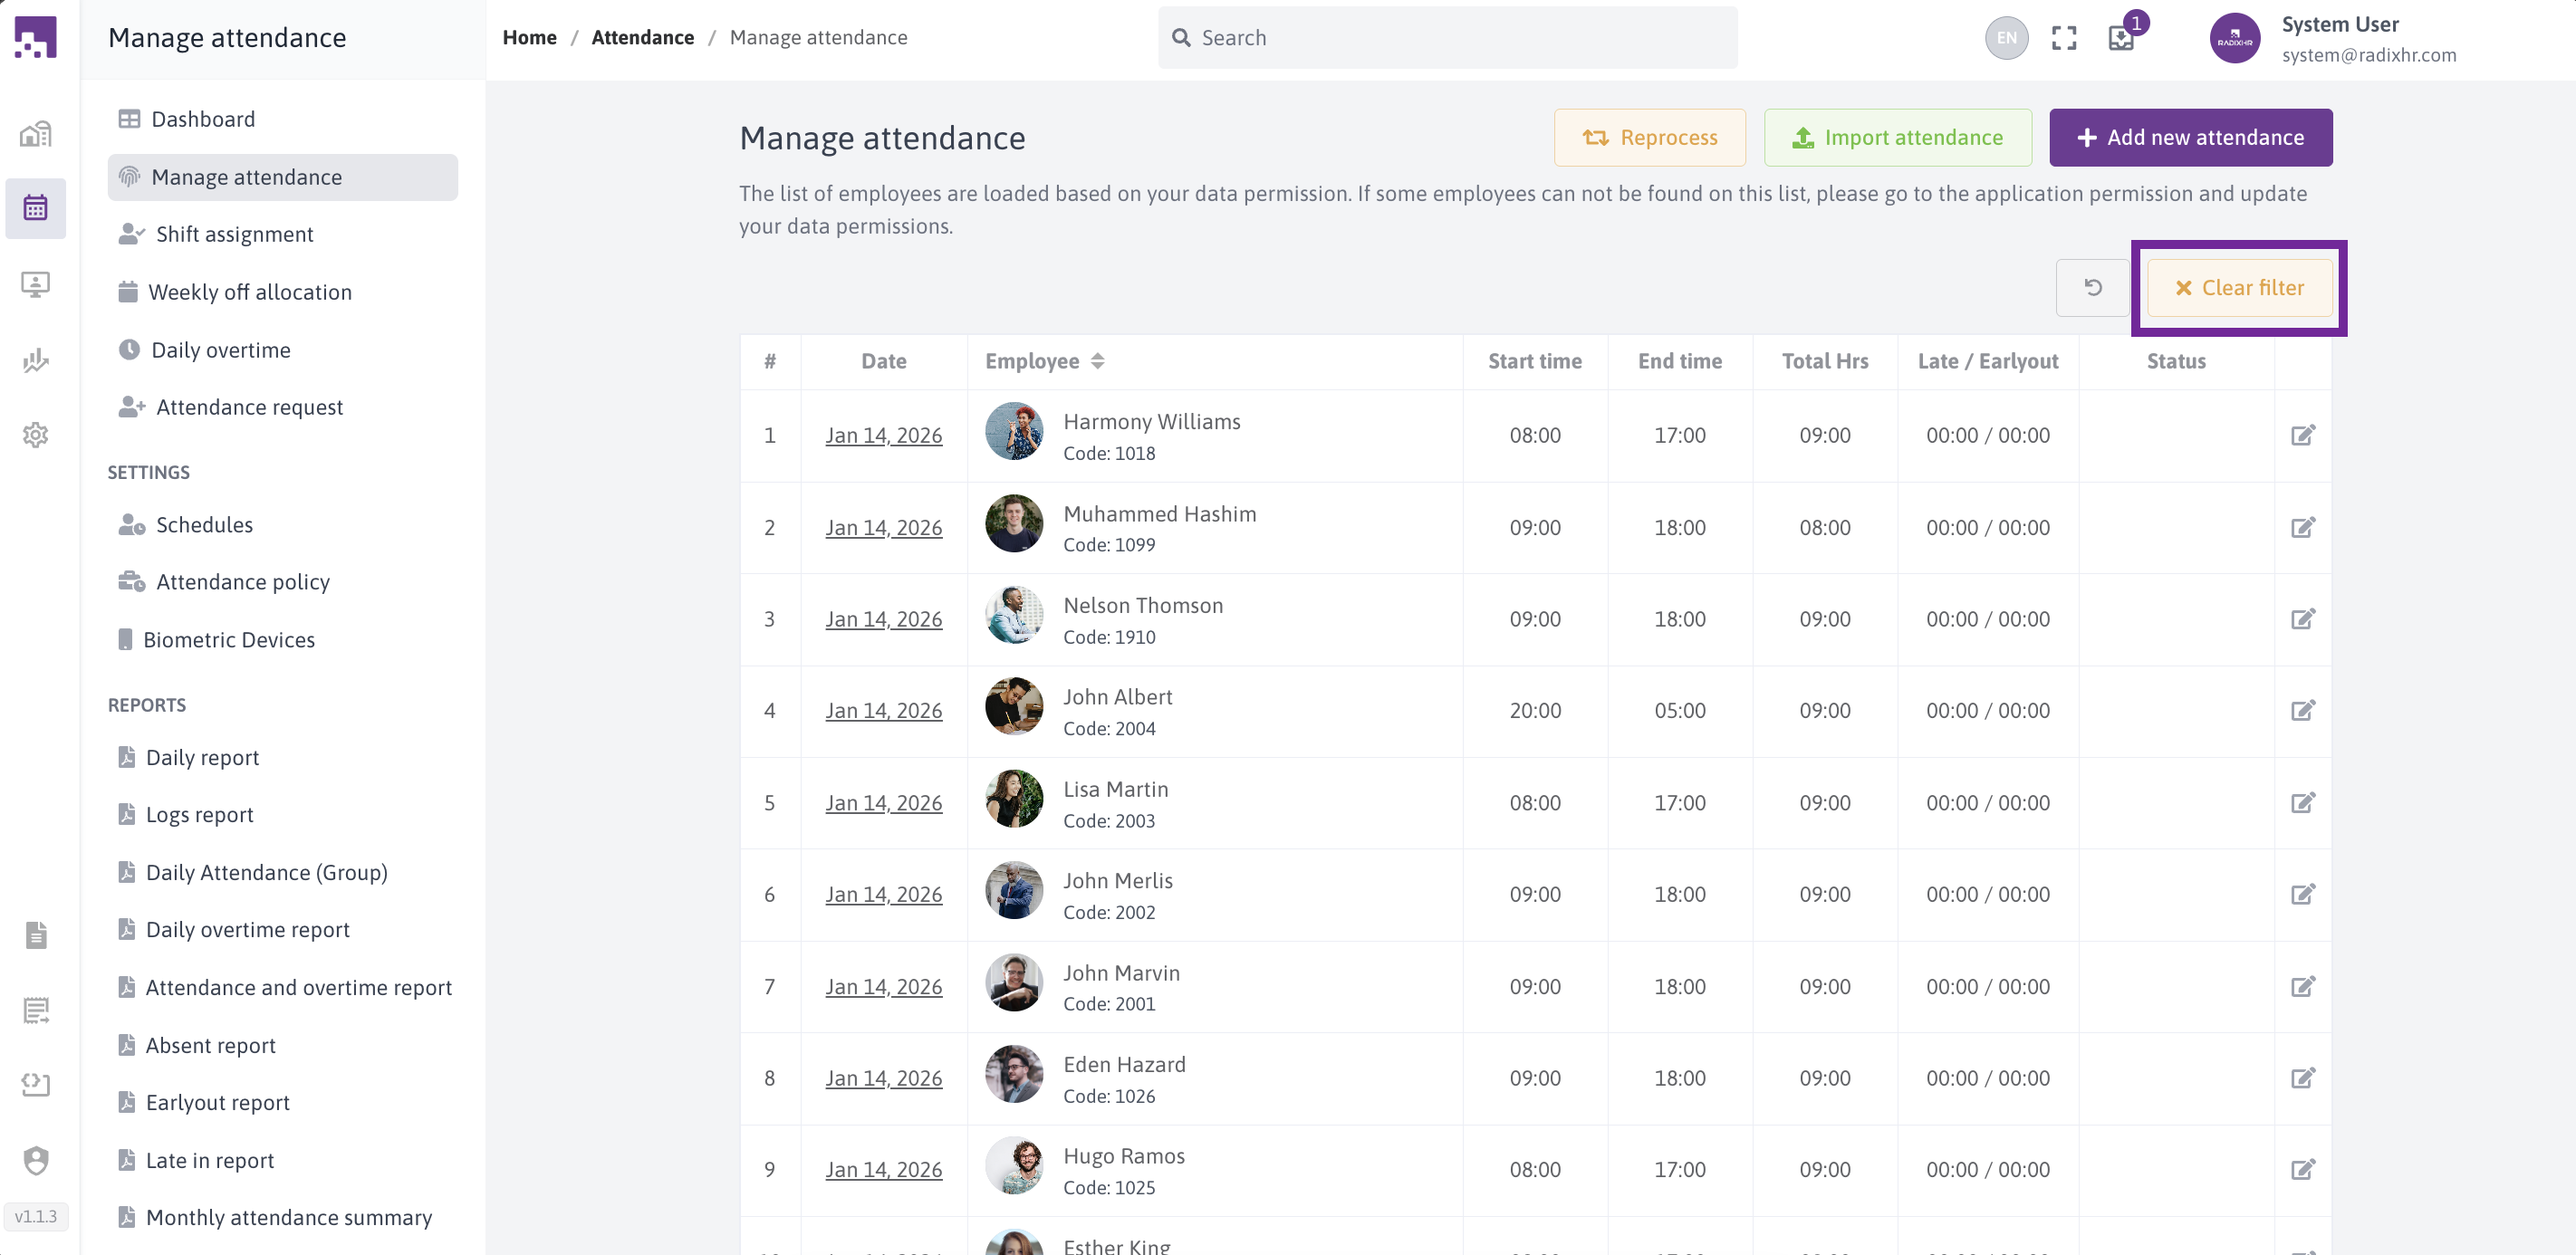
Step 5: Apply Filter
Click the Confirm button to apply the filter.
The system will:
- Show only matching attendance records
- Display filter applied status
- Show a Refresh button to reload data
- Update the URL with filter parameters (you can bookmark or share filtered views)

Step 6: Clear Filter
Click the Clear Filter button to:
- Remove all filters
- Show all attendance records
- Return to the default view
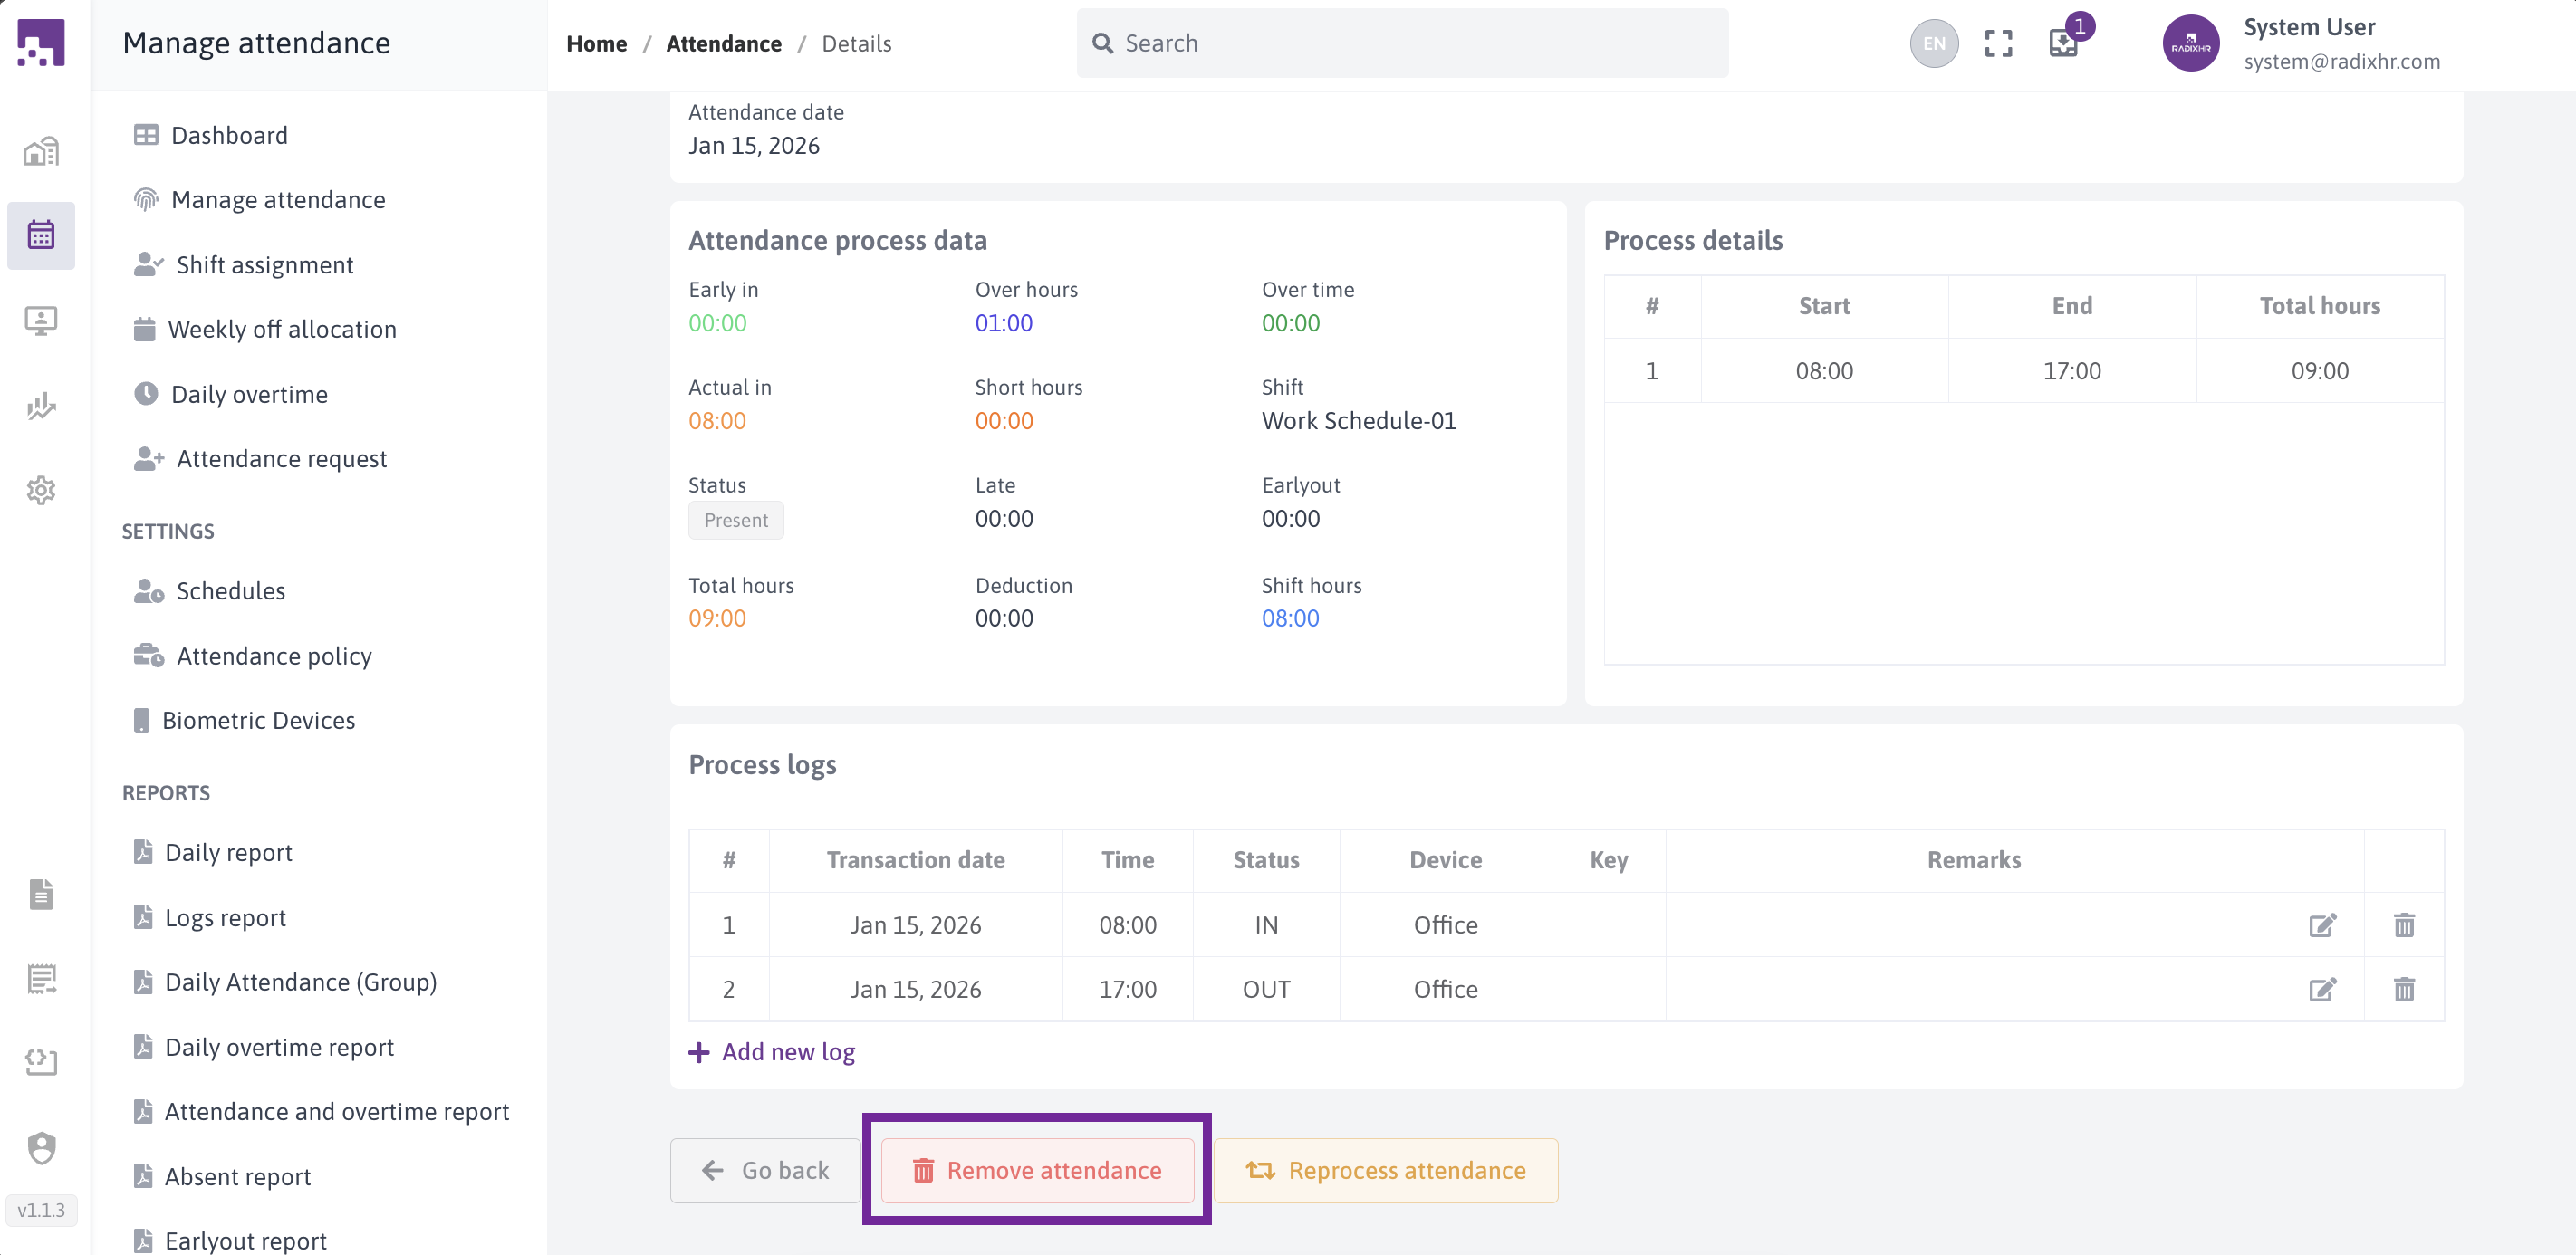
# Editing Attendance Records
You can modify any attendance record to correct errors or add missing information.
# Step-by-Step Guide
Step 1: Access the Edit Screen
Click the edit icon (pencil) in the Actions column of any attendance record.
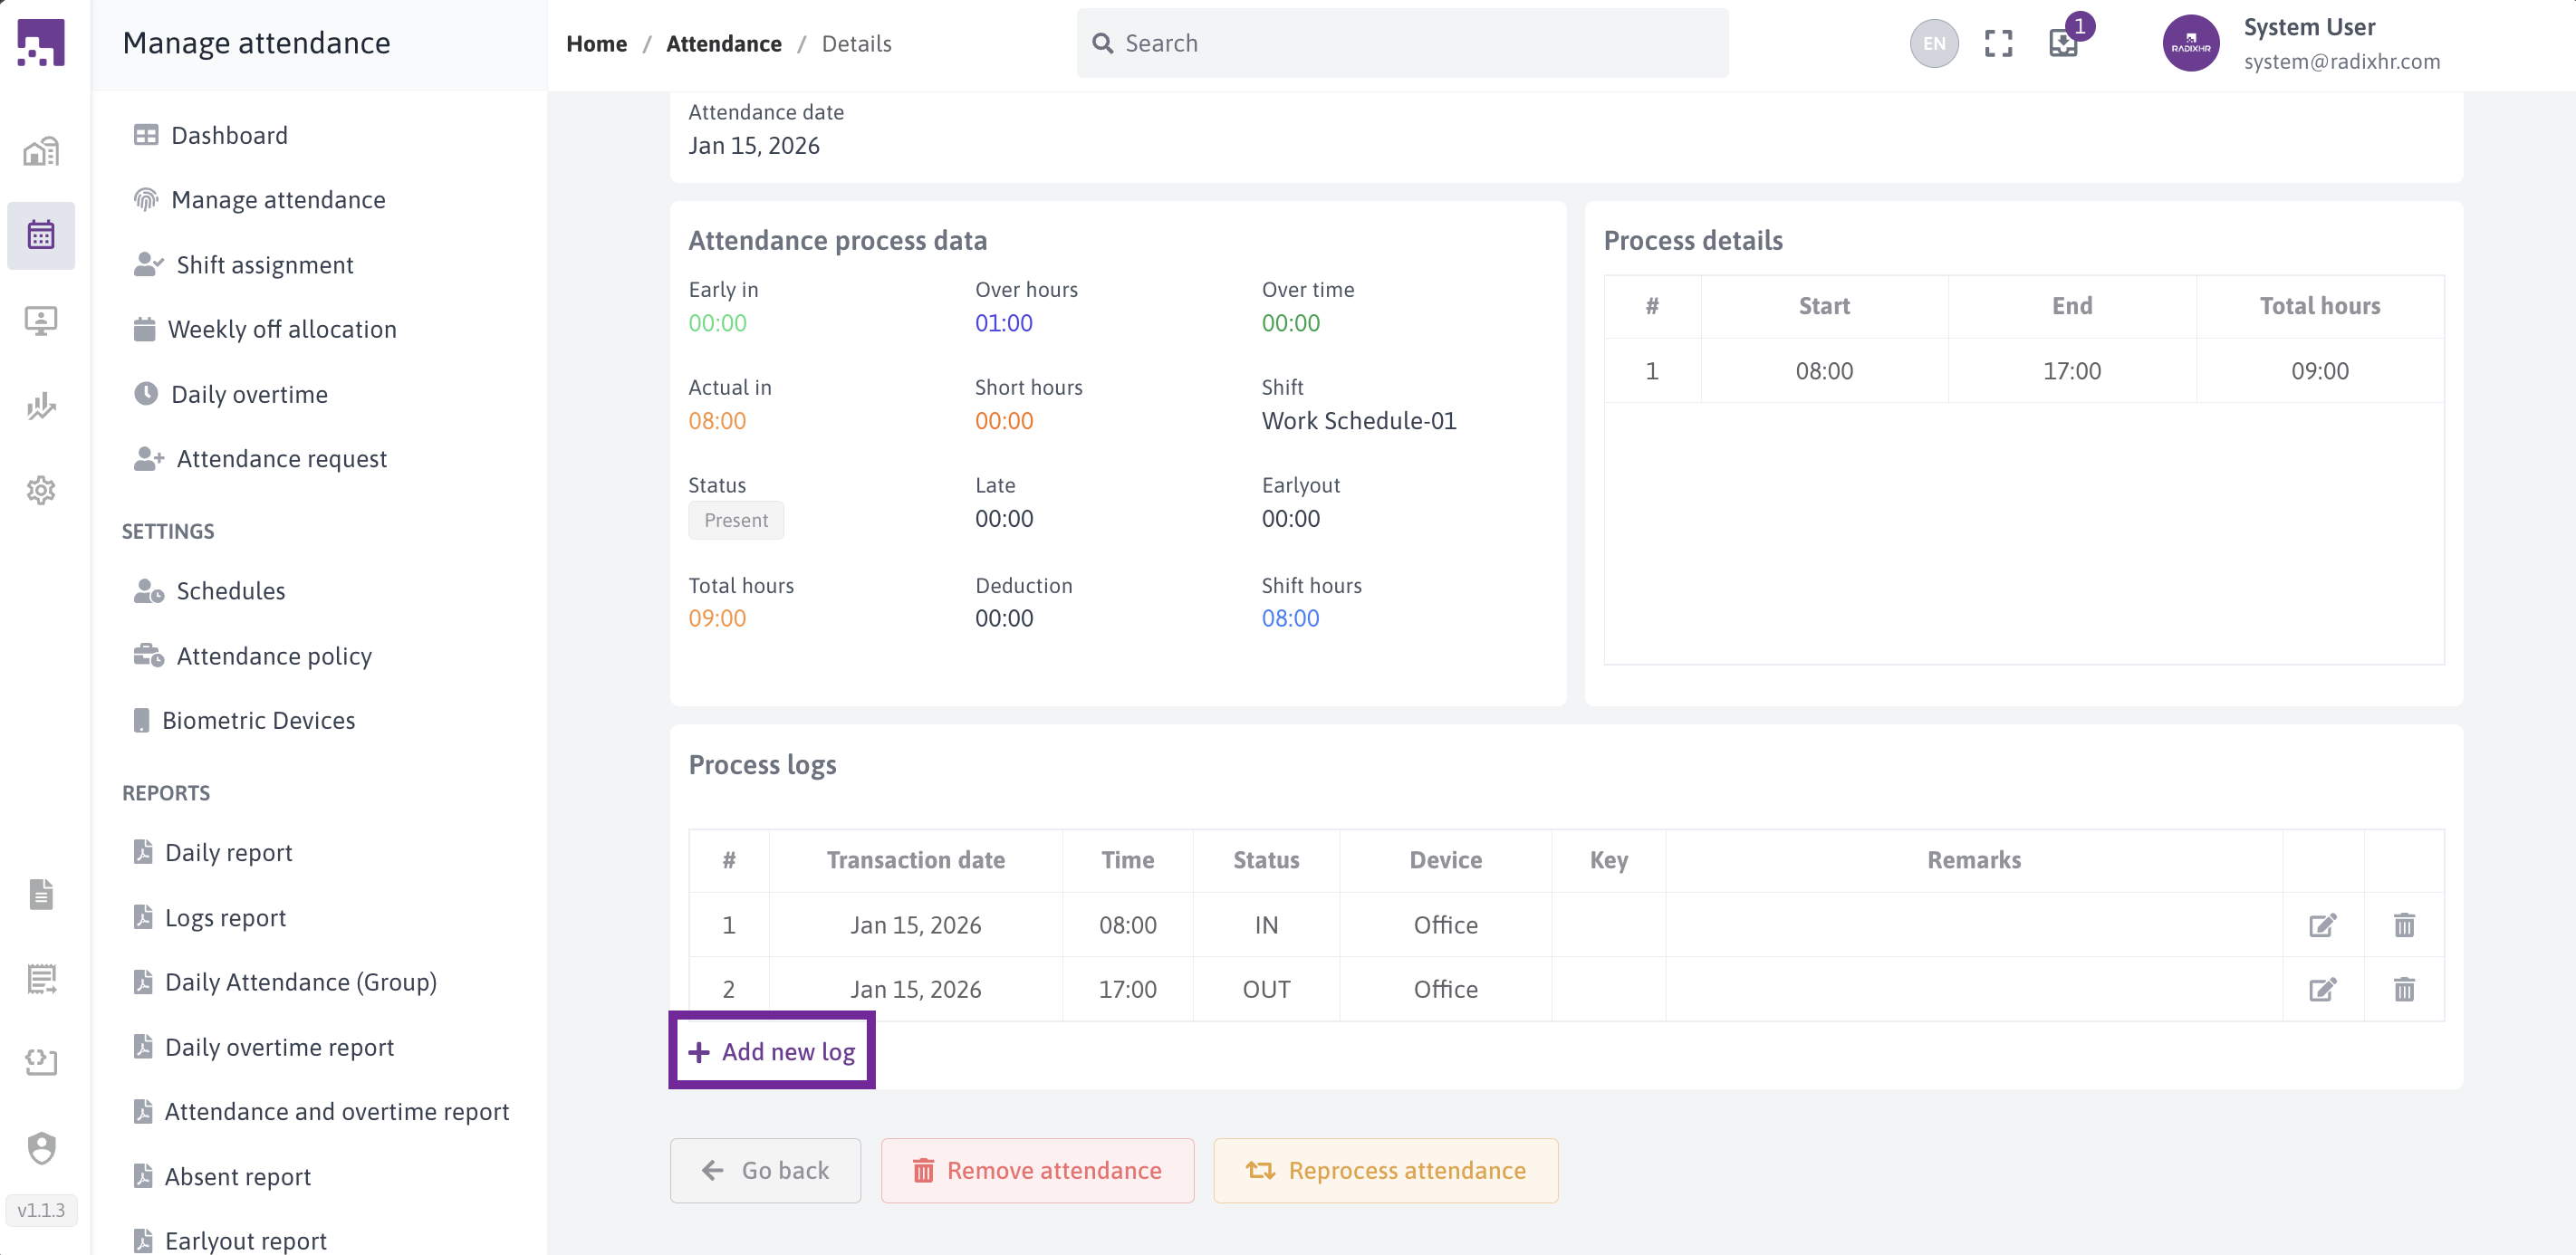
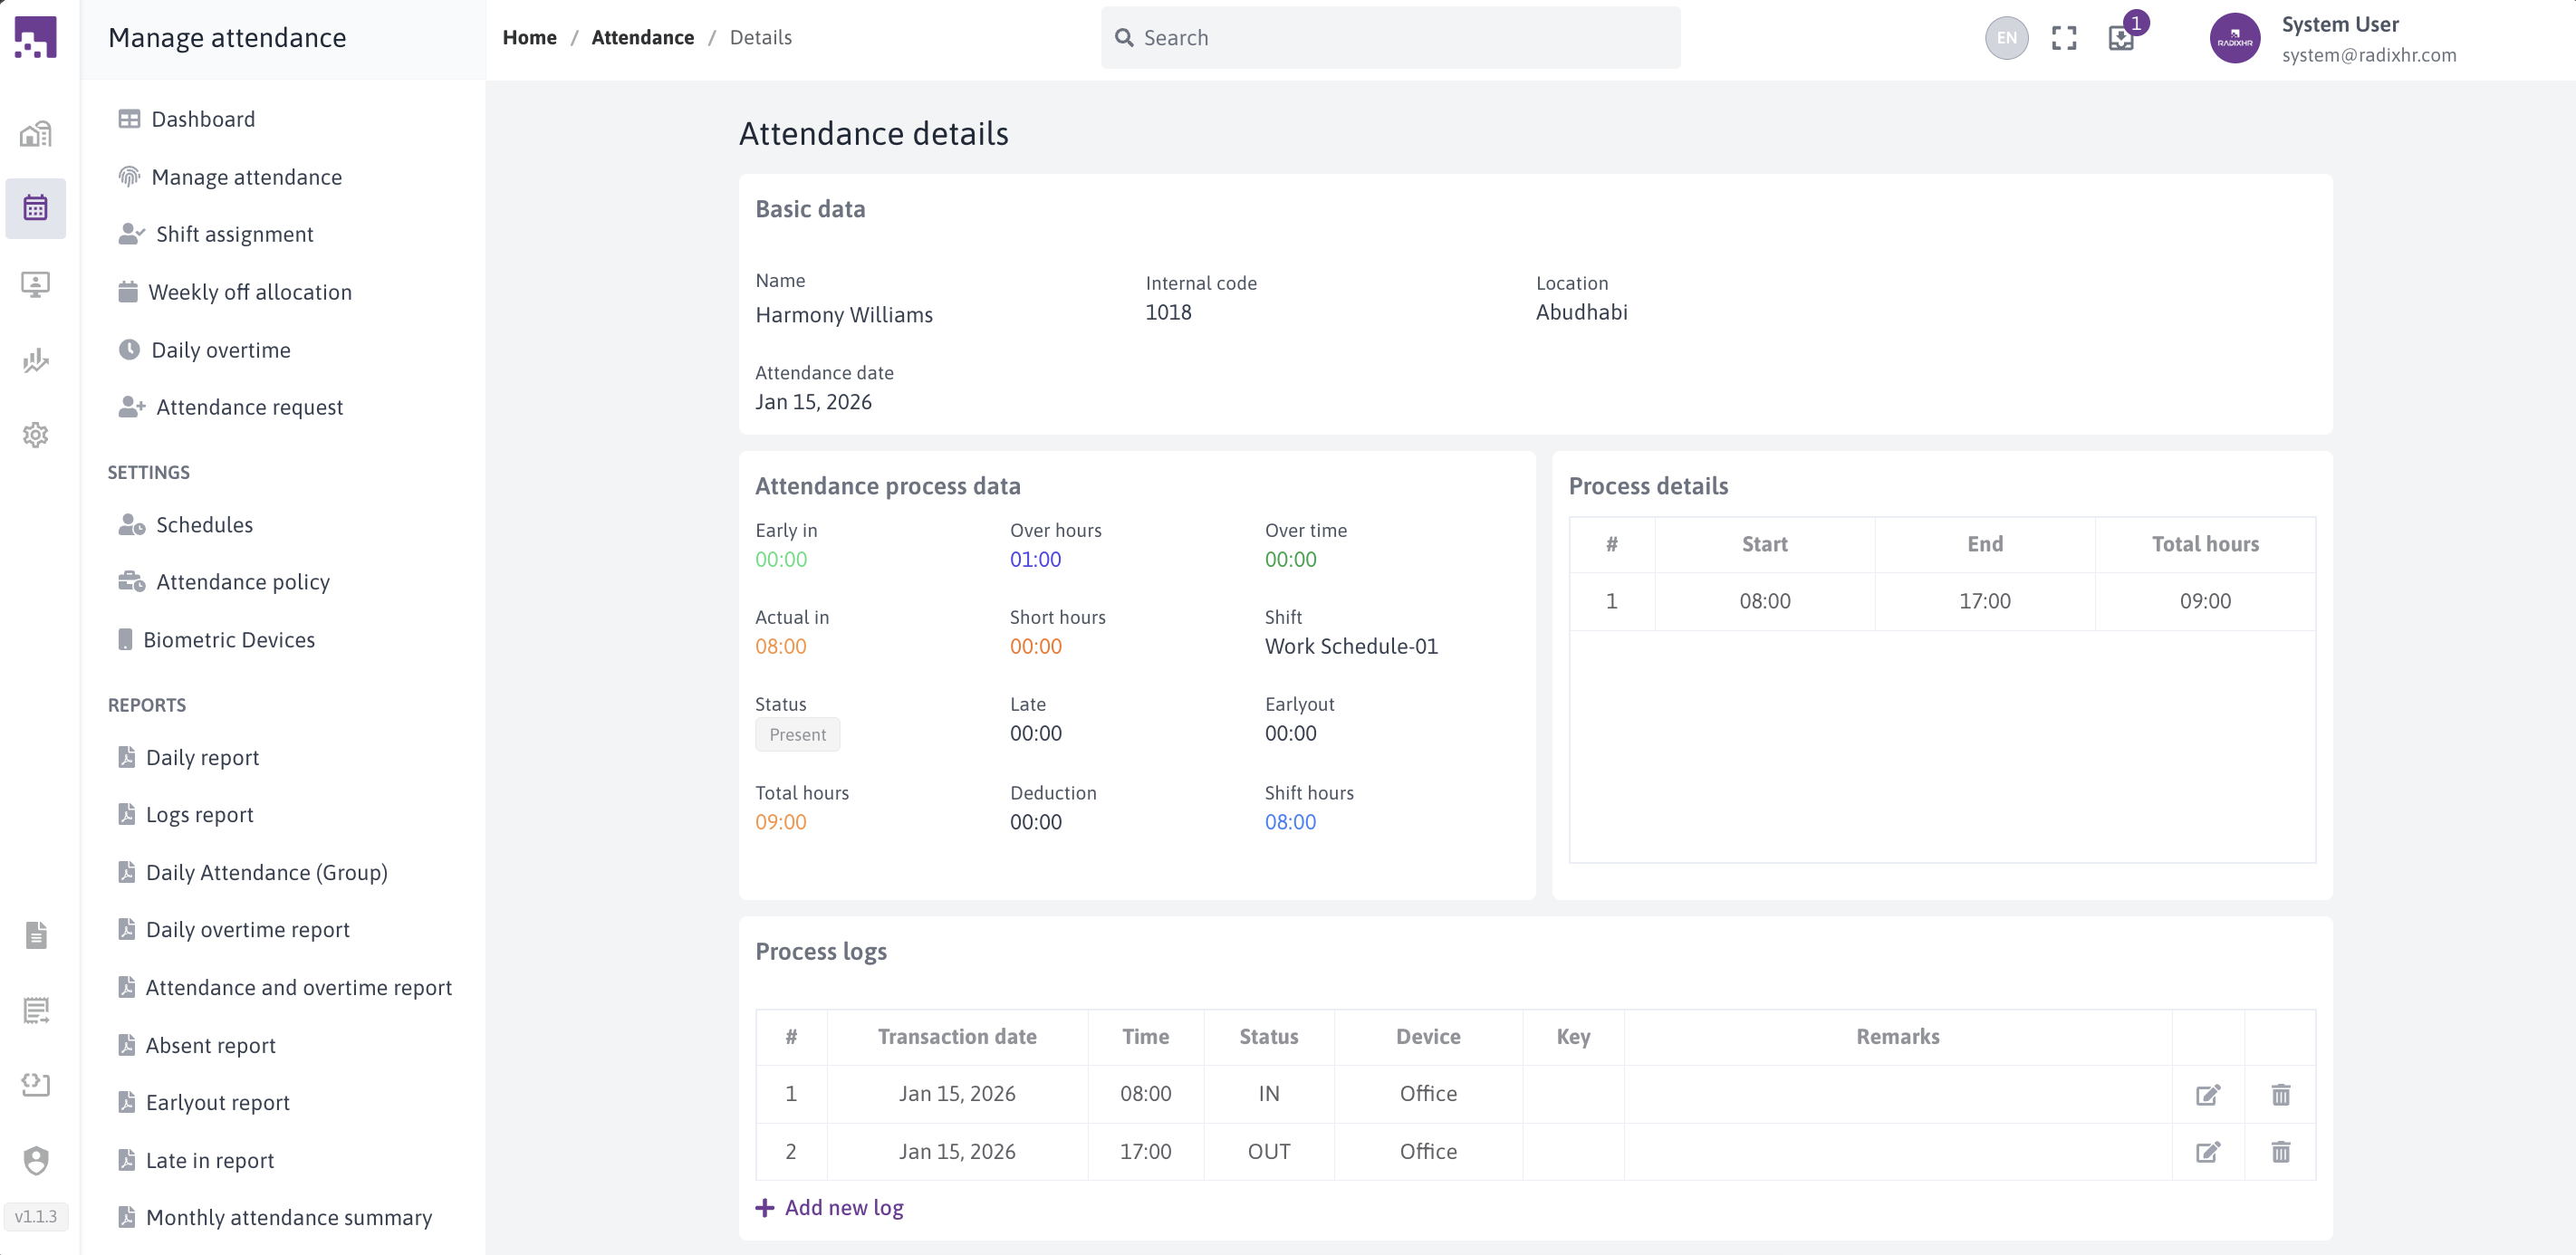
Step 2: View Attendance Details
The edit screen shows comprehensive information in sections:
# Basic Information
- Employee name and code
- Attendance date
- Work hours summary
- Status (Present, Absent, Late In, etc.)
- Shift information
# Attendance Process Data
- Start and end times
- Total hours worked
- Late hours
- Early out hours
- Overtime details
- Deduction information
# Process Details
- First punch/last punch calculations
- Total break time
- Worked hours
- Shift details
# Process Logs
A table showing all attendance logs for the day:
- Transaction date
- Time
- Status (IN/OUT)
- Device used
- Function key
- Remarks
Step 3: Edit or Delete Logs
In the Process Logs section:
- Click the edit icon to modify a log
- Click the delete icon to remove a log
- The system reprocesses attendance after changes
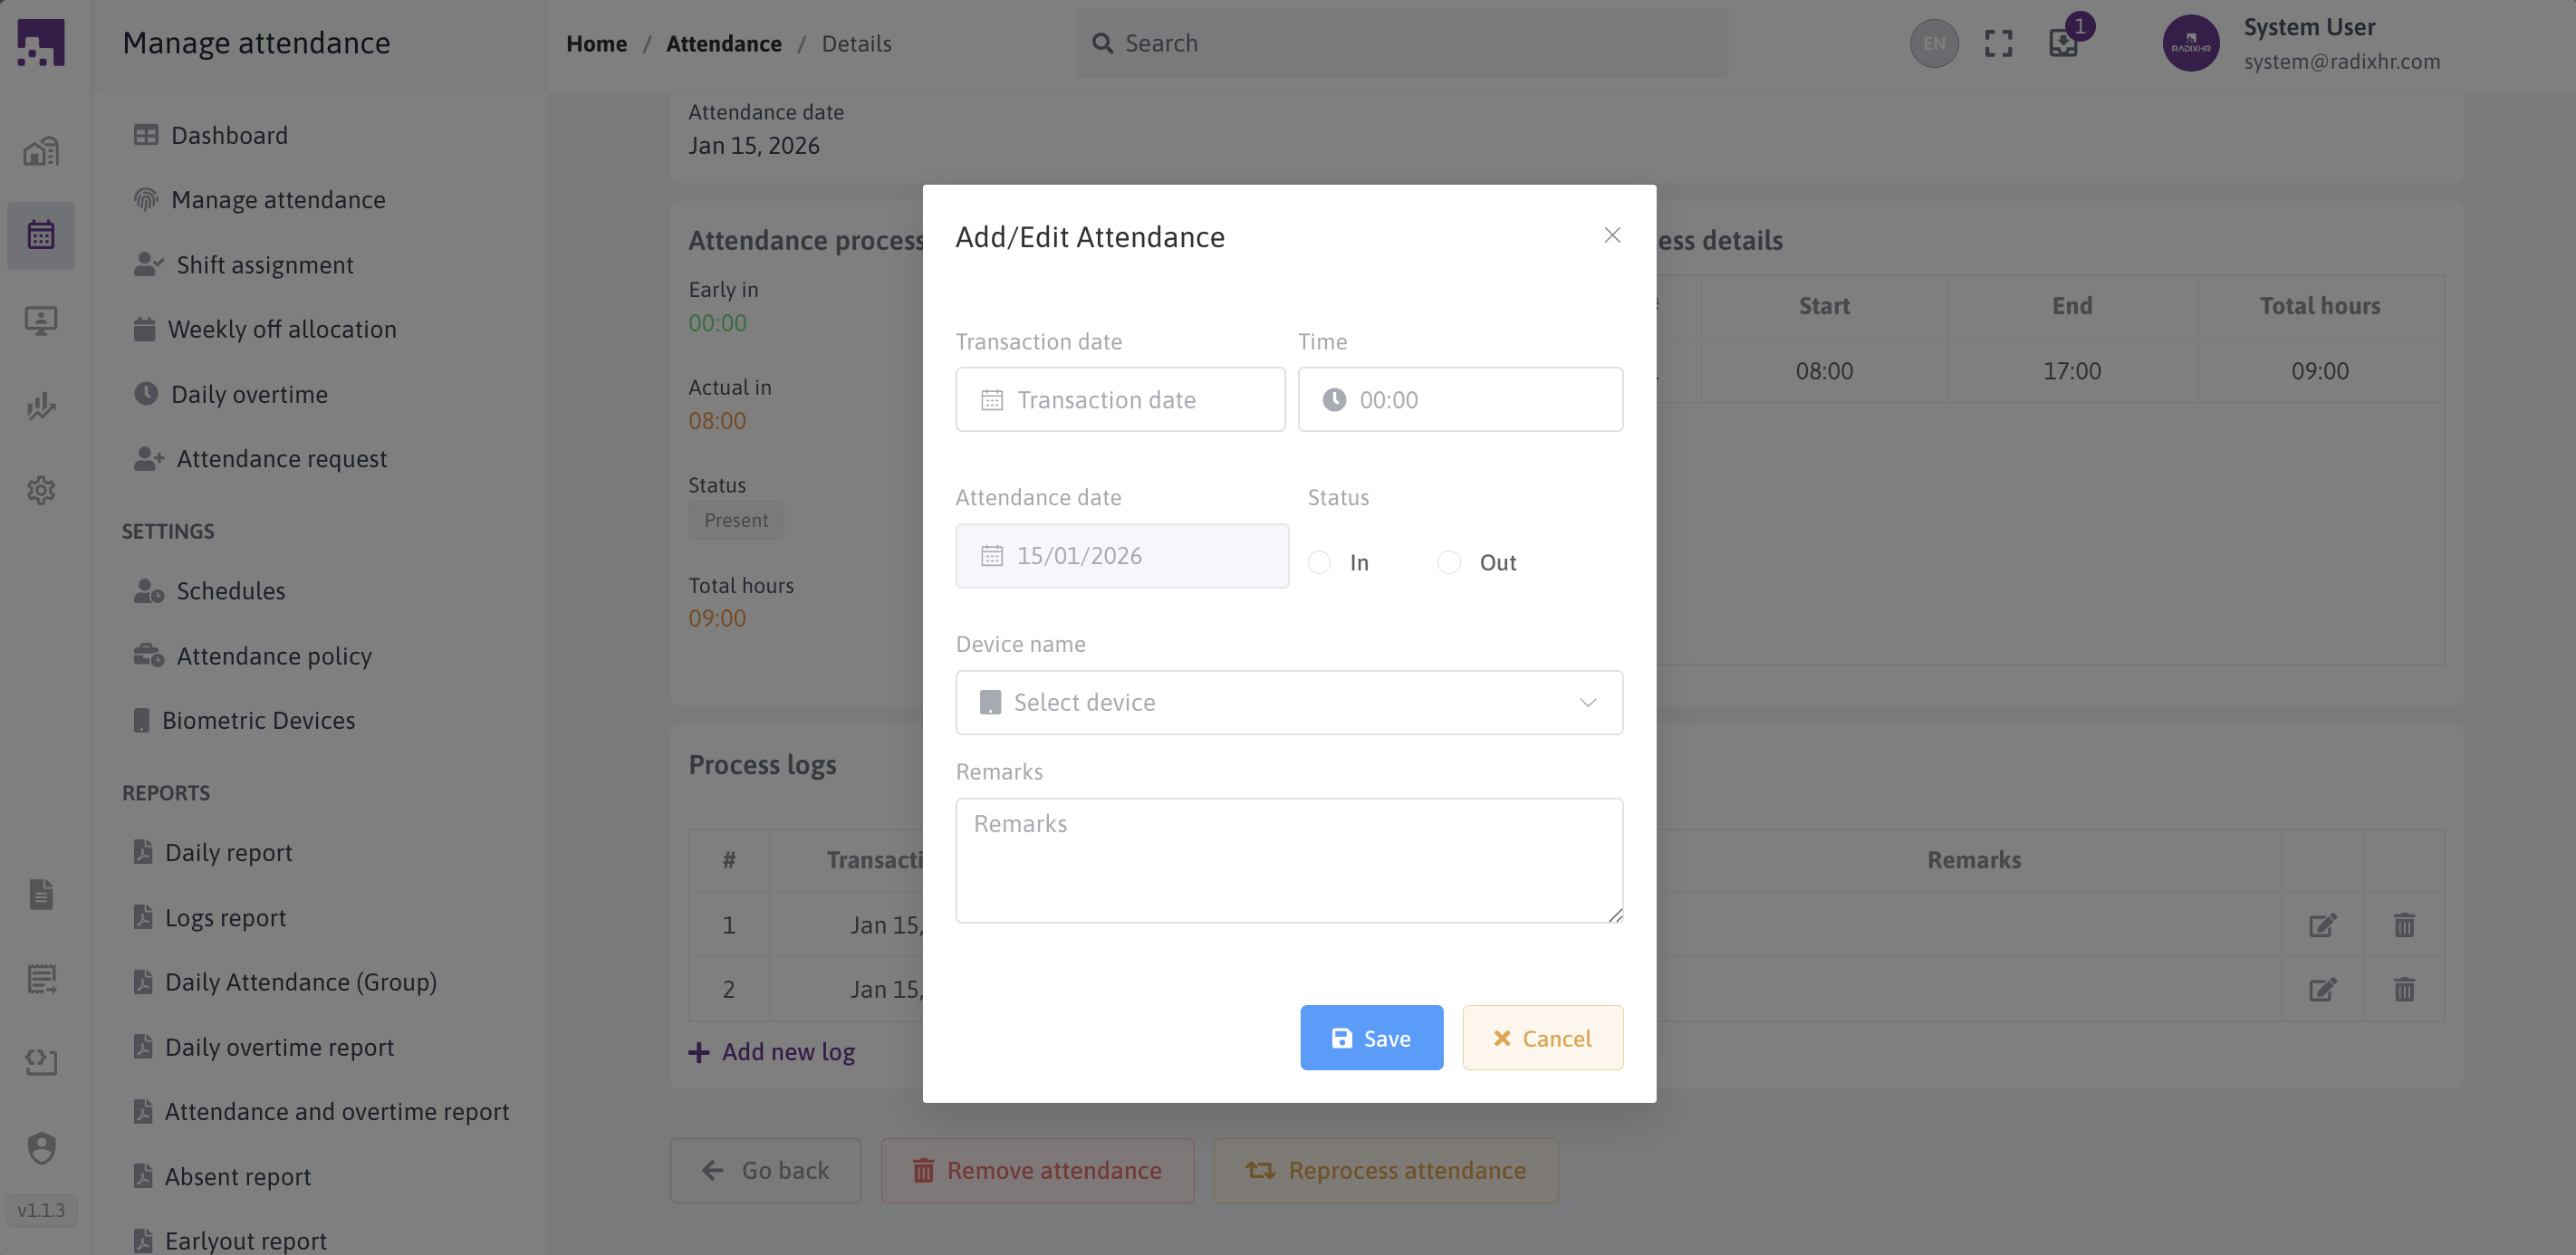
Step 4: Create New Log
Click the "Add New Log" link to:
- Open the log editor
- Add a new attendance log
- Specify all required fields
- Save to update the attendance
Step 5: Log Editor
When editing or adding logs, a dialog appears with:
- Transaction Date: When the punch occurred
- Time: Punch time in HH:MM format
- Attendance Date: The attendance date (disabled, for reference)
- Status: IN or OUT selection
- Device: Device used for punching
- Remarks: Reason for the change (min 5 characters)
- Function Key: F1-F4 (only for OUT status)
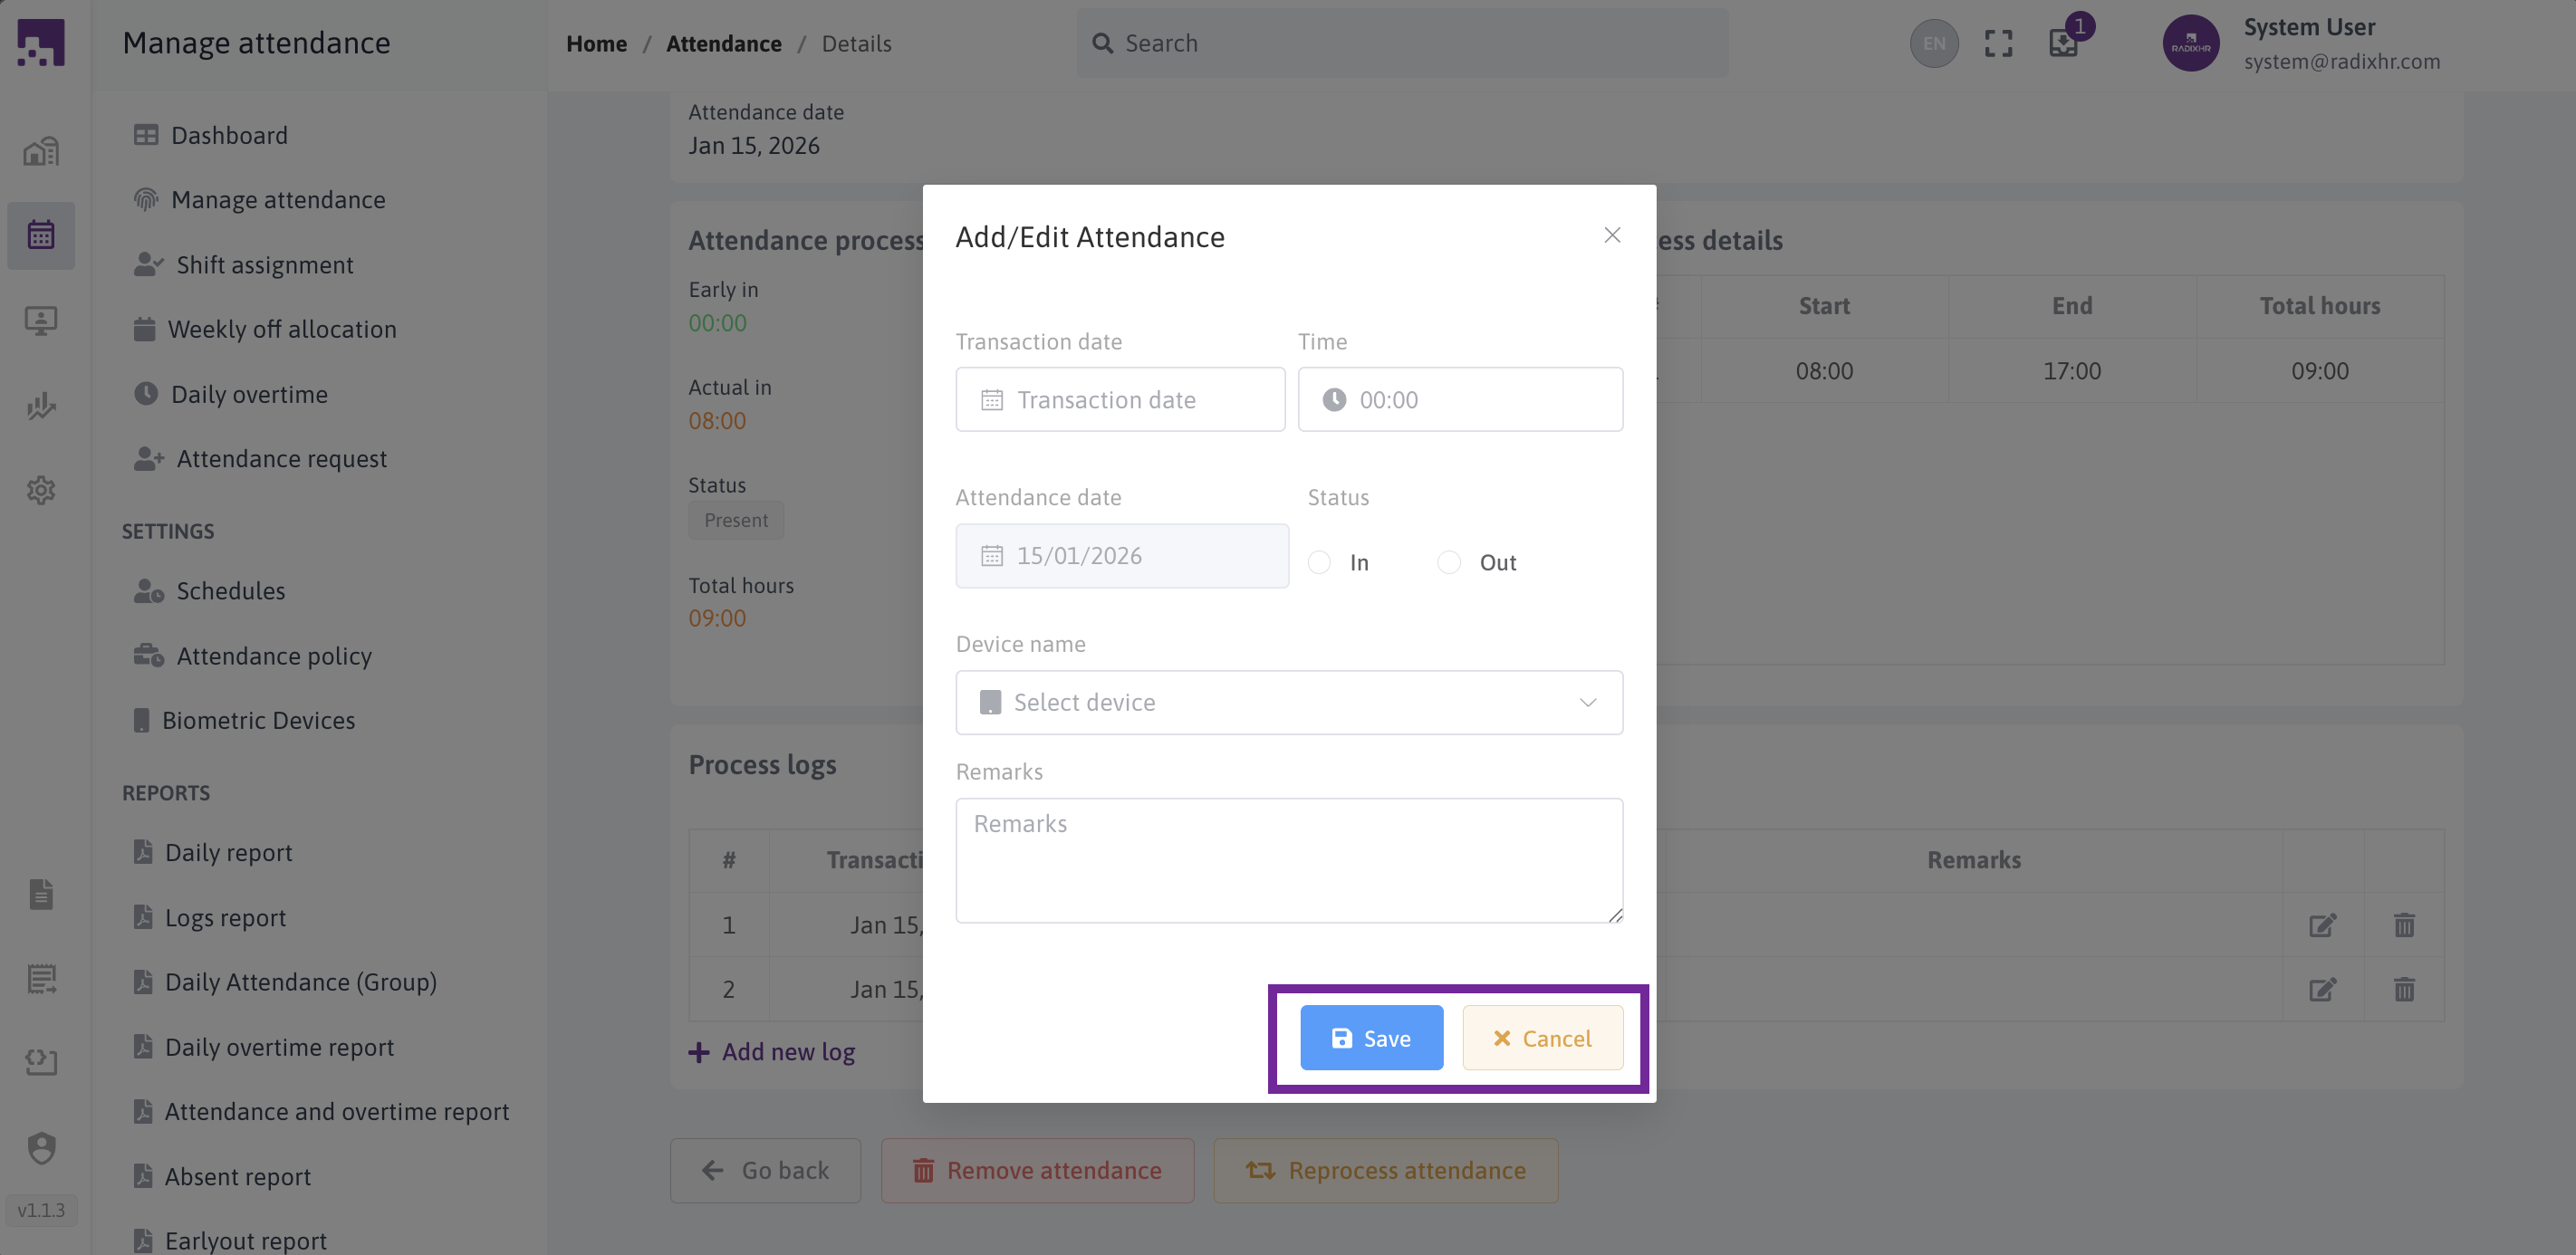
Step 6: Save Changes or Cancel Changes
Click Save to:
- Validate the data
- Update the log
- Reprocess attendance automatically
- Show success message
Click Cancel to:
- Confirm cancellation
- Discard unsaved changes
- Return to the attendance detail view
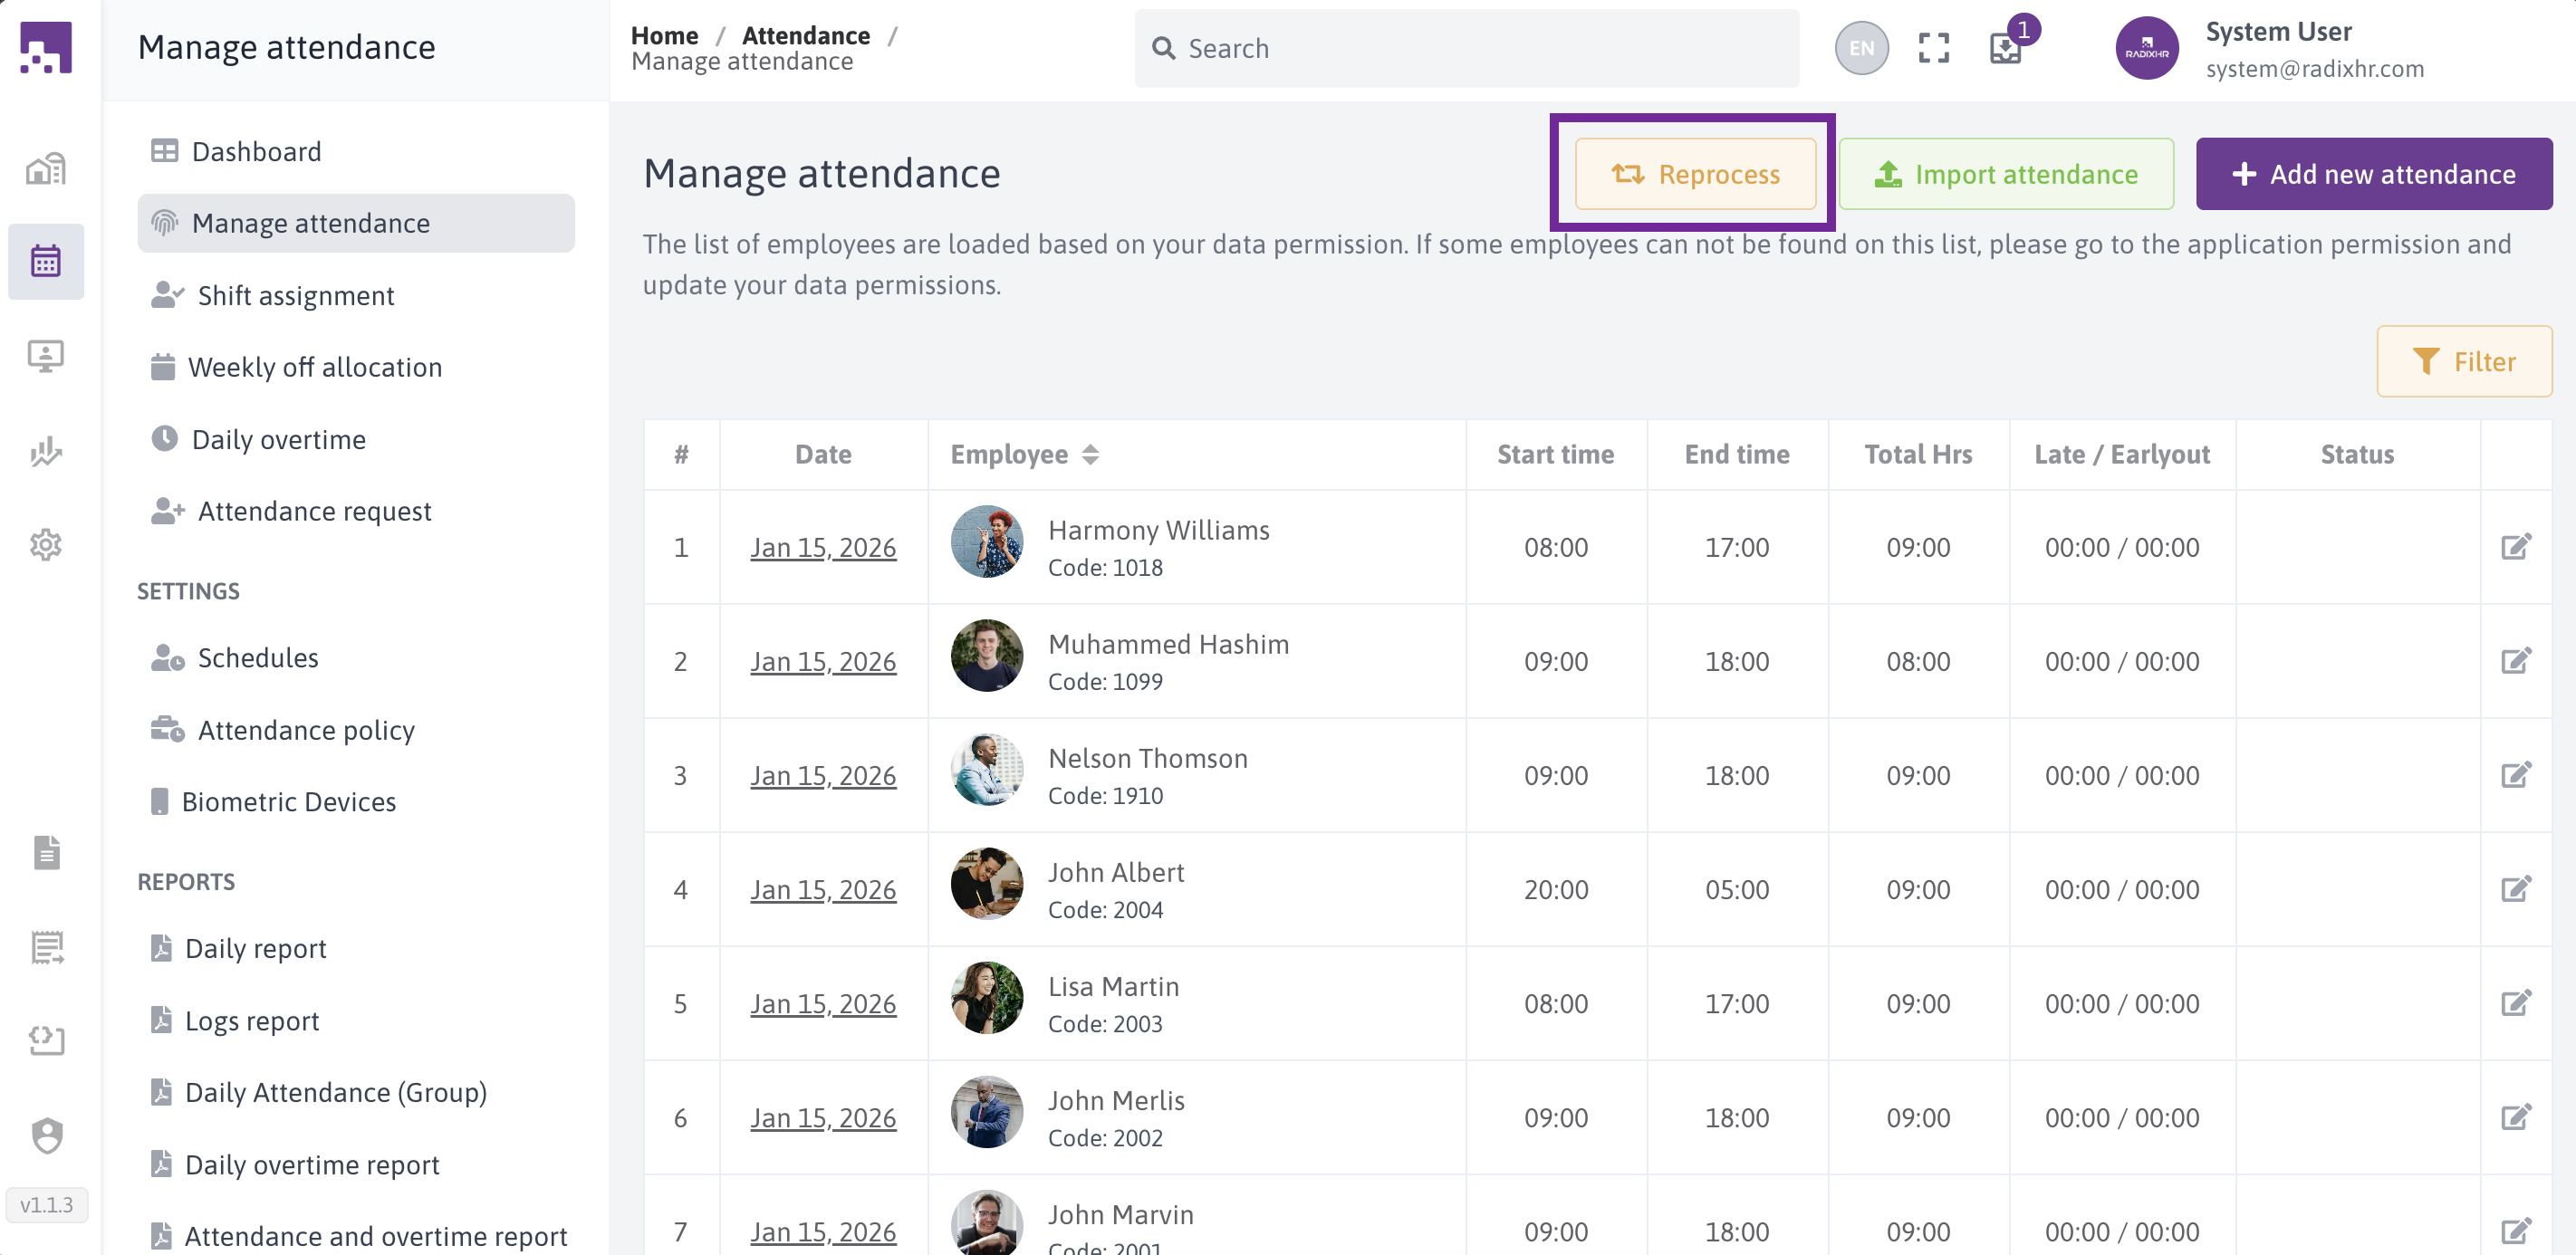
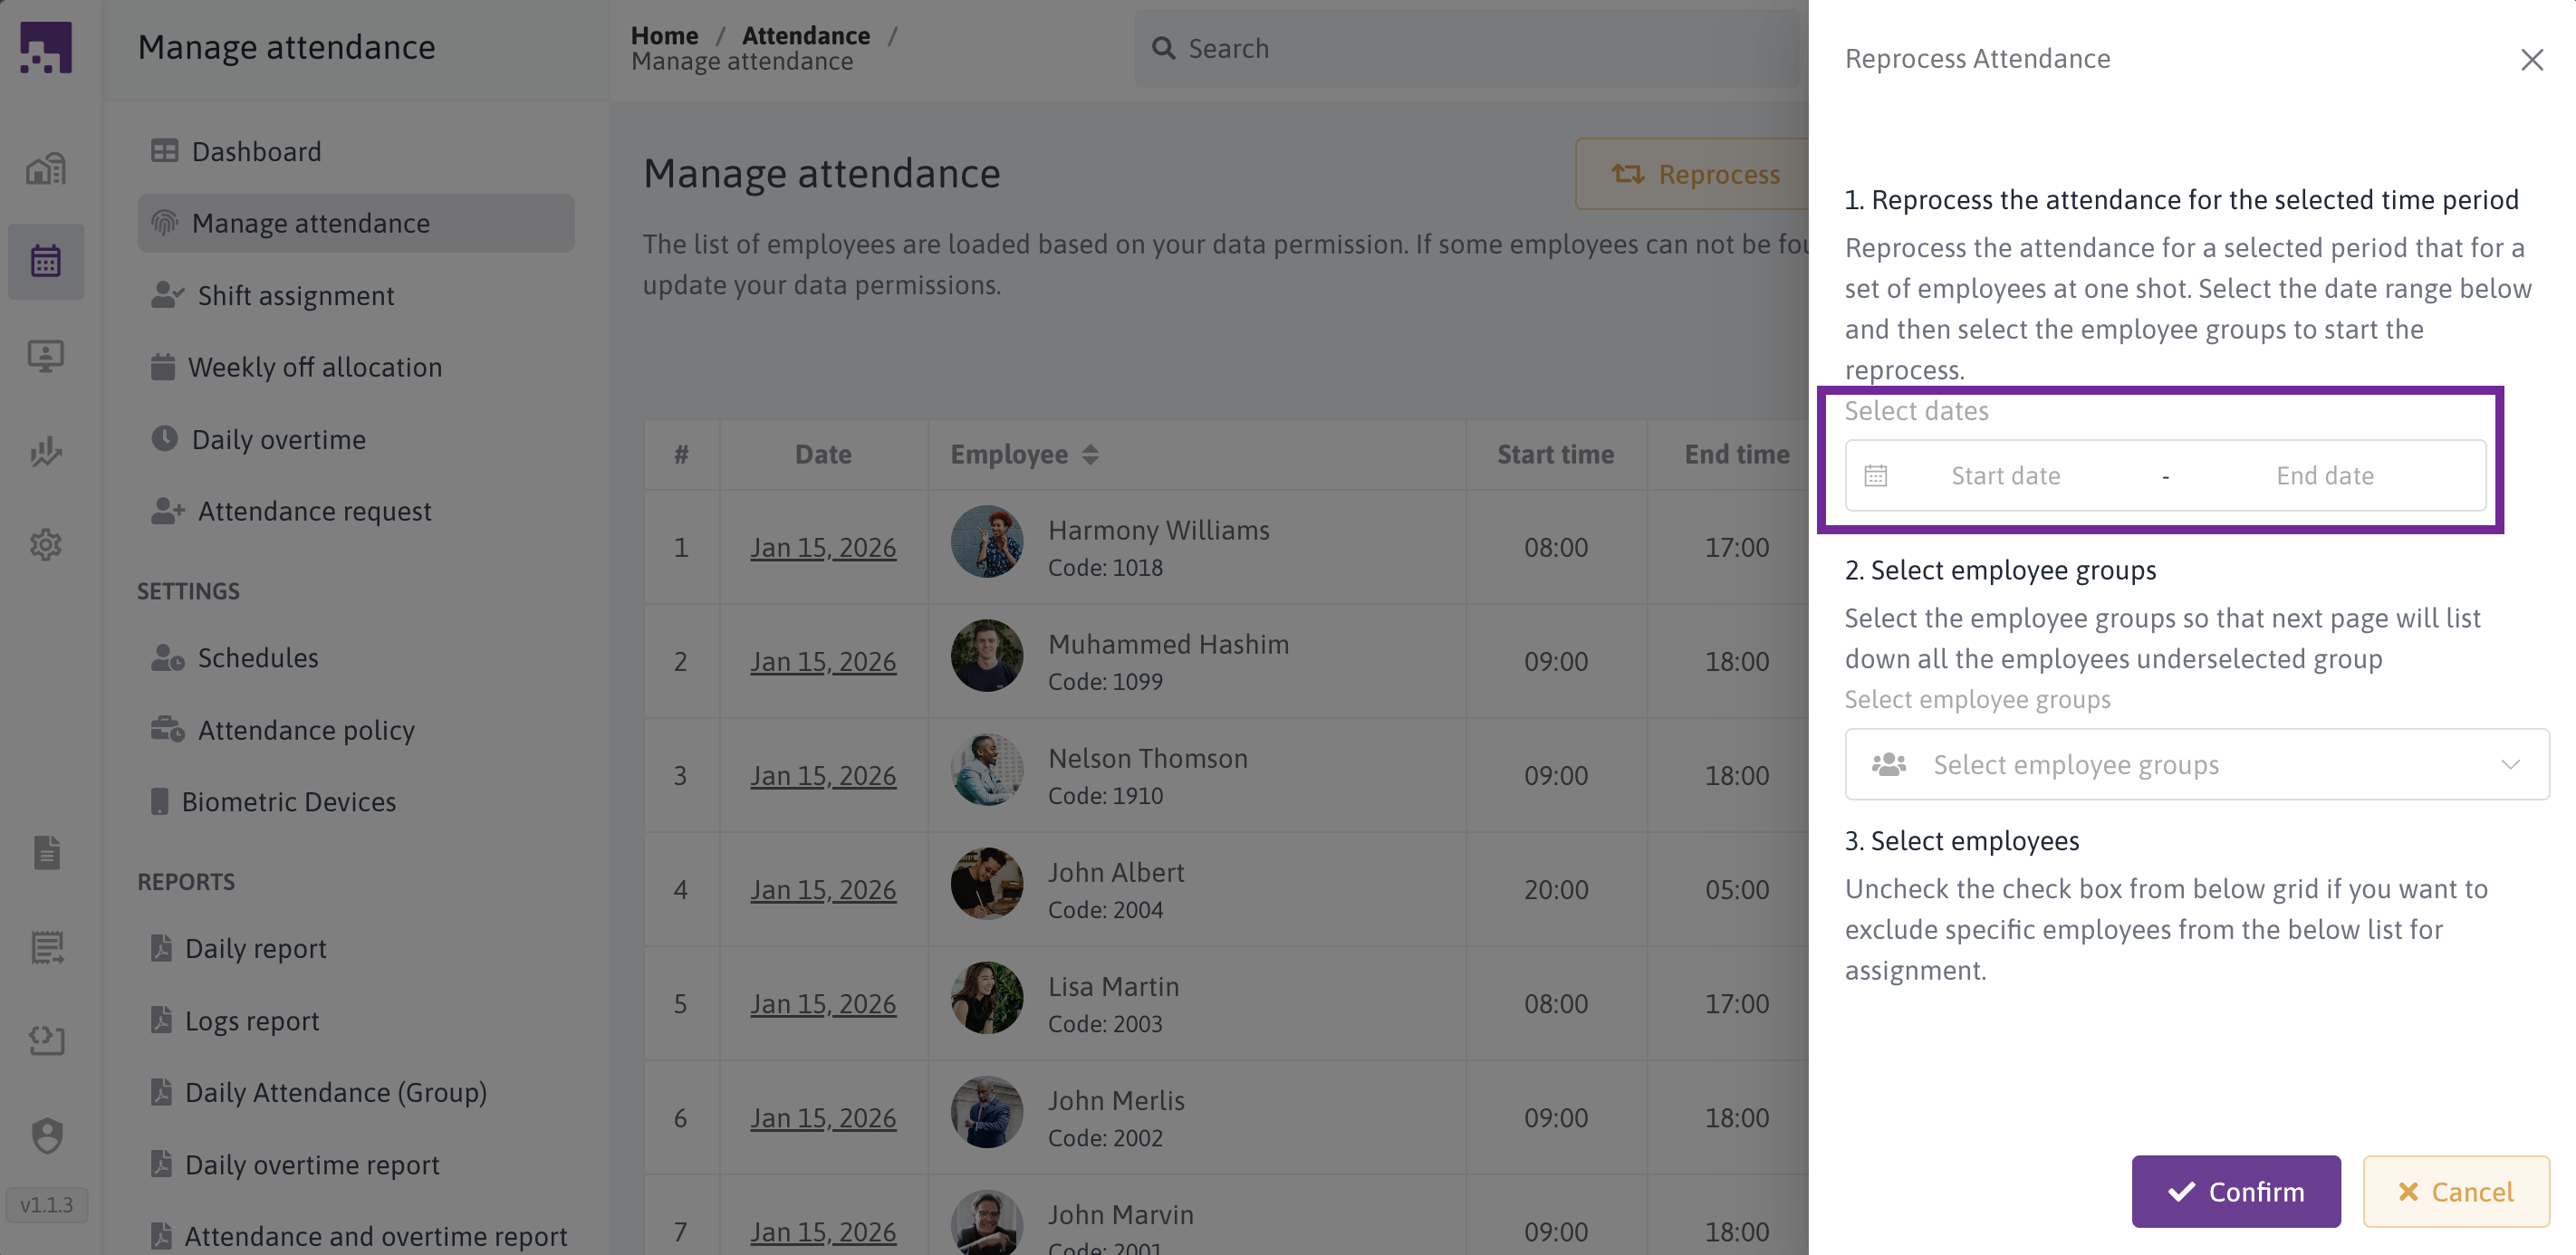
# Reprocessing Attendance
Reprocessing recalculates attendance based on the latest attendance logs and policies. Use this after making changes to ensure all calculations are correct.
# When to Reprocess
Reprocess attendance when:
- You've edited attendance logs
- You've imported new attendance data
- Attendance policies have changed
- Shift schedules have been updated
- You need to correct calculation errors
- System shows incorrect totals
# Step-by-Step Guide
Step 1: Open Reprocess Screen
Click the "Reprocess Attendance" button from the main attendance screen.
Step 2: Select Date Range
- Click the date range picker
- Select start and end dates
- Only past dates can be selected
- Future dates are disabled
- Format: DD/MM/YYYY
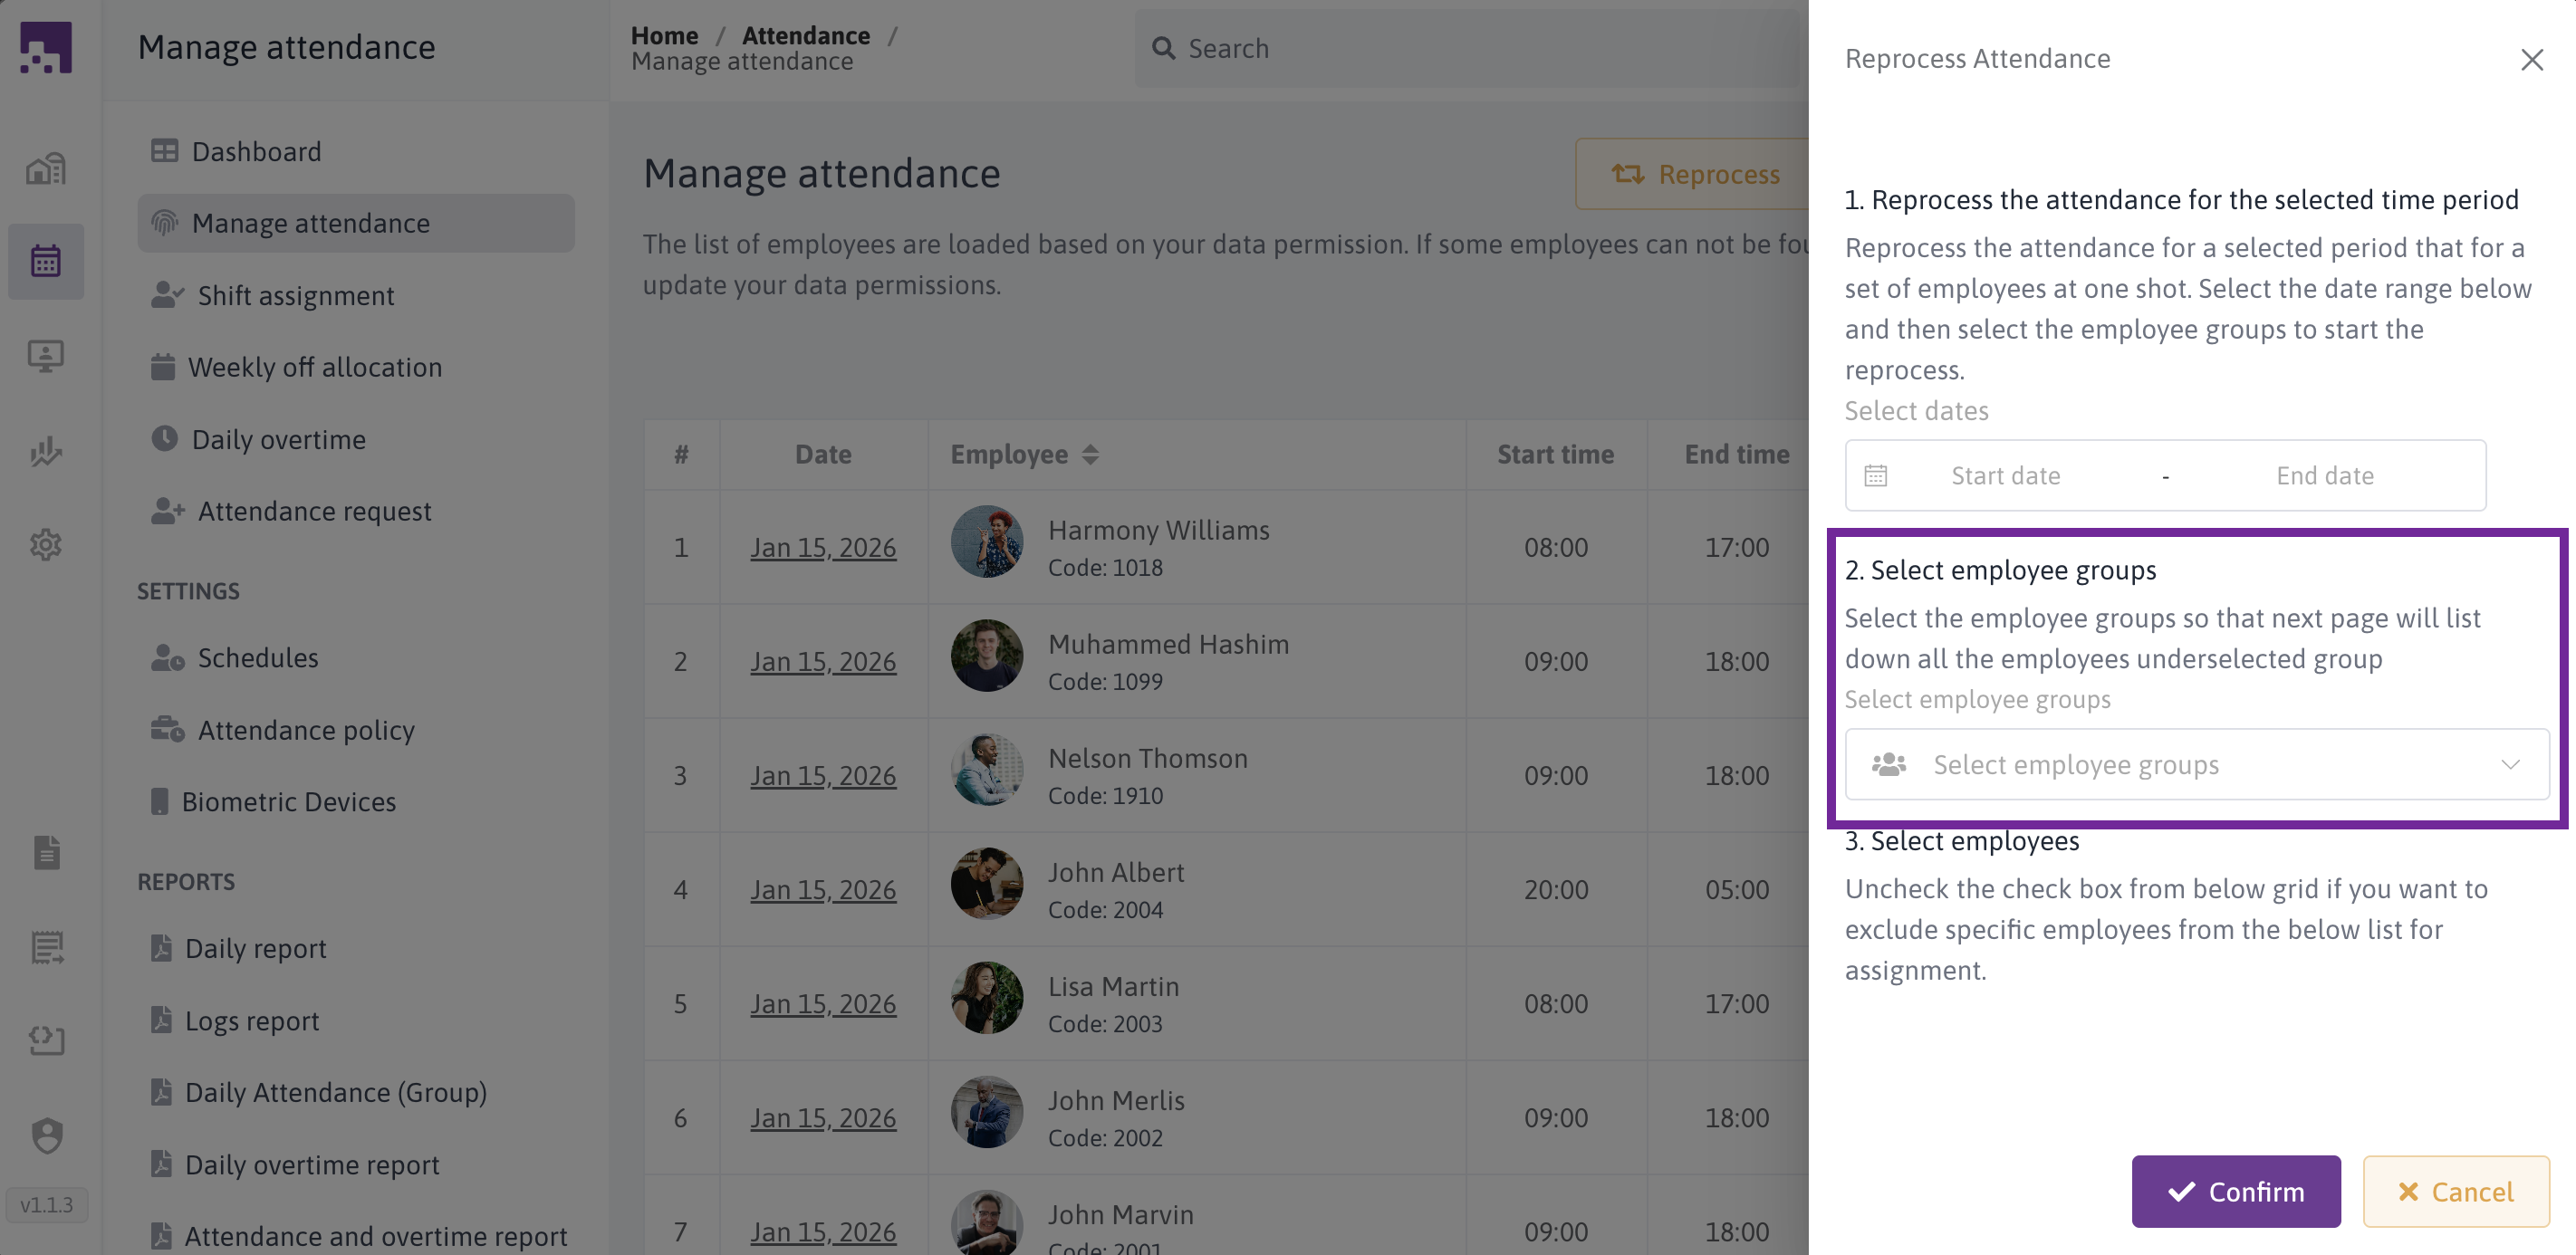
Step 3: Select Employee Groups
- Click "Select Employee Groups"
- Choose one or more groups
- Options include:
- Employees Under Me
- Specific employee groups
- Multiple selection allowed
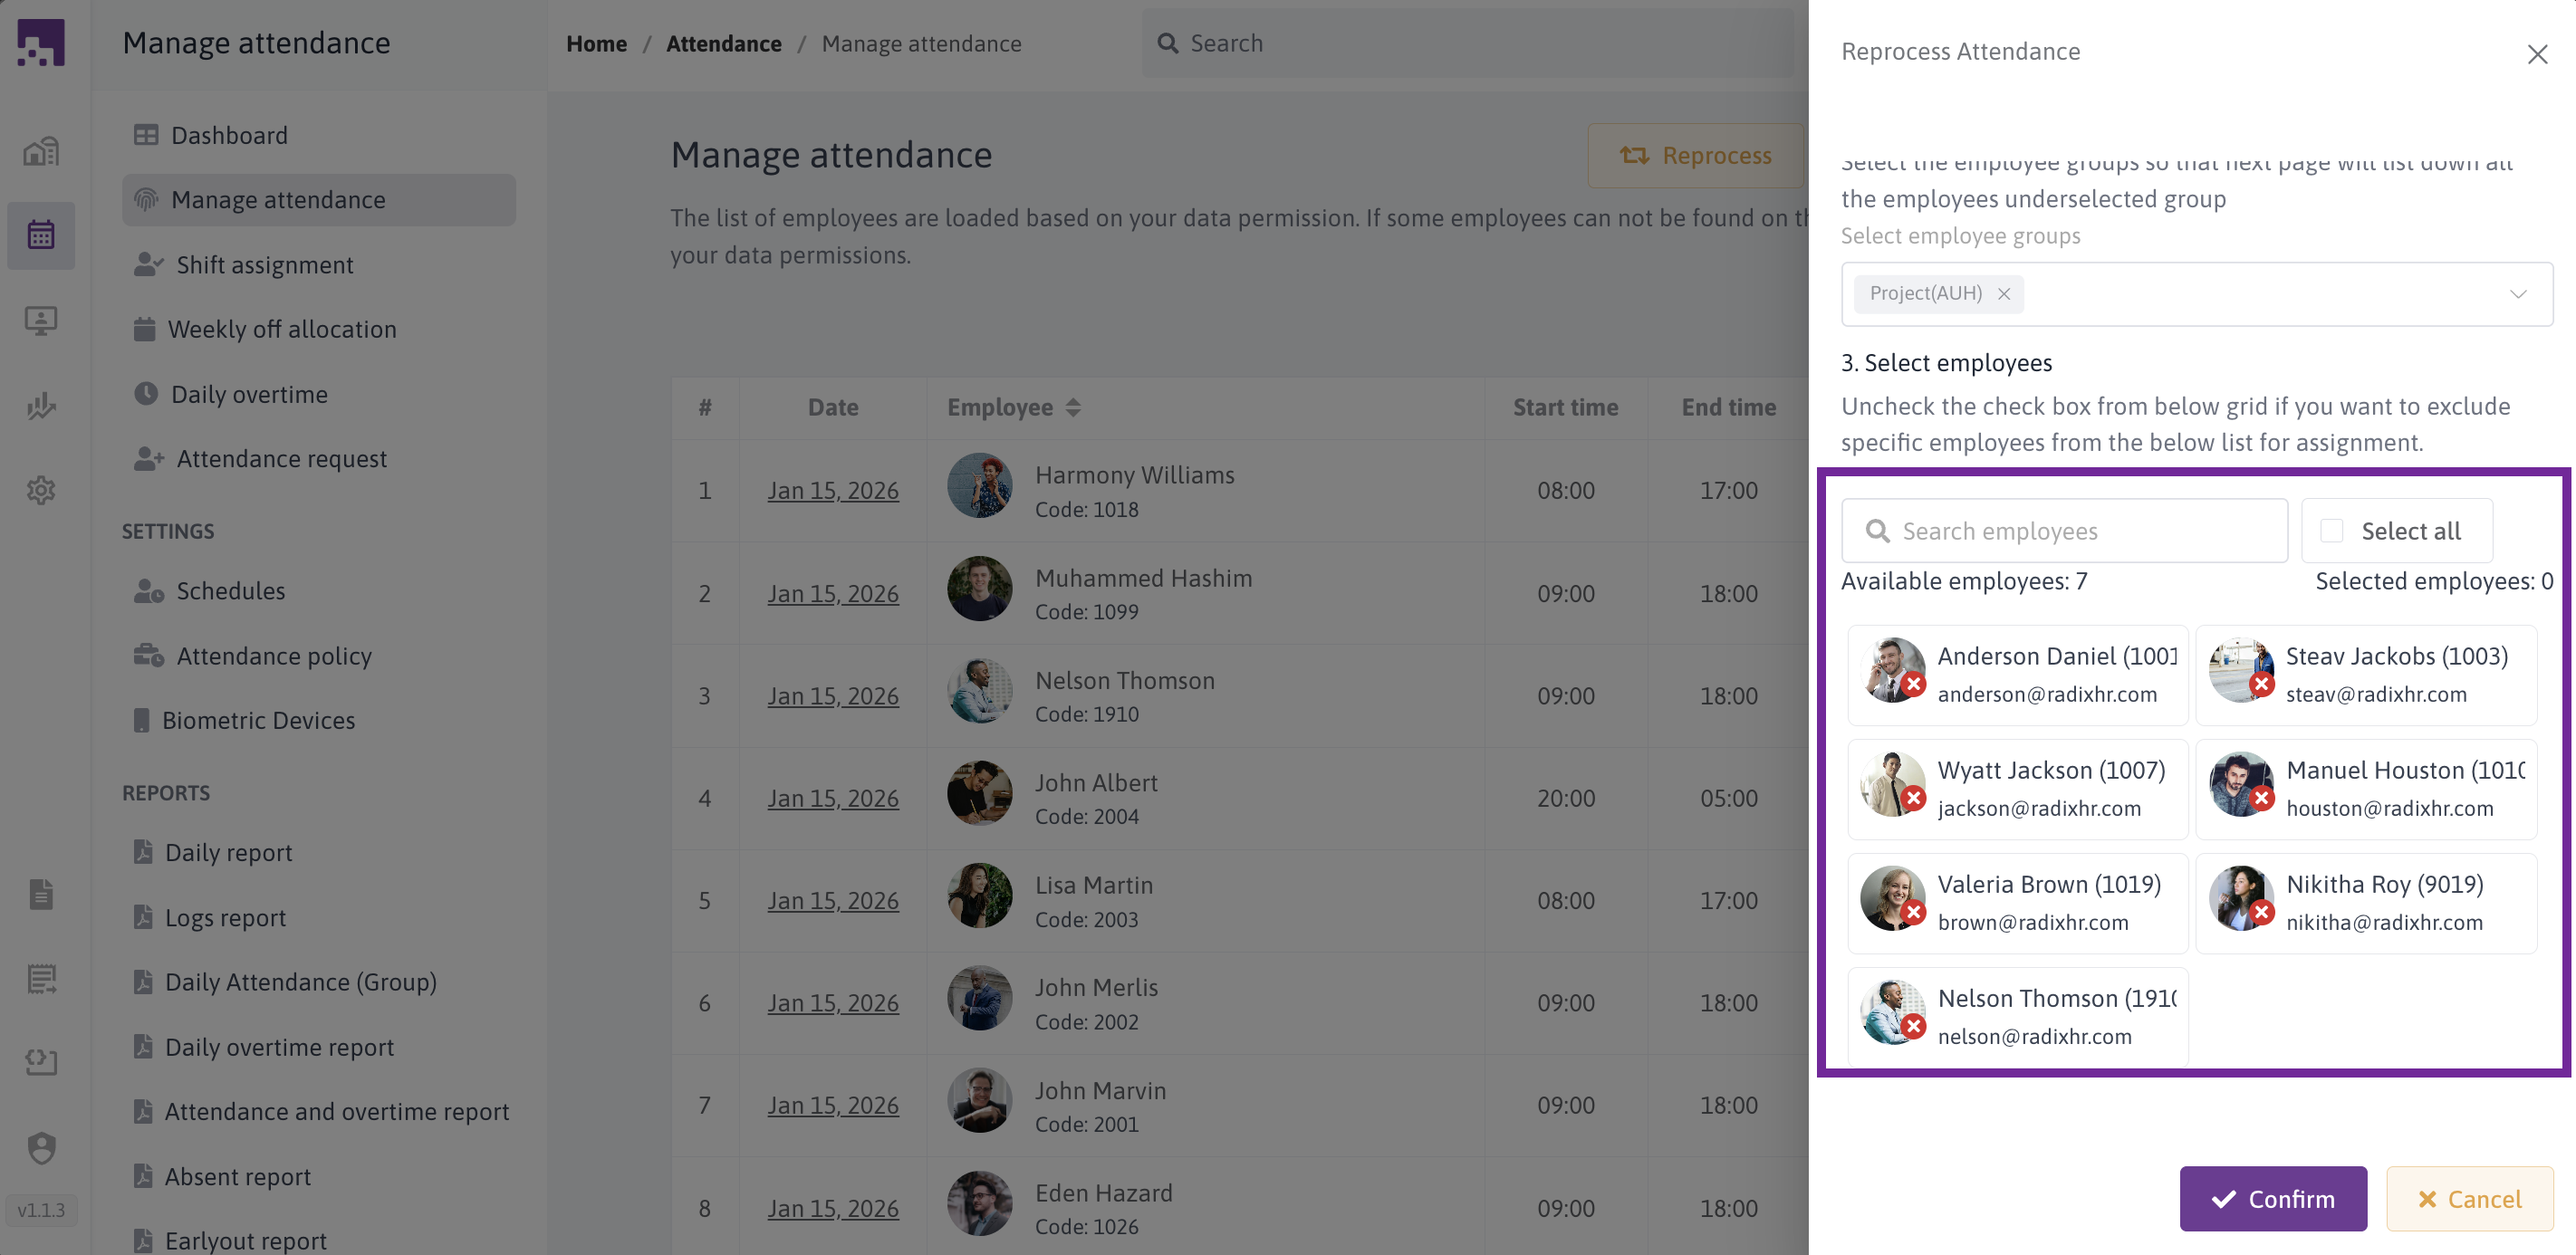
Step 4: Select Employees
After selecting groups:
- Browse employee cards
- Search by name or code
- Use Select All to choose everyone
- Click individual cards to select
- Monitor selection counters
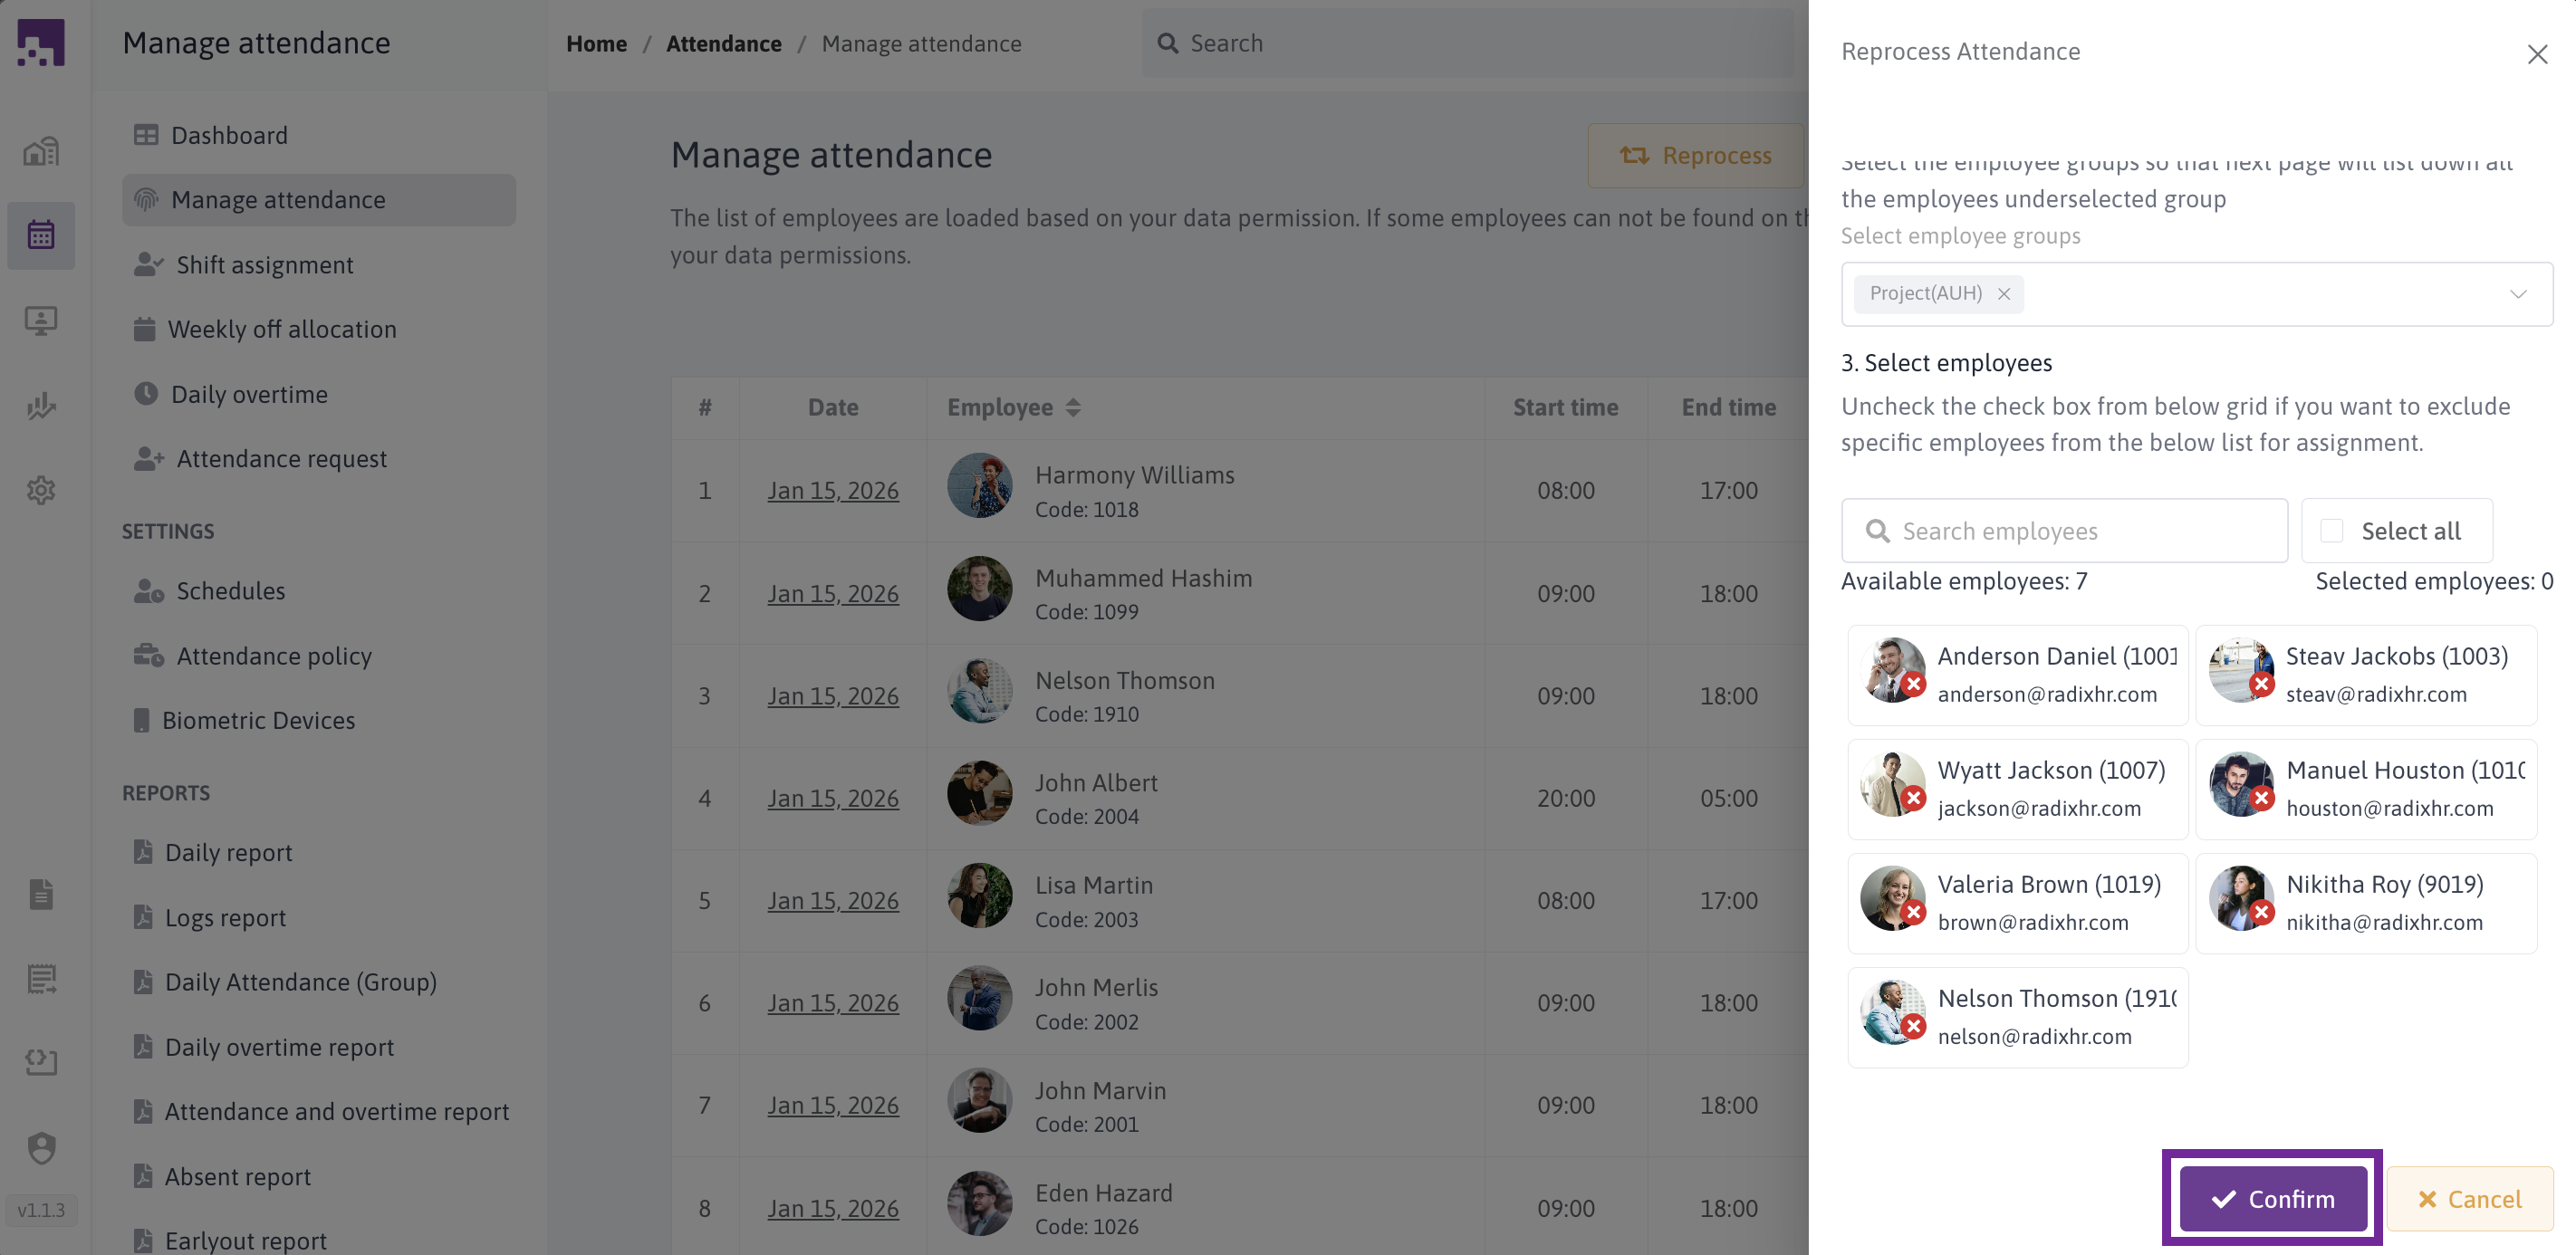
Step 5: Start Reprocessing
Click the Confirm button to:
- Queue reprocessing jobs
- Process each employee for each date
- Recalculate all attendance metrics
- Update overtime calculations
- Apply latest policies
- Show progress indicator
# Deleting Attendance Records
Remove incorrect attendance records when necessary.
# Deleting Single Records
From the Edit Screen:
- Open the attendance record
- Click the delete button (if available)
- Confirm the deletion
- System removes the record and associated logs
- Attendance is reprocessed automatically
# Reprocess Single Attendance
To Reprocess a Single Attendance ,click Reprocess Single Attendance button