Directory
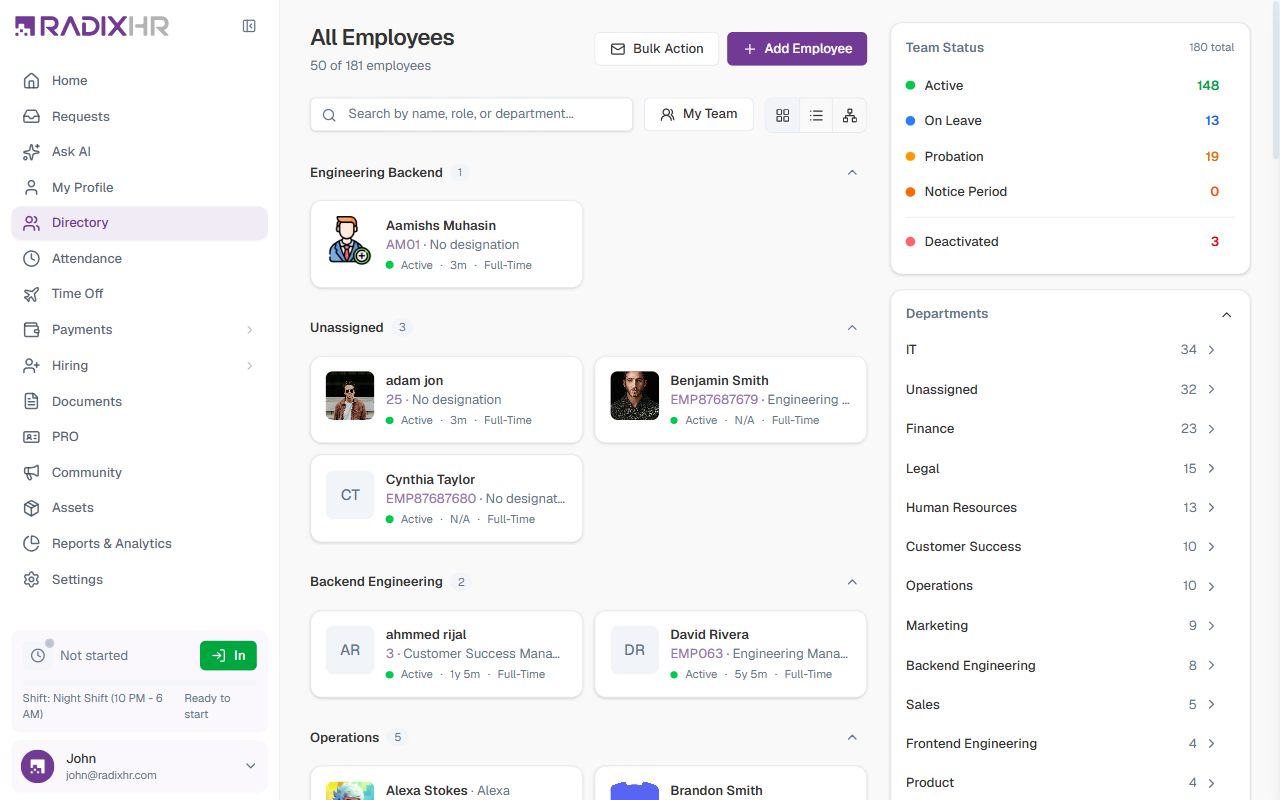
The Directory is your central hub for viewing everyone in the organization. From here you can search, filter, and browse all employees, switch between three different views, add new employees, provision portal access in bulk, and open any employee’s full profile.
What you can do here:
- Browse all employees grouped by department
- Search by name, role, or department
- Toggle My Team to see only the people who report directly to you
- Switch between Grid, List, and Organization views
- Filter by employment status, department, or nationality from the right sidebar
- Add new employees with basic details and complete their profile afterwards
- Provision portal access for multiple employees at once using Bulk Action
- Open an employee to view and manage their full profile
Page Layout
The page is divided into two columns:
- Left — the employee list with search, filters, and view toggles
- Right — a sidebar with Team Status counts, a Departments list, and a Nationality filter for quick filtering
Search and Filters
Search
Type in the Search by name, role, or department… box to filter the list. Results update as you type. Clear the search with the × icon inside the field.
My Team Toggle
Click My Team to filter the list to only the employees who report directly to you. The title changes to “My Team” and a Clear filters link appears next to the employee count. Click Clear filters or click My Team again to go back to all employees.
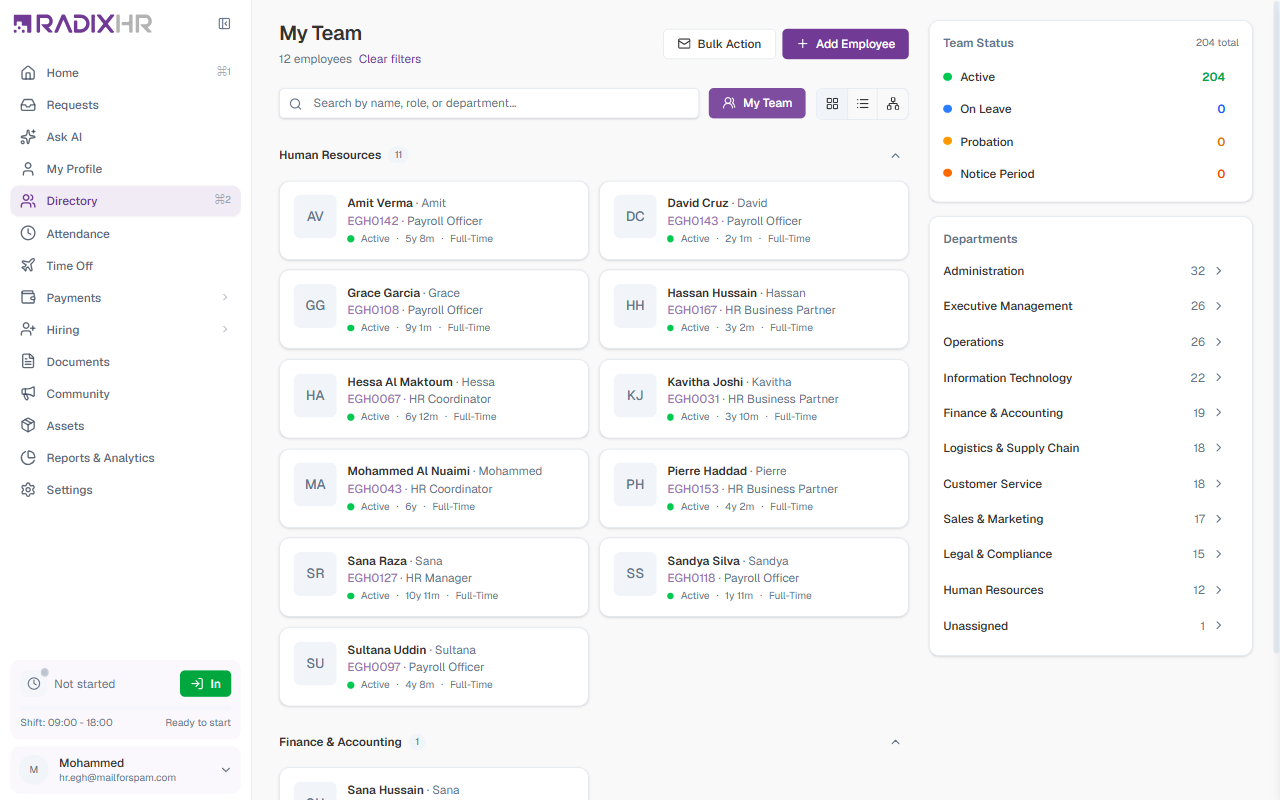
My Team shows employees whose manager is set to you. If you don’t manage anyone, the list will show “No direct reports”.
View Toggles
Three icons to the right of the search bar let you switch how employees are displayed:
| View | Description |
|---|---|
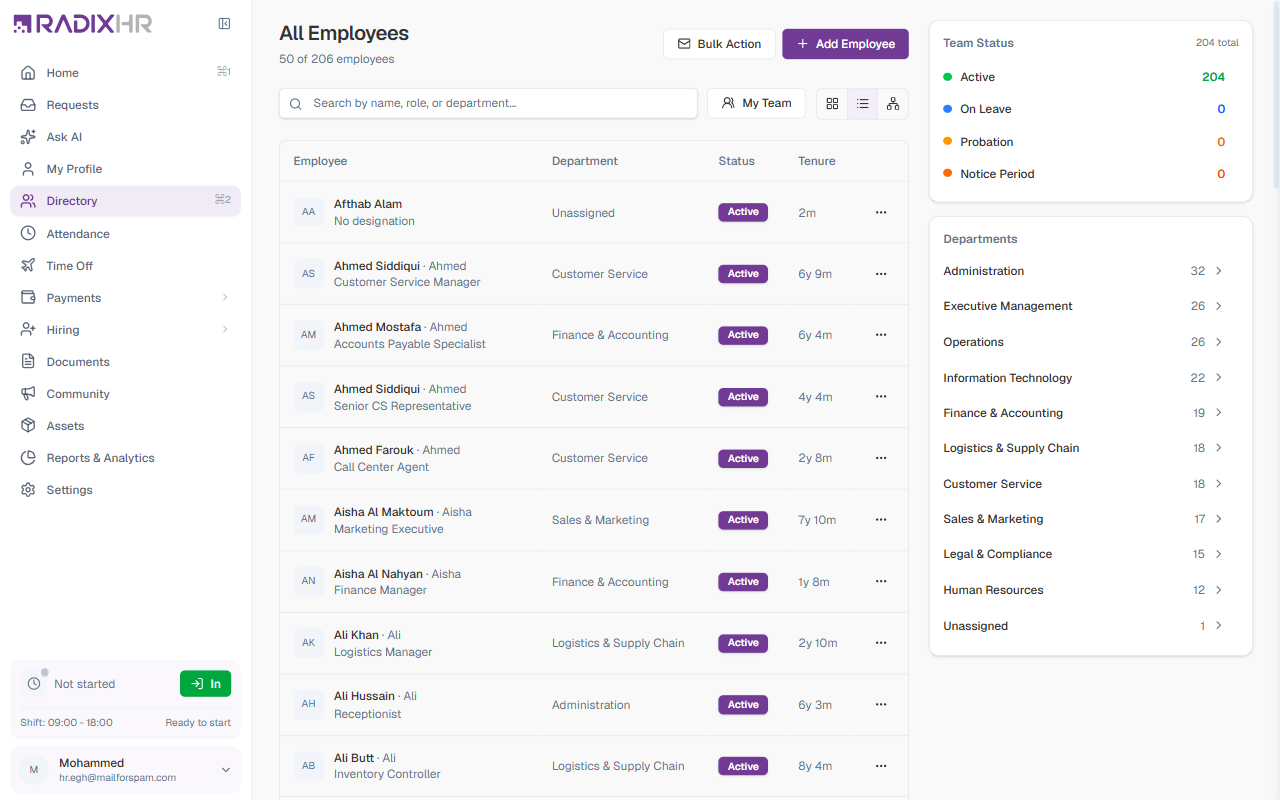
| Grid | Default view. Employee cards grouped under collapsible department headings. |
| List | Compact table showing Employee, Department, Status, and Tenure columns. |
| Organization | Hierarchical org chart showing employees under their reporting manager. |
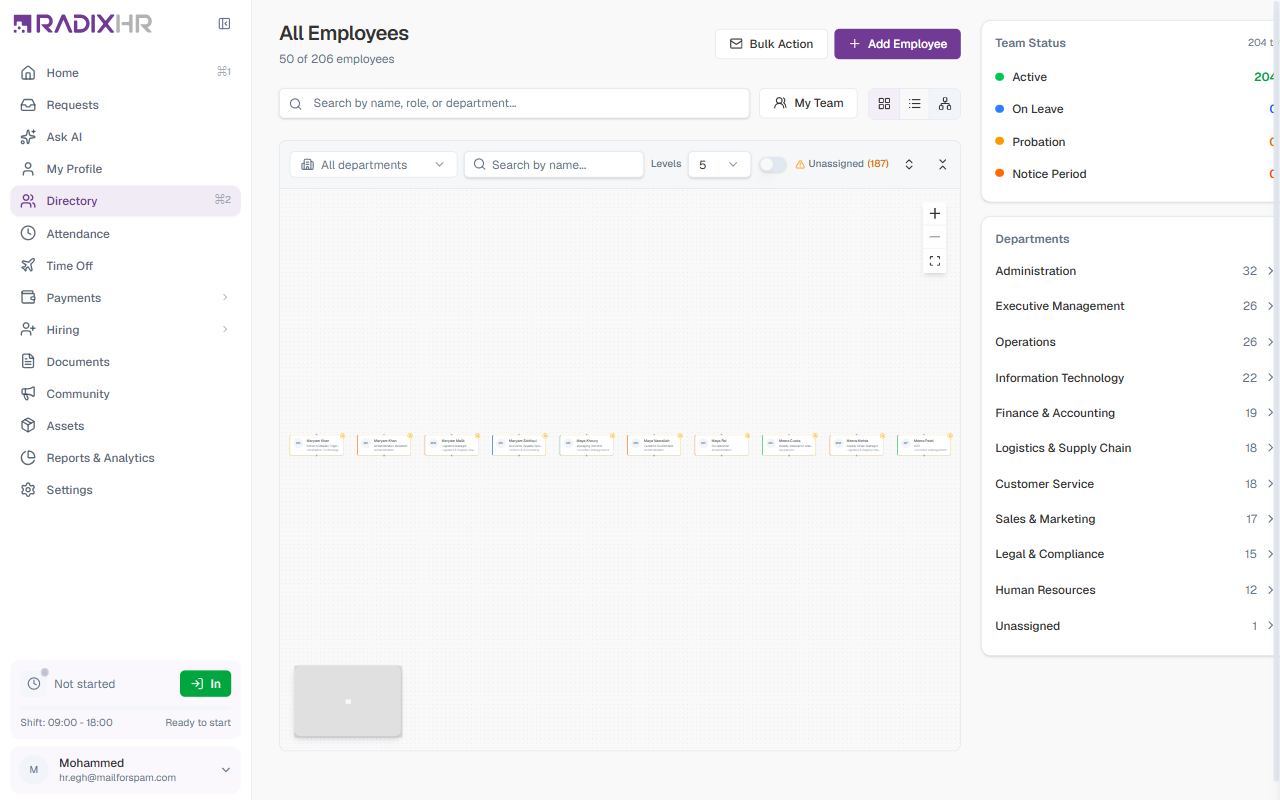
Organization View Controls
The Organization view shows the company’s reporting hierarchy as an org chart. It has additional controls:
| Control | Description |
|---|---|
| All departments | Dropdown to filter the chart to a single department. |
| Search by name | Search for a specific person within the org chart. |
| Levels | Controls how many levels deep the hierarchy is shown (default: 5). |
| Unassigned toggle | Toggle to show or hide employees who have no manager assigned. |
| Zoom in / Zoom out | Adjust the zoom level of the chart. |
| Fullscreen | Expand the chart to fill the entire screen. |
Employee Card (Grid View)
In Grid view, each employee appears as a card grouped under their department. Each card shows:
| Element | Description |
|---|---|
| Avatar | Circular avatar with photo, or initials if no photo is set (e.g., AS) |
| Name | Full name, with preferred name shown after a · if set (e.g., Ahmed Siddiqui · Ahmed) |
| Employee Code | Unique identifier (e.g., EGH0011) |
| Designation | Job title (e.g., Customer Service Manager). Shows “No designation” if not set. |
| Status dot | Coloured dot indicating current status — green Active, blue On Leave, orange Probation, red Notice Period |
| Tenure | How long the employee has been with the company (e.g., 6y 8m) |
| Employment type | Full-Time, Part-Time, Contract, Intern, or Consultant |
Click any card to open the employee’s full profile.
Department Groups
In Grid view, employees are grouped by department with a count next to each name. Click the chevron to collapse or expand a department’s employees. Employees without a department appear under Unassigned at the top.
Right Sidebar
Team Status
Shows a live count of employees by their current status. Each row is clickable to filter the list.
| Status | Indicator | Meaning |
|---|---|---|
| Active | Green dot | Currently employed and working |
| On Leave | Blue dot | Currently on approved leave |
| Probation | Orange dot | New hire in their probation period |
| Notice Period | Red dot | Has resigned and is serving notice |
| Deactivated | Red dot | Account deactivated and hidden from normal listings — click to surface those employees |
The number at the top right (e.g., 180 total) counts all employees regardless of status.
Click a status row — for example Probation — to filter the list to just those employees. Click it again to clear the filter.
Departments
Lists every department with a live employee count. Click any department to filter the list to only that team.
Nationality
Lists the nationalities present in your workforce, each with a count. Click one or more nationalities to filter the directory to employees of those nationalities.
How to Add an Employee
The Add Employee button opens a quick form to create a new employee record with the essential details. You can complete the rest of the profile (personal details, address, emergency contacts, bank details, etc.) afterwards from the employee’s profile page.
- Click + Add Employee in the top right
- Fill in the required fields (marked with
*) - Optionally enable Send welcome email to send login credentials
- Click Create Employee
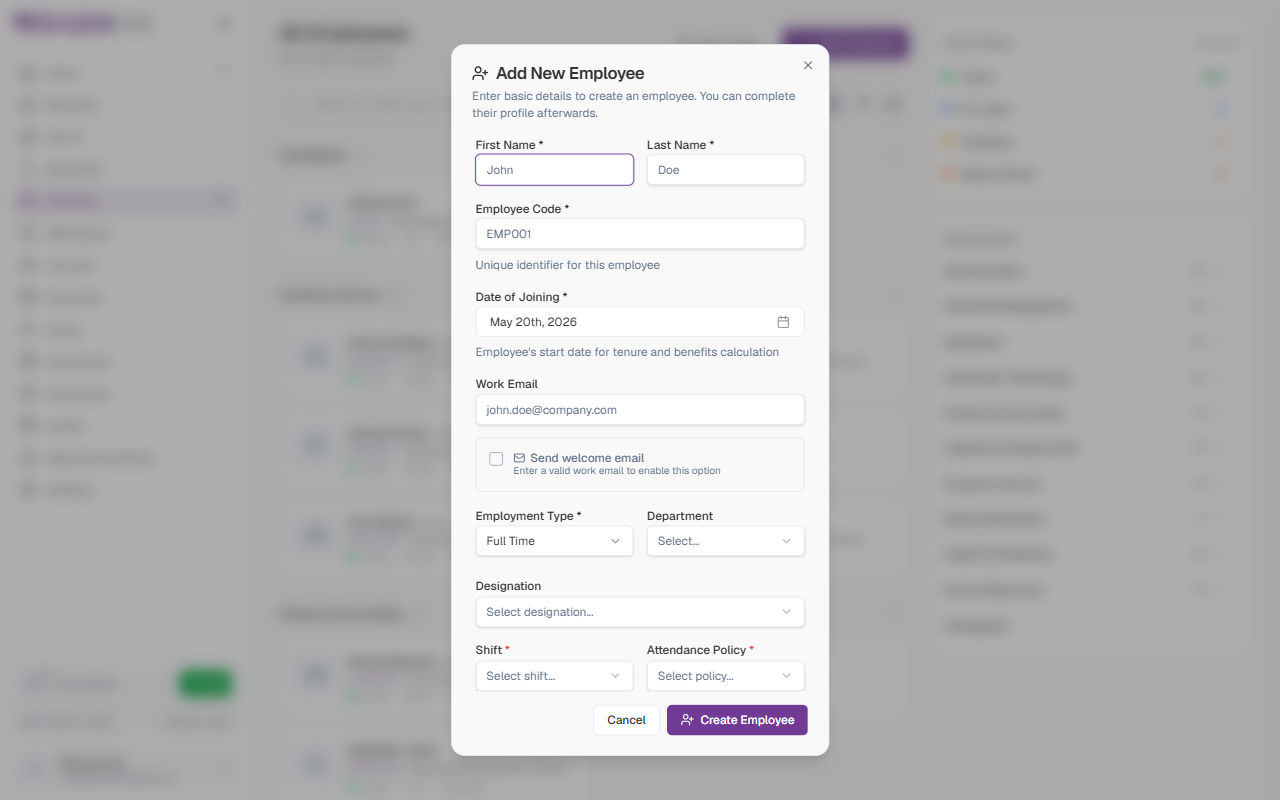
Field Descriptions
| Field | Description | Required |
|---|---|---|
| First Name | The employee’s given name | Yes |
| Last Name | The employee’s surname | Yes |
| Employee Code | A unique identifier for this employee (e.g., EMP001, EGH0023). | Yes |
| Date of Joining | The employee’s official start date. Used for tenure and benefits calculations. Defaults to today. | Yes |
| Work Email | The employee’s company email address. Required if you want to send a welcome email. | No |
| Send welcome email | When turned on, the employee receives an email with login credentials and a link to set up their account. This checkbox is disabled until a valid work email is entered. | No |
| Employment Type | The type of employment — Full Time, Part Time, Contract, Intern, or Consultant. Defaults to Full Time. | Yes |
| Department | Assigns the employee to a department. Can be left empty and set later. | No |
| Designation | The employee’s job title or role (e.g., Software Engineer). | No |
| Shift | The work shift the employee follows. Choose from shifts configured in your organization. | Yes |
| Attendance Policy | The set of attendance rules (lateness tolerance, overtime, deductions) that apply to this employee. | Yes |
Employee Code cannot be changed after the employee is created. Decide on a consistent numbering format (e.g., EMP001, ENG-001) before adding employees and use it across the organization.
Employment Type Options
| Type | Description |
|---|---|
| Full Time | Regular employees on standard full-time hours |
| Part Time | Employees working fewer than full-time hours |
| Contract | Fixed-term contract employees |
| Intern | Interns or trainees |
| Consultant | External consultants or advisors |
Welcome Email and Self-Onboarding
When you enable Send welcome email, the new hire receives an email with a secure link to set their password and access the platform. After logging in, they can complete their own profile details (personal information, contact info, address, bank details) through their My Profile page.
Send the welcome email on or before the employee’s first day so they can complete onboarding tasks right away.
If you skip the welcome email, the employee won’t be able to log in until credentials are provided another way. You can send the welcome email later from their profile.
Bulk Action — Provisioning Portal Access
Bulk Action lets you create portal accounts or send invitation emails to multiple employees at once. This is useful when onboarding a group of new hires.
- Click Bulk Action in the top right
- Choose an action type:
- Create Account — Generates portal accounts directly. You can download the generated passwords as a CSV file. No email is sent.
- Send Invitation — Creates accounts and emails login credentials to each selected employee. Best when you want employees to set up their own access.
- Click Continue to proceed to employee selection
- Select the employees to provision
- Review and confirm
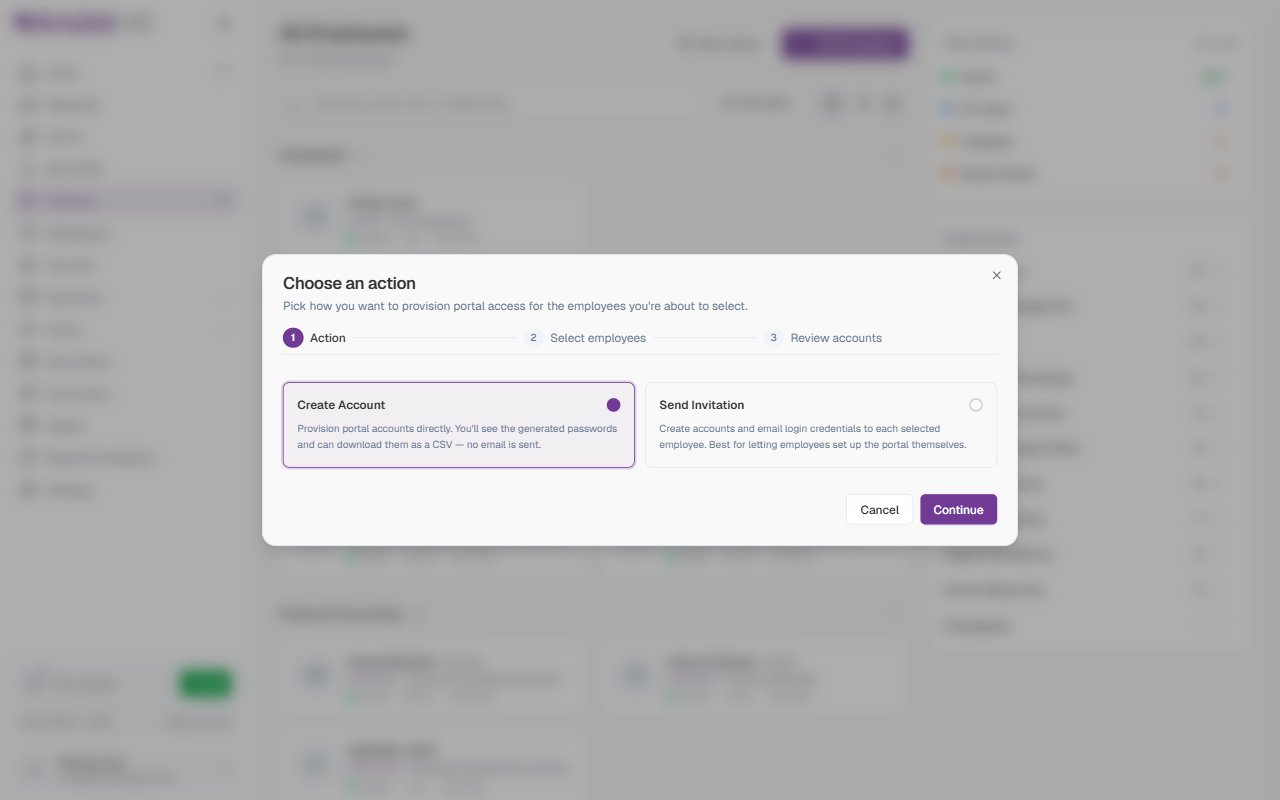
Use Create Account when you want to distribute credentials yourself (e.g., printing welcome packs). Use Send Invitation when you want employees to receive credentials directly and set themselves up.
Employee Status Reference
| Status | Description |
|---|---|
| Active | Currently employed and working |
| On Leave | On approved leave (annual, sick, etc.) |
| Probation | New hire in their trial period |
| Notice Period | Has resigned and is serving notice |
| Resigned | Has left the organization |
| Deactivated | Account deactivated; does not appear in normal directory listings |
The Employee Profile
Click any employee in the Directory to open their profile — a complete view of everything related to that person, from personal details to compensation, documents, leave, and settings.
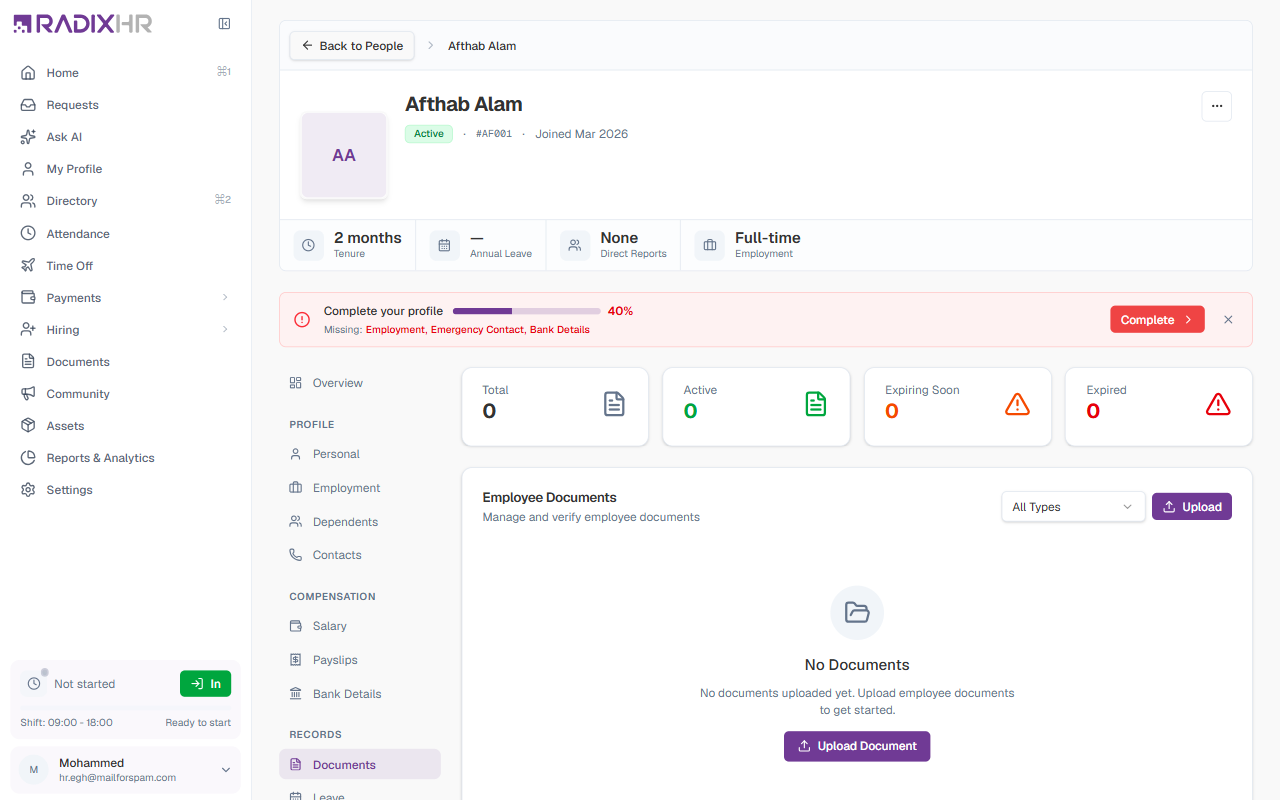
Profile Header
The header sits at the top of the profile and shows the most-needed information at a glance:
| Element | Description |
|---|---|
| Back to People | Link that returns you to the directory |
| Profile Photo | Employee’s photo or initials avatar |
| Name | Full name of the employee |
| Job Title | The current designation (e.g., “Engineering Manager”) |
| Department · Location | The team and office under the job title |
| Status Badge | Active, Probation, Notice, Terminated, etc. |
| Employee Code | Unique identifier prefixed with # (e.g., #EMP063) |
| Joining Line | ”Joined [Month Year]” — the date they joined |
Clickable mailto: link to the employee’s work email | |
| Phone | Clickable tel: link to the employee’s primary phone |
| More options (⋯) | Menu with extra actions — see below |
More Options Menu
Click the ⋯ button in the top-right of the header for profile-level actions:
| Action | Description |
|---|---|
| Download Profile | Export the employee’s profile as a file you can save locally |
| Print Profile | Open the print dialog for a printer-friendly version |
| Deactivate Employee | Deactivate the account so the employee can no longer log in. Use this when offboarding. |
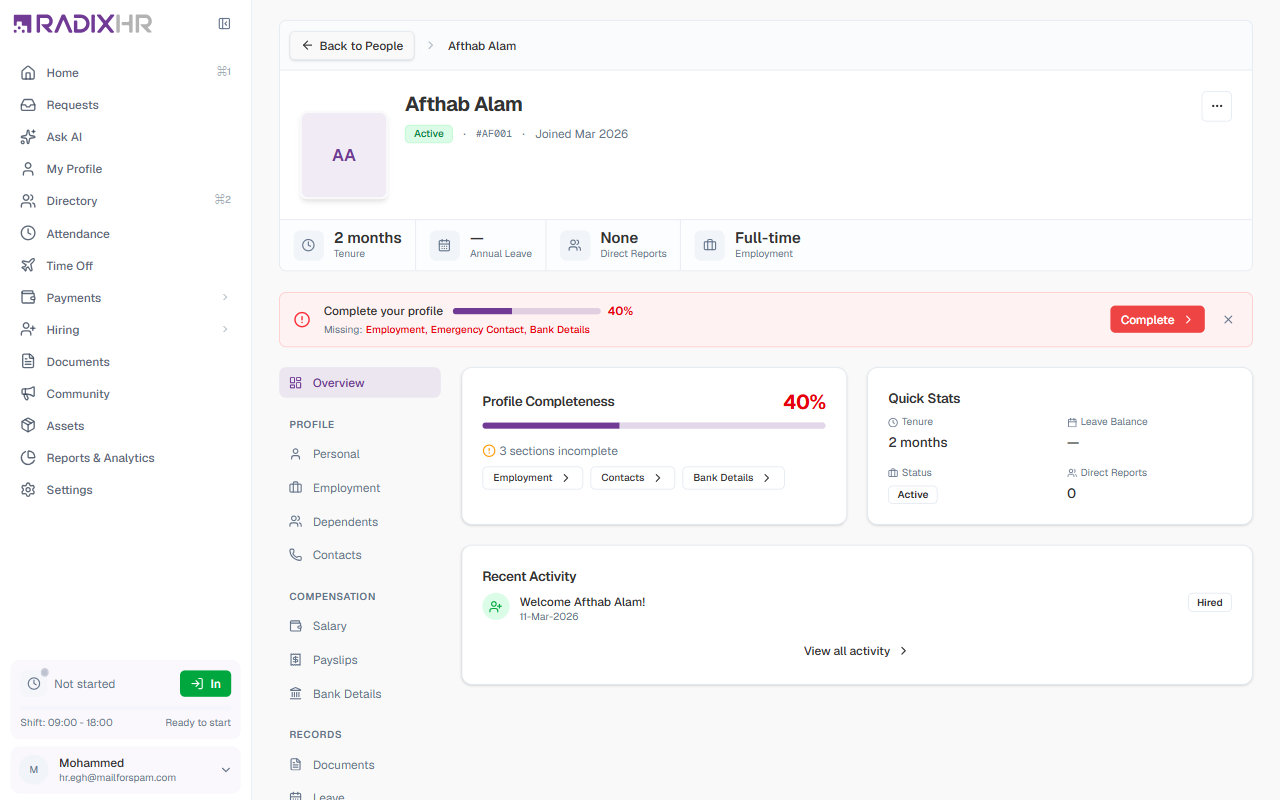
Profile Completion Banner
When key information is missing, a yellow banner appears across the top with a progress percentage and a list of incomplete sections (e.g., “Missing: Employment, Emergency Contact, Bank Details”). Use the Complete button to jump straight to the first missing section, or click × to dismiss the banner for now.
Profile Sections
The profile is organized into a left sidebar navigation, grouped by category. Click any item on the left to load its content on the right.
| Group | Section | What it covers |
|---|---|---|
| — | Overview | A dashboard view with profile completeness, quick stats, and recent activity |
| Profile | Personal | Demographic and contact details |
| Employment | Job details, organization, designations, reporting manager | |
| Dependents | Family members and dependents | |
| Contacts | Emergency contacts | |
| Compensation | Salary | Current salary and revision history |
| Payslips | Monthly payslip records | |
| Bank Details | Bank accounts used for salary disbursement | |
| Records | Documents | Uploaded documents and certificates |
| Leave | Leave balances, requests, and history | |
| Assets | Company equipment currently issued to the employee | |
| Activity | History | Timeline of employment events |
| Configuration | Settings | Per-employee Access, Time, Leave, and Pay settings |
Some sections may be hidden depending on which modules your organization has enabled — for example, Payslips and Bank Details only appear when the Payroll module is active.
Overview
The Overview section is the default landing view. It’s a quick dashboard with:
- Profile Completeness — the percentage of the profile filled in, with each missing section shown as a button that jumps you straight to it
- Quick Stats — Tenure, Leave Balance, Status, and Direct Reports
- Reporting Structure — a small diagram showing the employee’s manager above and direct reports below, each a clickable card
- Recent Activity — a short timeline of recent events on the record
Personal Information
The Personal section holds demographic and personal details.
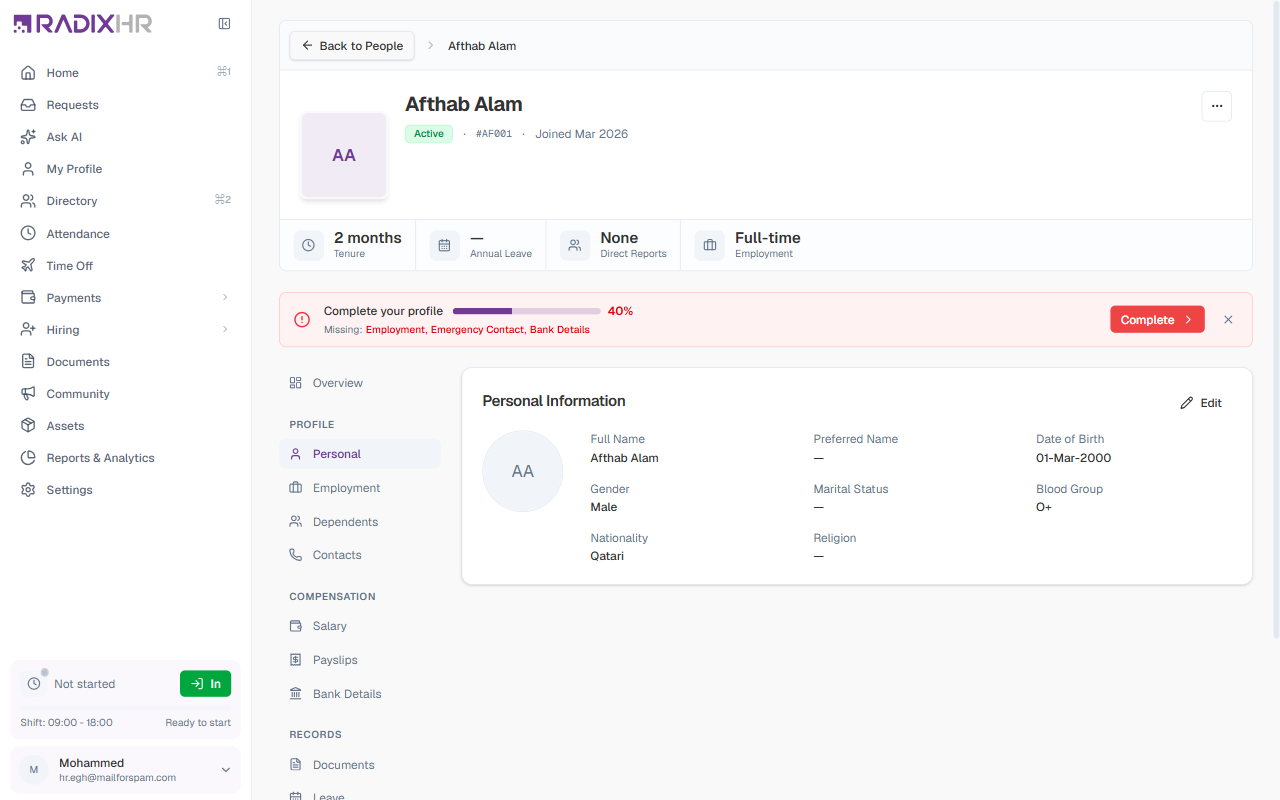
| Field | Description | Required |
|---|---|---|
| Profile Photo | Employee’s photograph | No |
| Full Name | The employee’s full legal name | Yes |
| Preferred Name | Nickname or preferred name | No |
| Date of Birth | Birth date for age calculation | No |
| Gender | Male, Female, or Other | No |
| Marital Status | Single, Married, Divorced, etc. | No |
| Blood Group | Blood type for emergencies | No |
| Nationality | Country of citizenship | No |
| Religion | Religious affiliation | No |
To edit, click the Edit (pencil) icon in the top-right of the card, update the fields, and click Save.
Employment Information
The Employment section holds work-related details, organizational assignments, and reporting structure.

Contact details: Work Email, Personal Email, Mobile, Work Phone.
Employment details:
| Field | Description |
|---|---|
| Employee Code | Unique identifier (read-only after creation) |
| Date of Joining | Official start date |
| Confirmation Date | Date the employee was confirmed (end of probation) |
| Employment Type | Full Time, Part Time, Contract, Intern |
| Status | Active, Probation, Notice Period, Terminated |
| Notice Period (Days) | Required notice period in days |
| Grade | Employee grade level |
Organization: Department, Designation, Location, and Internal Notes (private notes visible only to HR).
The section also lets you manage the employee’s Designations (current role, role history, and adding additional roles) and their Reporting Manager (current manager, history, and changing the manager).
Dependents
The Dependents section tracks family members for benefits administration and emergencies.
| Field | Description | Required |
|---|---|---|
| Name | Full name of the dependent | Yes |
| Relationship | Spouse, Child, Parent, Sibling, etc. | Yes |
| Gender | Male, Female, or Other | No |
| Date of Birth | Dependent’s birth date | No |
| Phone | Contact phone number | No |
| Occupation | Job or profession | No |
| ID Number | Passport or national ID number | No |
| Address | Residential address | No |
Each dependent can also be marked as an Emergency Contact, a Tax Dependent, or Enrolled in Company Insurance.
Emergency Contacts
The Contacts section stores emergency contact information.
| Field | Description | Required |
|---|---|---|
| Name | Full name of the contact | Yes |
| Relationship | Spouse, Parent, Friend, etc. | Yes |
| Mobile | Primary phone number | Yes |
| Phone | Secondary phone number | No |
| Email address | No | |
| Address | Physical address | No |
Every employee should have at least one emergency contact — this information is critical during workplace emergencies.
Salary
The Salary section shows current compensation and revision history — Basic Salary, Gross Salary, the date the current salary became effective, and the revision type. A components table lists each earning and deduction.
Click Revise Salary to record a new salary revision:
| Field | Description | Required |
|---|---|---|
| Revision Type | Annual Review, Promotion, Adjustment, etc. | Yes |
| Effective From | Date the new salary takes effect | Yes |
| Currency | Currency for the salary (from the payroll group) | Read-only |
| Salary Structure | A predefined structure defining the components | No |
| Basic Salary (Monthly) | The new monthly basic salary amount | Yes |
| Remarks | Notes about this salary change | No |
The form previews the current salary, the change percentage, the full component breakdown, and the estimated net salary.
Bank Details
The Bank Details section manages the bank accounts used for salary disbursement.
| Field | Description | Required |
|---|---|---|
| Bank Name | Name of the bank | Yes |
| Branch Name | Branch name or location | No |
| Account Holder Name | Name as it appears on the account | Yes |
| Account Number | Bank account number | Yes |
| Currency | Account currency | No |
| IBAN | International Bank Account Number | No |
| Routing Number | Bank routing/ABA number | No |
| SWIFT Code | SWIFT/BIC code for international transfers | No |
Verify bank details carefully before processing payroll. Incorrect information can delay salary payments.
Documents
The Documents section holds the employee’s documents — IDs, contracts, certificates, and so on. Summary cards show the Total, Active, Expiring Soon, and Expired counts, and a table lists each document with its type, upload date, expiry, and status. Use the upload form to add a document (document type, file up to 10 MB, name, and an optional description).
Leave
The Leave section shows the employee’s leave balances and history. Each leave type card shows the available balance, days used, and total entitlement. Tabs below cover Requests (recent applications), Transactions (a log of balance changes), and Forecast (projected future balances). From here HR can also apply for leave on the employee’s behalf or adjust a balance.
Assets
The Assets section lists the company equipment issued to the employee. Summary cards show the Currently Issued, Returned, and Damaged/Lost counts, and an Issued Assets list shows each item assigned to them (or “No assets assigned to this employee” when there are none).
History
The History section is a chronological timeline of significant employment events — designation changes, manager changes, department transfers, status changes, and salary revisions — each with its date and related details.
Settings
The Settings section configures per-employee options across four areas:
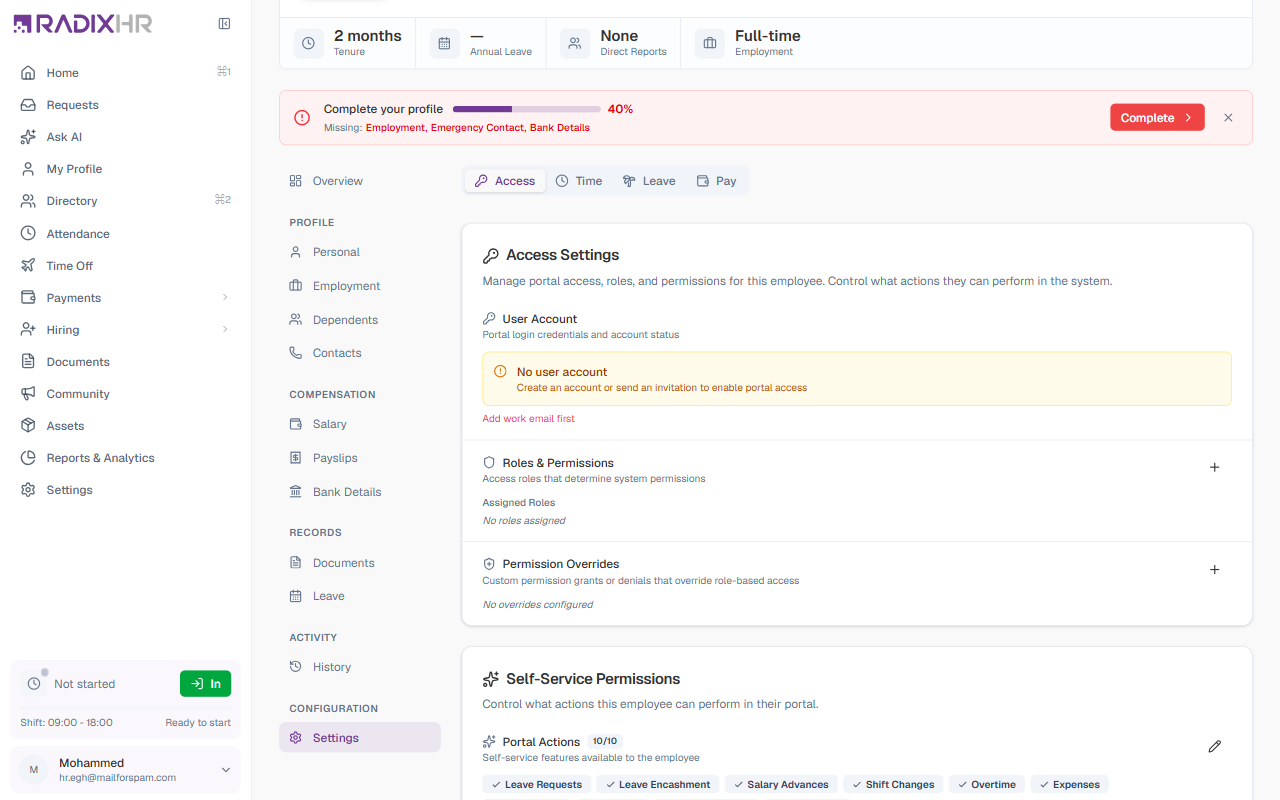
- Access — the user account, assigned roles and permissions, permission overrides, and self-service permissions (which actions the employee can perform in the portal)
- Time — work schedule, attendance policy, work arrangement (on-site/remote/hybrid), device settings, and mobile check-in
- Leave — the holiday calendar and leave group that apply to the employee
- Pay — payroll readiness checklist plus payroll company, payroll group, payment method, payroll number, and cost center