Locations
Locations represent the physical offices, branches, or work sites where your employees are based. Setting up locations lets you organize your workforce geographically, assign people to specific work sites, and use location data in reports.
What you can do here:
- Create and manage office and work locations
- Record full address details (street, city, state, country, postal code)
- Assign employees to specific work sites
- See employee headcount per location
- Activate or deactivate locations as needed
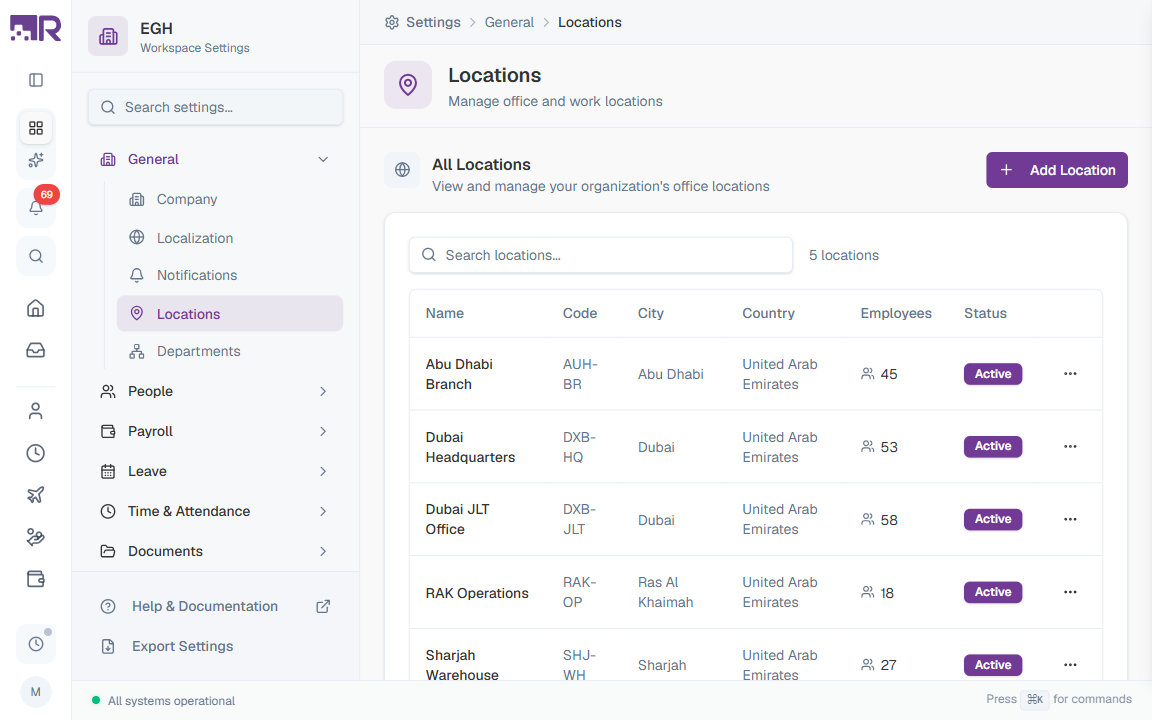
Understanding the Locations Table
The locations table lists every office or work site in your organization. The total count appears next to the search box (e.g., “5 locations”).
| Column | Description |
|---|---|
| Name | The display name of the location (e.g., “Dubai Headquarters”, “Sharjah Warehouse”) |
| Code | A short identifier used in reports and integrations (e.g., “DXB-HQ”, “SHJ-WH”) |
| City | The city where the location is situated |
| Country | The country where the location is based |
| Employees | The number of employees currently assigned to this location |
| Status | Active — the location can be assigned to employees. Inactive — it cannot be assigned to new employees, but existing assignments remain. |
Use the Search locations… box above the table to filter by name, code, or city.
How to Add a Location
- Go to Settings > General > Locations
- Click the Add Location button in the top-right of the All Locations card
- Fill in the location details
- Click Create Location
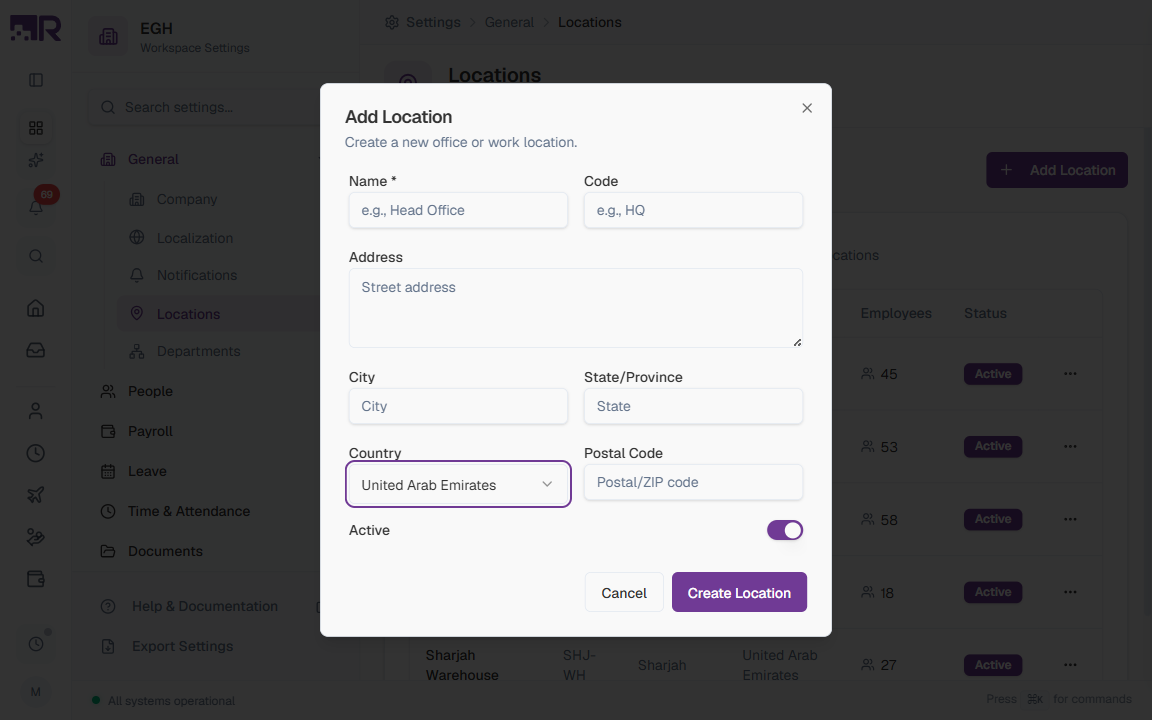
Location Form Fields
| Field | Description | Required |
|---|---|---|
| Name | A descriptive name employees will recognize. Examples: “Head Office”, “Dubai Headquarters”, “Sharjah Warehouse”. | Yes |
| Code | A short, unique identifier for the location, used in reports, exports, and integrations. Keep it short and memorable. Examples: “HQ”, “DXB-HQ”, “SHJ-WH”. | No |
| Address | The street address of the location. Include building name, street number, and street name. Useful for employee profiles and official documents. | No |
| City | The city where the location is based. Used for filtering and reporting. | No |
| State/Province | The state, province, or region within the country. | No |
| Country | The country where the location is situated. Pick from the dropdown — see supported countries below. Default: United Arab Emirates. | No |
| Postal Code | The postal or ZIP code for the address. Format depends on the country. | No |
| Active | ON: The location can be assigned to employees. OFF: It cannot be assigned to new employees, but existing assignments remain. Default: ON. | No |
Supported Countries
The Country dropdown currently includes:
| Country |
|---|
| United Arab Emirates |
| Australia |
| Canada |
| Germany |
| United Kingdom |
| India |
| Japan |
| Singapore |
| United States |
If you don’t see a country you need, contact your system administrator — country options are managed centrally.
How to Edit a Location
- In the Locations table, find the location you want to modify
- Click the three-dot menu (⋯) at the end of the row
- Select Edit
- Update the location details
- Click Save Changes
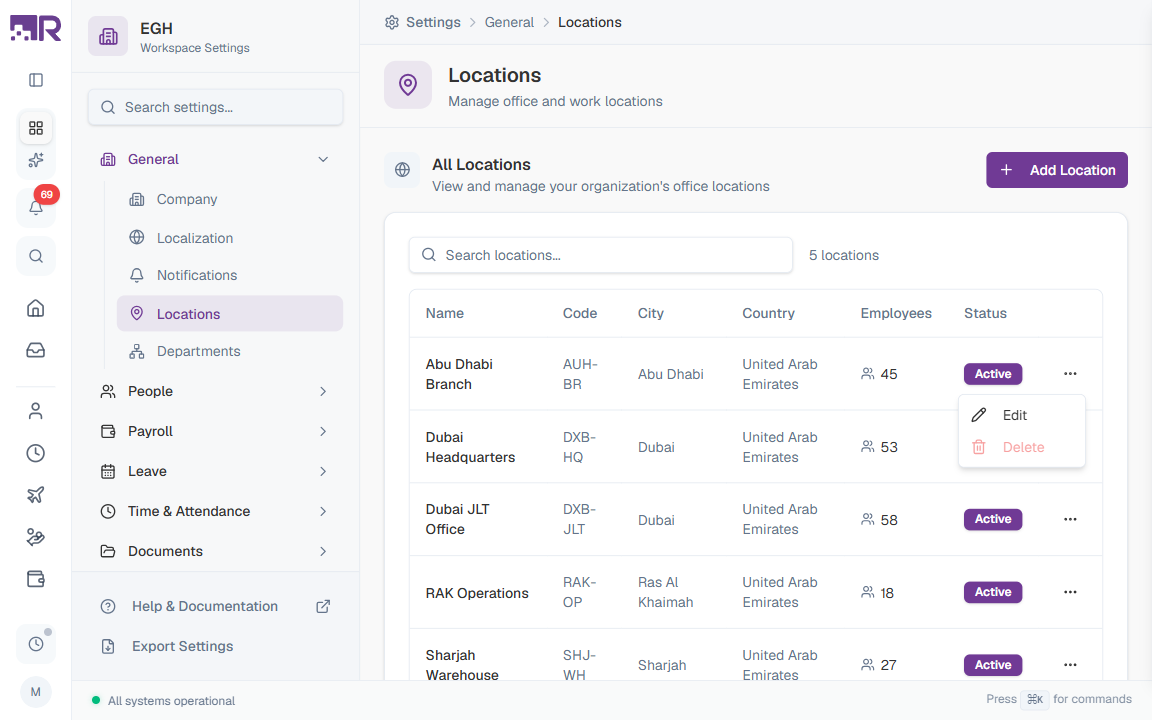
How to Delete a Location
- In the Locations table, find the location you want to remove
- Click the three-dot menu (⋯) at the end of the row
- Select Delete
- Confirm the deletion in the dialog
You cannot delete a location that has employees assigned to it. First reassign those employees to another location, then delete.
How to Deactivate a Location
If you want to stop using a location but preserve its historical data:
- Click the three-dot menu (⋯) on the location’s row and select Edit
- Toggle the Active switch to OFF
- Click Save Changes
When a location is Inactive:
- It cannot be assigned to new employees
- Existing employee assignments remain unchanged
- The location still appears in historical reports
- It shows an Inactive badge in the locations table
This is useful when closing an office while preserving attendance and payroll history for employees who previously worked there.
Best Practices
-
Use consistent naming: Establish a convention like “City - Office Type” (e.g., “Dubai - Head Office”, “Sharjah - Warehouse”).
-
Use meaningful codes: Short but descriptive codes make reports easier to read. For example,
DXB-HQis clearer than1. -
Keep addresses complete: A full address helps with official documentation and employee records.
-
Review periodically: Audit your locations regularly and deactivate (rather than delete) ones no longer in use, so historical data stays intact.
-
Consider remote workers: If you have remote employees, create one or more “Remote” locations (e.g., “Remote - UAE”, “Remote - India”) to categorize them properly.