Departments
Departments represent the organizational units within your company — such as Human Resources, Finance, Operations, or Sales. Setting up departments lets you group employees by function, build your reporting hierarchy, and route approvals to the right people.
What you can do here:
- Create and manage organizational departments
- Build a parent-child hierarchy (e.g., sub-teams under a parent department)
- Assign a department head for approval workflows
- See how many employees belong to each department
- Activate or deactivate departments without deleting historical data

Understanding the Departments Table
The departments table lists every department in your organization, with key details at a glance. The total count is shown next to the search box (e.g., “10 departments”).
| Column | Description |
|---|---|
| Name | The display name of the department (e.g., “Human Resources”, “Finance & Accounting”) |
| Code | A short identifier used in reports and integrations (e.g., “HR”, “FIN”, “SALES”) |
| Parent | The parent department if this is a sub-department. Shows ”-” for top-level departments |
| Department Head | The employee designated as the head of this department, used for approval workflows |
| Employees | The number of employees currently assigned to this department |
| Status | Active — the department can be assigned to employees. Inactive — it cannot be assigned to new employees but existing assignments remain. |
Use the Search departments… box above the table to filter by name or code.
How to Add a Department
- Go to Settings > General > Departments
- Click the Add Department button in the top-right of the All Departments card
- Fill in the department details
- Click Create Department
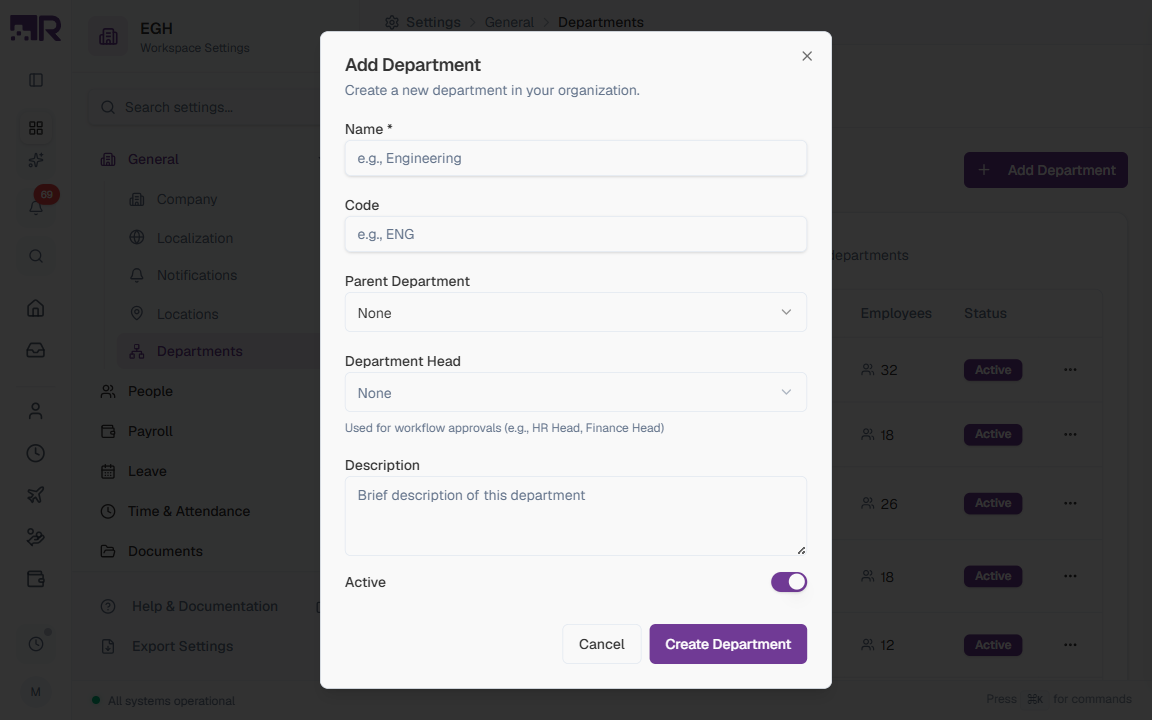
Department Form Fields
| Field | Description | Required |
|---|---|---|
| Name | A descriptive name employees will recognize. Examples: “Engineering”, “Human Resources”, “Sales & Marketing”. | Yes |
| Code | A short, unique identifier for the department, used in reports, exports, and integrations. Keep it short and memorable. Examples: “ENG”, “HR”, “SALES”. | No |
| Parent Department | Select a parent if this is a sub-department. For example, “Frontend Team” might have “Engineering” as its parent. Leave as None for top-level departments. | No |
| Department Head | The employee who heads this department. Used for workflow approvals (e.g., when a request needs “Department Head” approval, the system routes it to this person). | No |
| Description | A brief description of the department’s purpose. Helps other administrators understand the department’s role. | No |
| Active | ON: The department can be assigned to employees. OFF: It cannot be assigned to new employees, but existing assignments remain. Default: ON. | No |
Understanding Department Hierarchy
Departments can be organized hierarchically using the Parent Department field. This is useful for:
- Large organizations with multiple teams under a single department
- Reporting structures where sub-departments roll up to a parent
- Approval workflows that escalate through the hierarchy
Example hierarchy:
Engineering (Parent)
├── Frontend Team (Child)
├── Backend Team (Child)
└── DevOps (Child)
Create the parent departments first, then create the child departments and assign their parent.
Understanding Department Head
A department head is the employee who approves requests on behalf of a department. When a workflow includes a “Department Head” approval step, the system looks up the head of the requesting employee’s department and routes the request to them.
How it works:
- An employee submits a request (leave, expense, attendance correction, etc.)
- The workflow reaches a “Department Head” approval step
- The system finds the employee’s department
- The request is routed to that department’s head for approval
If no department head is assigned, workflows requiring department-head approval may stall or fall back to other approvers. Always assign a department head for any department that has employees.
How to Edit a Department
- In the Departments table, find the department you want to modify
- Click the three-dot menu (⋯) at the end of the row
- Select Edit
- Update the department details
- Click Save Changes
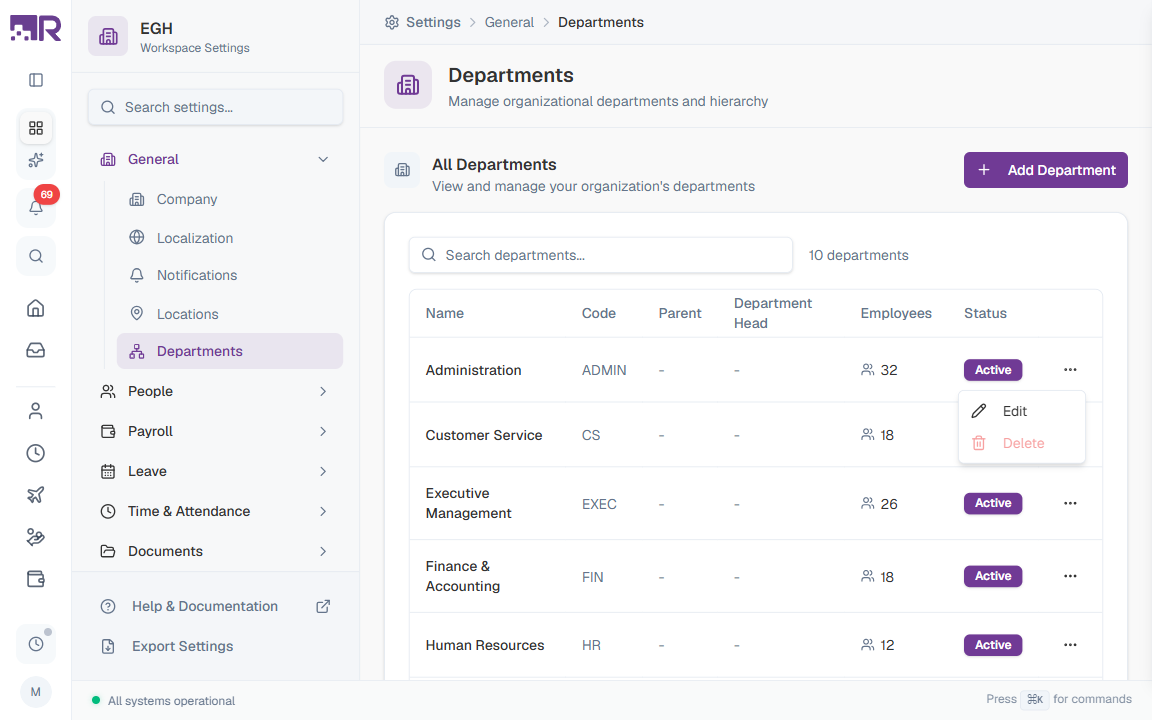
How to Delete a Department
- In the Departments table, find the department you want to remove
- Click the three-dot menu (⋯) at the end of the row
- Select Delete
- Confirm the deletion in the dialog
You cannot delete a department that has employees assigned to it. First reassign those employees to another department, then delete.
How to Deactivate a Department
If you want to stop using a department but preserve its historical data:
- Click the three-dot menu (⋯) on the department’s row and select Edit
- Toggle the Active switch to OFF
- Click Save Changes
When a department is Inactive:
- It cannot be assigned to new employees
- Existing employee assignments remain unchanged
- The department still appears in historical reports
- It shows an Inactive badge in the departments table
This is useful when restructuring without losing the department’s history.
Best Practices
-
Keep names clear: Use descriptive names that identify the department’s function. Save abbreviations for the Code field.
-
Establish a code convention: Use a consistent pattern, such as 3–5 letter codes (
HR,FIN,OPS,SALES). -
Always assign department heads: For smooth workflow operations, ensure every department with employees has a head assigned.
-
Use hierarchy only when needed: Flat structures are easier to manage. Only create sub-departments if you need them for reporting or approval routing.
-
Review periodically: Audit departments regularly and deactivate (rather than delete) ones no longer in use, so historical data stays intact.
-
Document descriptions: Use the Description field to explain the department’s responsibilities — useful when onboarding new administrators.