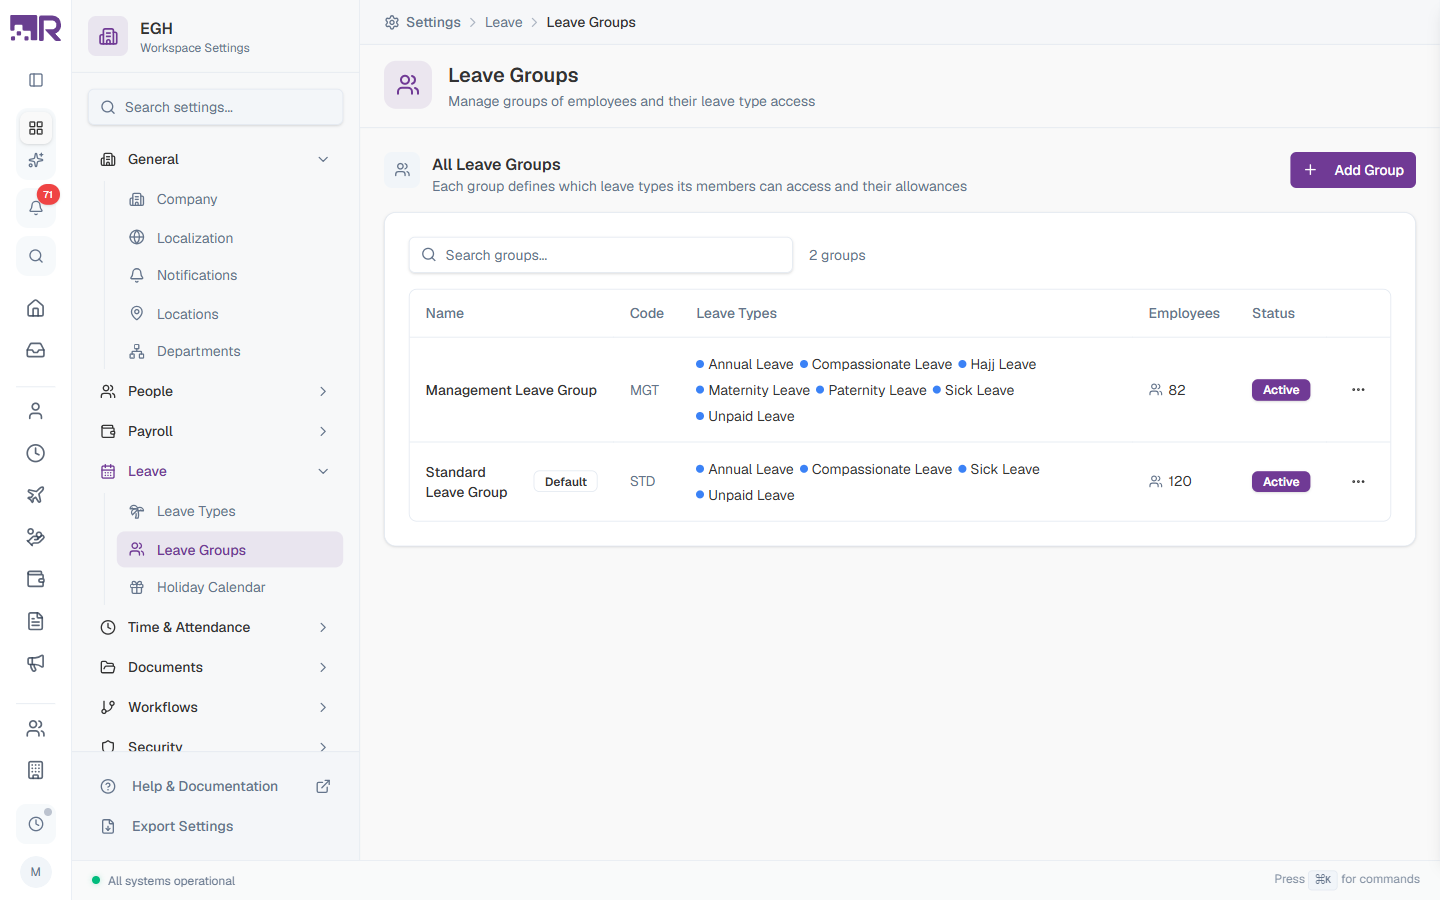
Leave Groups
Leave groups bundle employees together based on what leave entitlements they should share. Each group defines which leave types its members can request and how the leave year is calculated. Assigning an employee to a group instantly grants them access to that group’s leave types — making it easy to manage leave policies for different departments, employment types, or seniority levels.
What you can do here:
- Create groups for different employee categories (e.g., Standard Staff, Management, Contract)
- Pick which leave types each group can access
- Configure the leave year calculation method per group
- Mark one group as the default for new employees
Understanding Leave Groups
A leave group is a collection of employees who share the same leave entitlements. When you assign an employee to a leave group, they automatically gain access to all the leave types configured for that group.
Examples:
- A Standard Leave Group might include Annual Leave, Compassionate Leave, Sick Leave, and Unpaid Leave
- A Management Leave Group might include all of the above plus Maternity, Paternity, and Hajj Leave
- A Contract Leave Group might include only Annual Leave, Sick Leave, and Unpaid Leave
Each group also defines how the leave year is calculated, which controls when balances reset and how pro-rata calculations work. (Pro-rata = calculated proportionally based on time worked.)
Understanding the Leave Groups Table
The table lists every leave group in your workspace. The total count is shown next to the search box.
| Column | Description |
|---|---|
| Name | The display name of the group. The default group is marked with a Default badge. |
| Code | The short unique identifier for the group (e.g., STD, MGT) |
| Leave Types | All leave types available to members of this group, shown as colored badges |
| Employees | The number of employees currently assigned to this group |
| Status | Active if the group is in use, Inactive otherwise |
Use the Search groups… box above the table to filter by name or code.
How to Create a Leave Group
- Go to Settings > Leave > Leave Groups
- Click Add Group in the top-right
- Fill in the group details
- Pick a Year Type
- Add the leave types members of this group can request (at least one Annual and one Sick type are required)
- Click Create Group
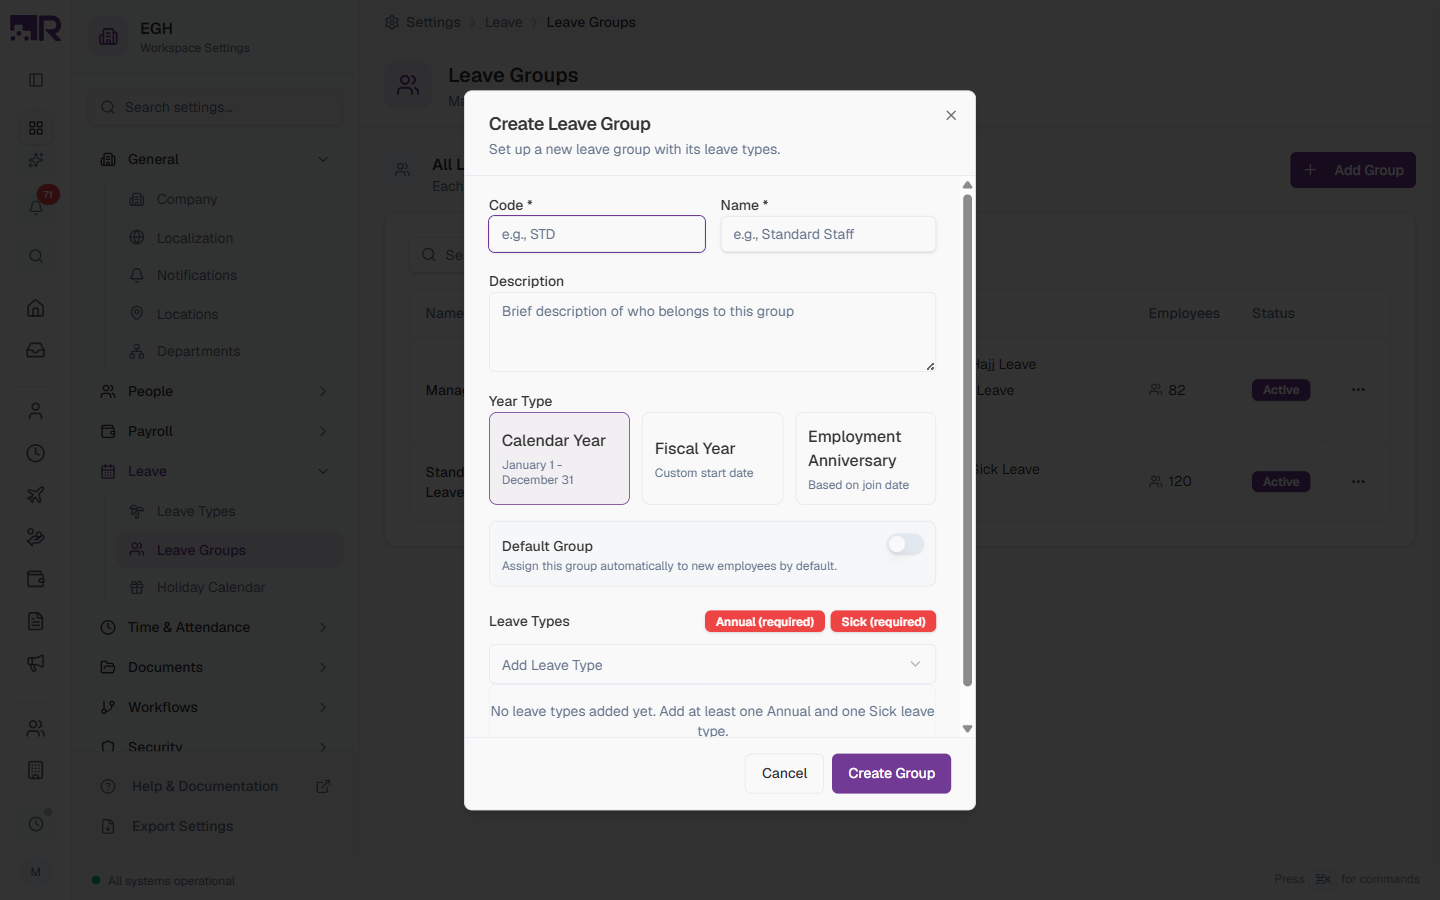
Group Details
| Field | Description | Required |
|---|---|---|
| Code | A short unique identifier for the group, used in reports and integrations. Examples: STD, MGT, CTR. | Yes |
| Name | The display name shown in the table and on employee profiles. Examples: “Standard Leave Group”, “Management Leave Group”. | Yes |
| Description | A brief note about who belongs to this group. Helps administrators understand the group’s purpose. | No |
Year Type
The year type controls how leave periods are calculated for everyone in the group. This determines when balances reset and feeds into pro-rata calculations for new joiners and leavers.
| Year Type | Description |
|---|---|
| Calendar Year | Leave year runs from January 1 to December 31. Balances reset every January 1 for all members. Best for organisations on a standard calendar year. Default. |
| Fiscal Year | Leave year follows your organisation’s fiscal year with a custom start date. Useful when your financial year doesn’t align with the calendar year. |
| Employment Anniversary | Leave year is based on each employee’s join date. For example, if an employee joined March 15, their leave resets every March 15. Ideal for continuous accrual systems. |
Switching the Year Type of an existing group can shift when balances reset for current members. Plan the change for the start of a leave year to avoid unexpected mid-year resets.
Default Group
| Setting | Description |
|---|---|
| Default Group | ON: New employees are automatically assigned to this group. Only one group can be the default at a time — turning it ON for one group turns it OFF for the previous default. OFF: New employees must be assigned a group manually. |
Leave Types
Each group must include at least one Annual leave type and at least one Sick leave type before it can be saved. The form shows the requirement badges (Annual (required) and Sick (required)) until both are added.
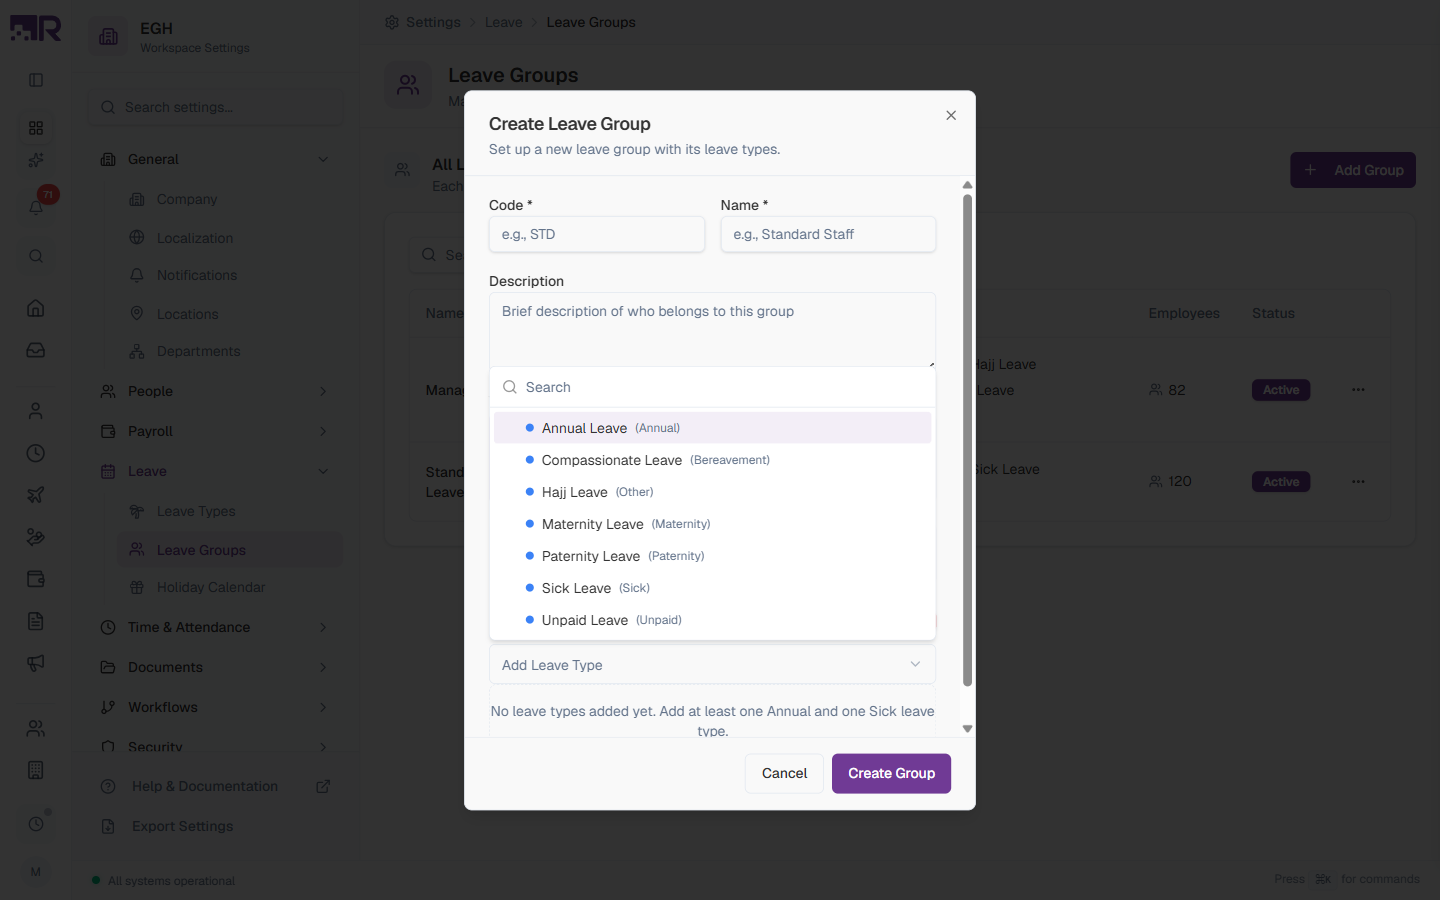
To add a leave type:
- Click Add Leave Type
- Search or scroll the list — each entry shows the leave type name and its category in parentheses (e.g.,
Annual Leave (Annual)) - Click the type to add it to the group
- Repeat for any additional leave types
The list comes from the leave types you’ve created in Settings > Leave > Leave Types. If a type you need isn’t in the dropdown, create it there first.
The required badges turn into “added” badges (e.g., Annual added, Sick added) once you’ve satisfied the minimum. Until both are satisfied, Create Group stays disabled.
How to Edit a Leave Group
- In the Leave Groups table, click the row of the group you want to edit
- Update the group details, year type, default toggle, or leave types
- Click Save Changes
To remove a leave type from the group, click the small X next to its row in the Leave Types list.
Removing a leave type from a group prevents members from submitting new requests for that leave type. Existing approved leave requests are not affected.
Best Practices
-
Start simple — begin with one or two groups that cover your main employee categories (e.g., a default Standard group and a Management group), then add more specific groups only when policies actually differ.
-
Use clear names so anyone reading the table can tell who belongs to which group. Prefer “Full-Time Sales” over “Group A”.
-
Always set a default so new employees are automatically assigned appropriate entitlements and don’t end up with no leave access.
-
Mind the leave-type prerequisites — every group needs at least one Annual and one Sick type. Plan your leave types first, then assign them to groups.
-
Keep groups in sync with org changes — when restructuring departments or rolling out new benefits, review which groups are affected and update them together.
-
Match Year Type to your policies — Calendar Year is simplest for HR reporting; Employment Anniversary is fairer for new joiners but harder to audit at year-end.