Time Off
The Time Off page is the central place for managing leave across your organisation. HR admins and managers use Organisation Leave to review, approve, and adjust everyone’s time off; employees use My Leave to check their own balances and submit requests.
What you can do here:
- View pending and approved leave requests for the whole organisation
- See who is off and when in the monthly calendar
- View and manually adjust an employee’s leave balance
- Submit a leave request on behalf of any employee
- Process leave encashments
- Check your own leave balances and submit your own requests
The page has two views: Organisation Leave (for HR and managers) and My Leave (for all employees). Use the scope switcher in the top-right to move between them.
Organisation Leave
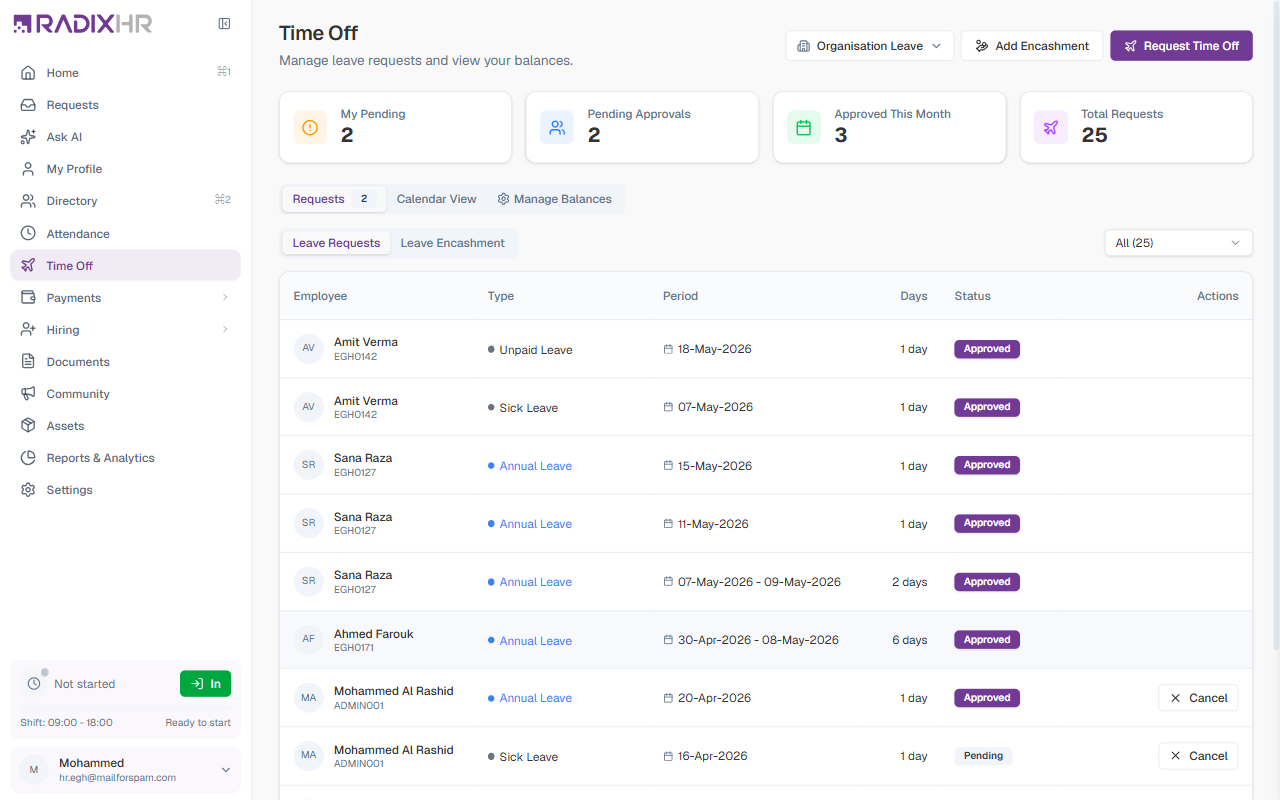
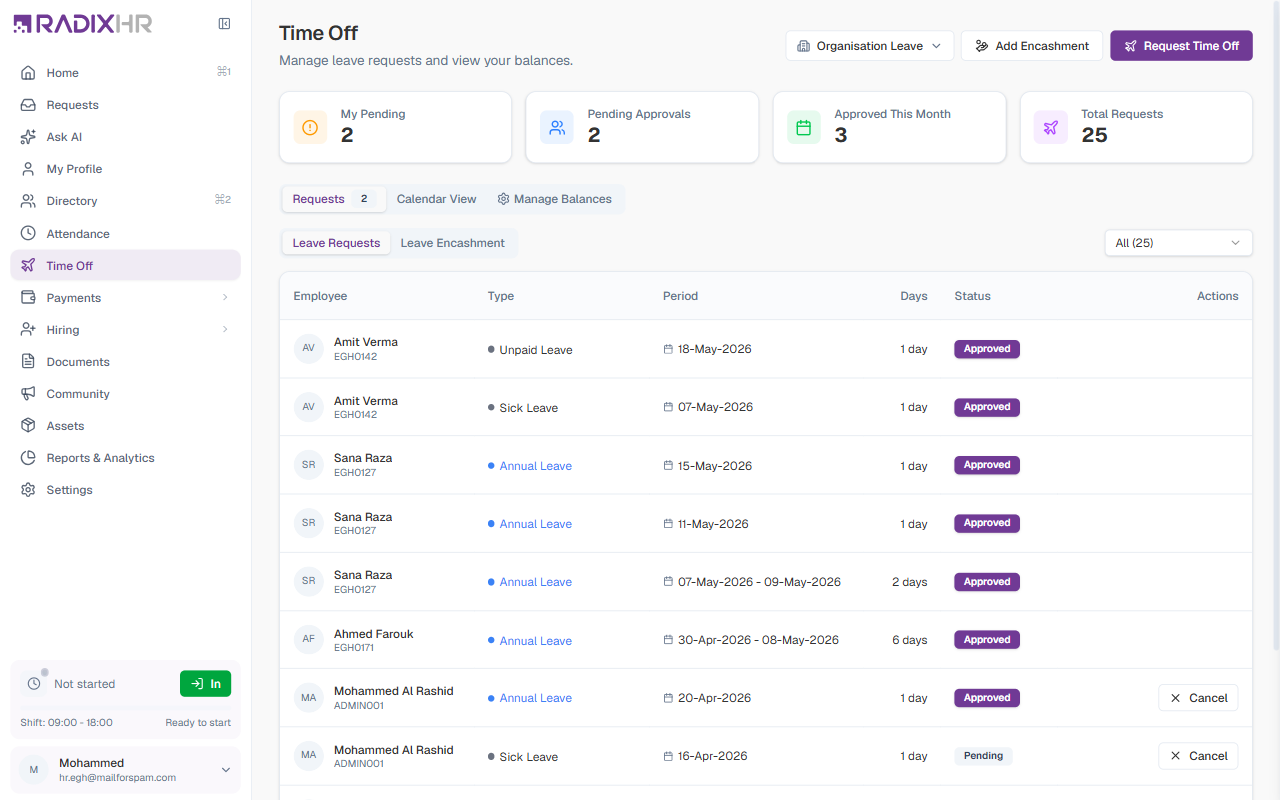
Organisation Leave is the default view when you navigate to Time Off. It shows all leave requests across the workspace and gives HR and managers the tools to act on them.
Summary Cards
The four cards at the top give you a live snapshot of leave activity:
| Card | What it counts |
|---|---|
| My Pending | Your own leave requests that are still awaiting approval |
| Pending Approvals | Requests from other employees waiting for your action (visible to managers and HR) |
| Approved This Month | Requests approved during the current calendar month |
| Total Requests | All leave requests submitted in the workspace |
Requests Tab
The Requests tab is the default tab. It lists all leave submissions and has two sub-tabs: Leave Requests and Leave Encashment.
Leave Requests
Use the status filter to narrow the list:
| Filter | Shows |
|---|---|
| All | Every request regardless of status |
| Pending | Requests awaiting an approver’s action |
| Approved | Requests that were accepted |
| Rejected | Requests that were declined |
| Cancelled | Requests withdrawn by the employee or by HR |
The requests appear in a table with Employee, Type, Period, Days, Status, and Actions columns. A Cancel action shows in the Actions column for requests that can still be withdrawn, and long lists are split into pages. Click any row to open the Request Details panel.
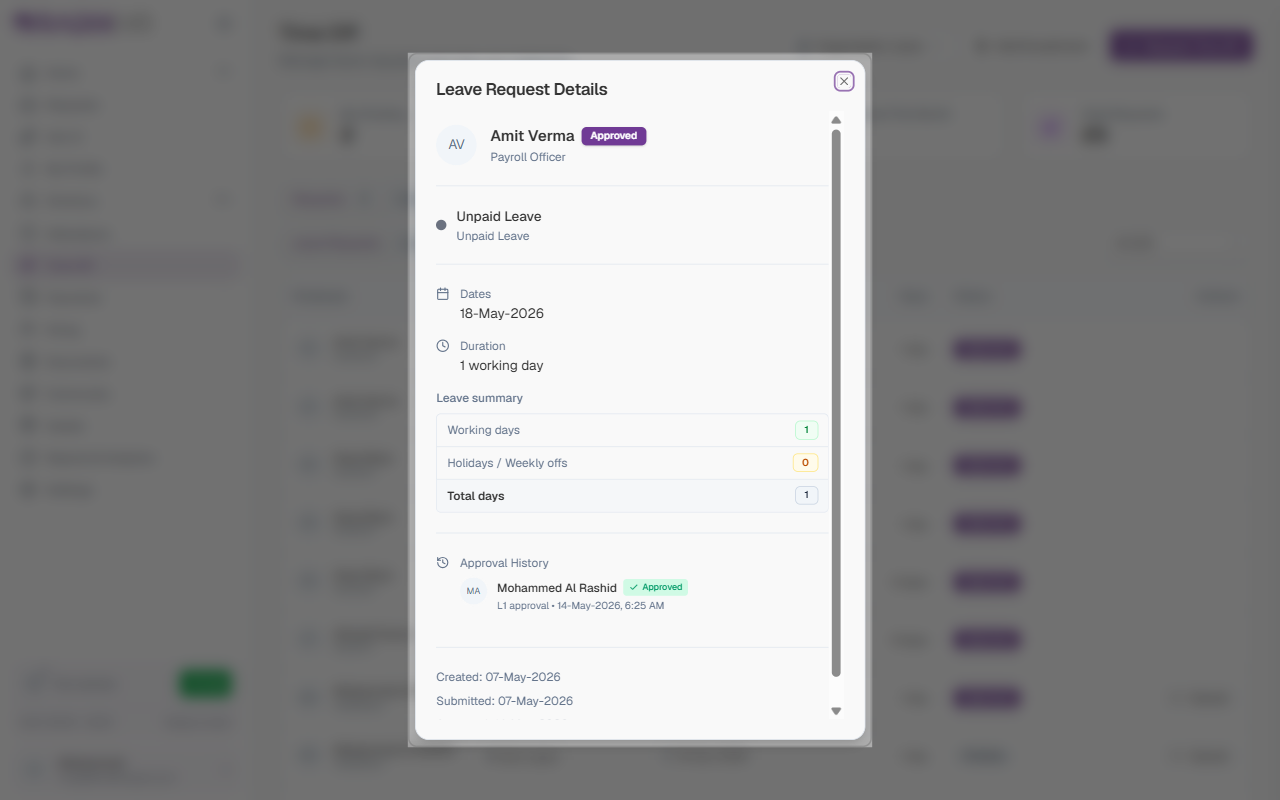
The Request Details dialog shows:
| Section | Details |
|---|---|
| Employee & Status | Name, avatar, and current approval status |
| Leave Type | The category (e.g., Annual Leave) and sub-category |
| Date Range | Start and end dates of the leave |
| Leave Summary | Working days, Holidays/Weekly offs included in the range, and Total days requested |
| Approval History | A timeline of every approval action taken on this request, including who approved or rejected it and when |
For Pending requests, the dialog also shows action buttons so you can Approve, Reject, or send it back with a question.
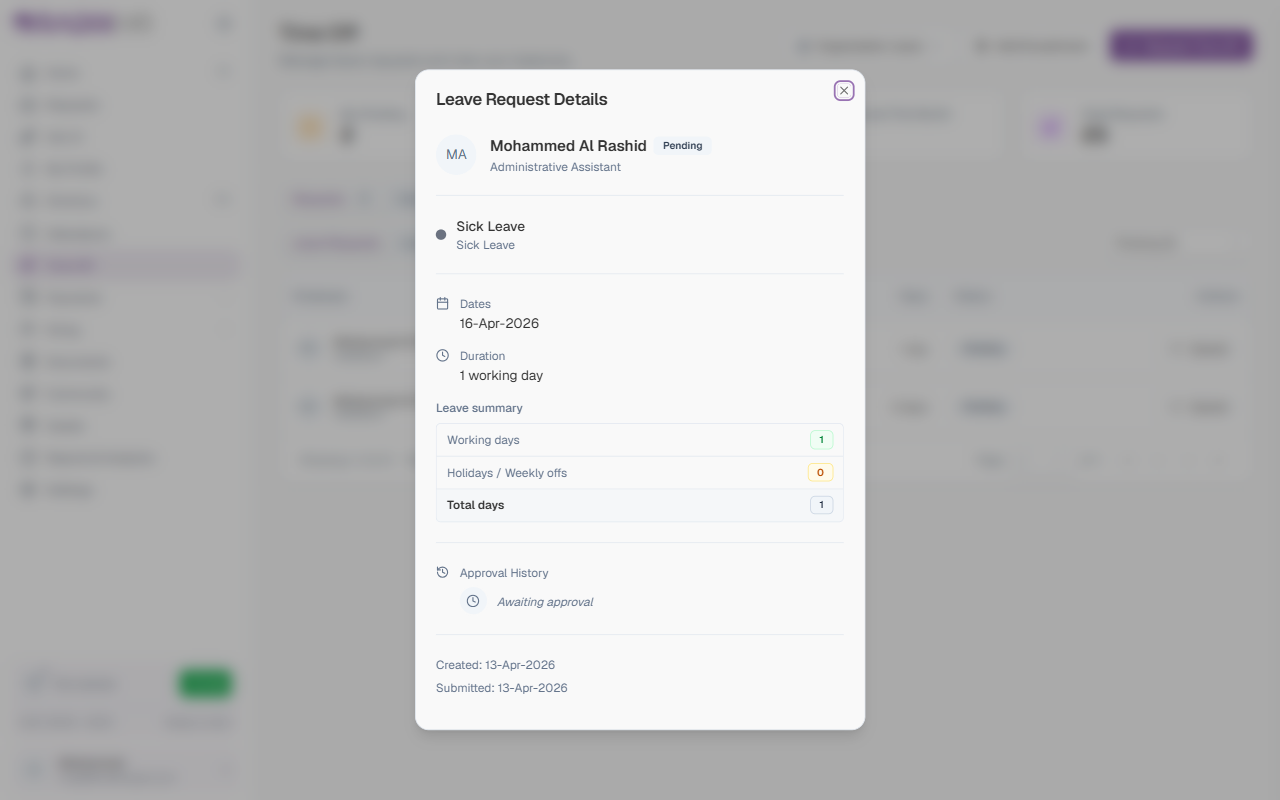
Leave Encashment
The Leave Encashment sub-tab lists all encashment requests — cases where an employee is paid out for unused leave days instead of taking them as time off.
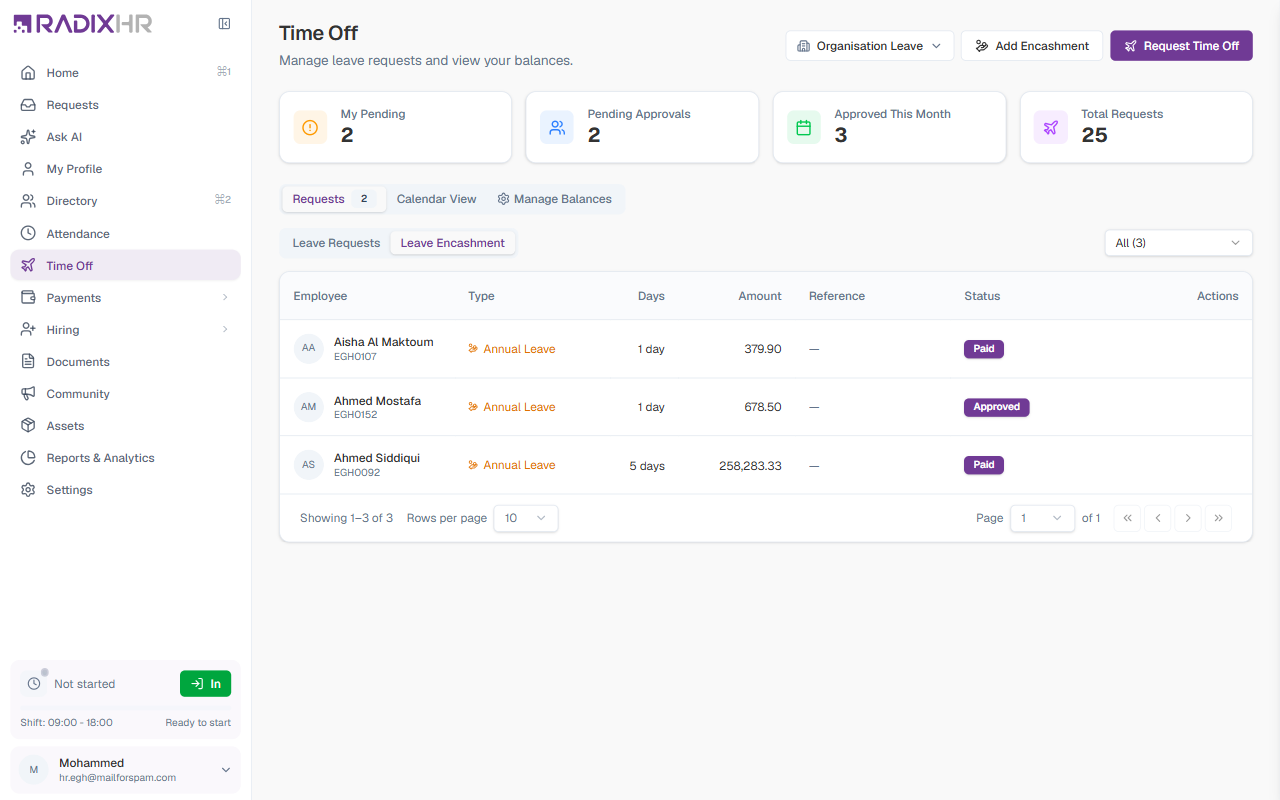
| Column | Description |
|---|---|
| Employee | The employee receiving the encashment |
| Type | The leave type being encashed (e.g., Annual Leave) |
| Days | Number of leave days being converted to cash |
| Amount | The calculated payout value |
| Reference | The auto-generated reference number (e.g., ENC-2026-001) |
| Status | Current status: Approved or Paid |
Calendar View
The Calendar View shows a monthly grid of who is taking leave on each day — useful for checking coverage before approving a request.
| Control | Description |
|---|---|
| Month navigation | Use the left and right arrows to move between months |
| Department filter | Narrow the calendar to employees in a specific department |
Reading the calendar:
| Indicator | Meaning |
|---|---|
| Blue employee tag | An employee with approved leave on that day |
| Green day highlight | A public holiday |
| Today marker | The current date is highlighted |
| +N more | More employees are off than can be displayed — click to see all |
Always check the Calendar View before approving a long block of leave — it lets you spot days where multiple employees are already off.
Manage Balances
The Manage Balances tab lets HR view any employee’s leave balance for the year and make manual adjustments when needed.
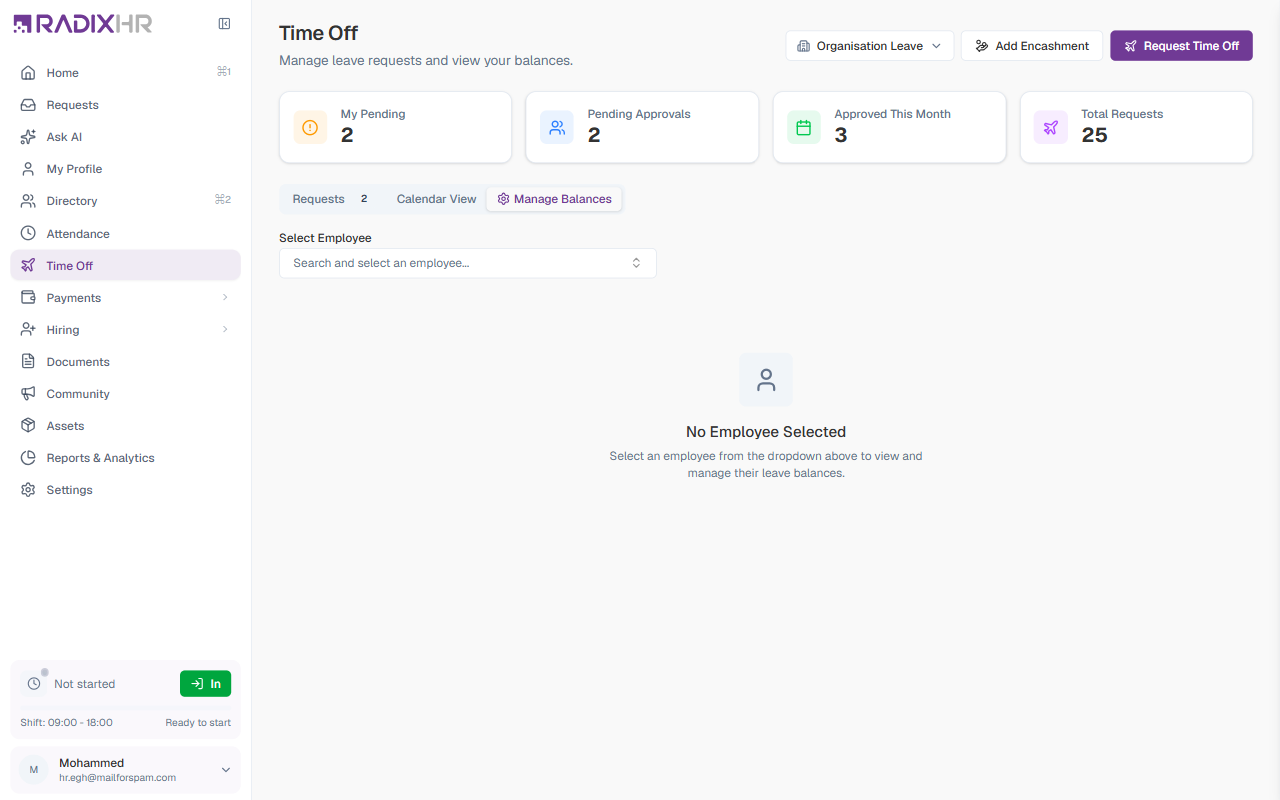
Use the Select Employee dropdown to search for and pick the employee whose balances you want to see.
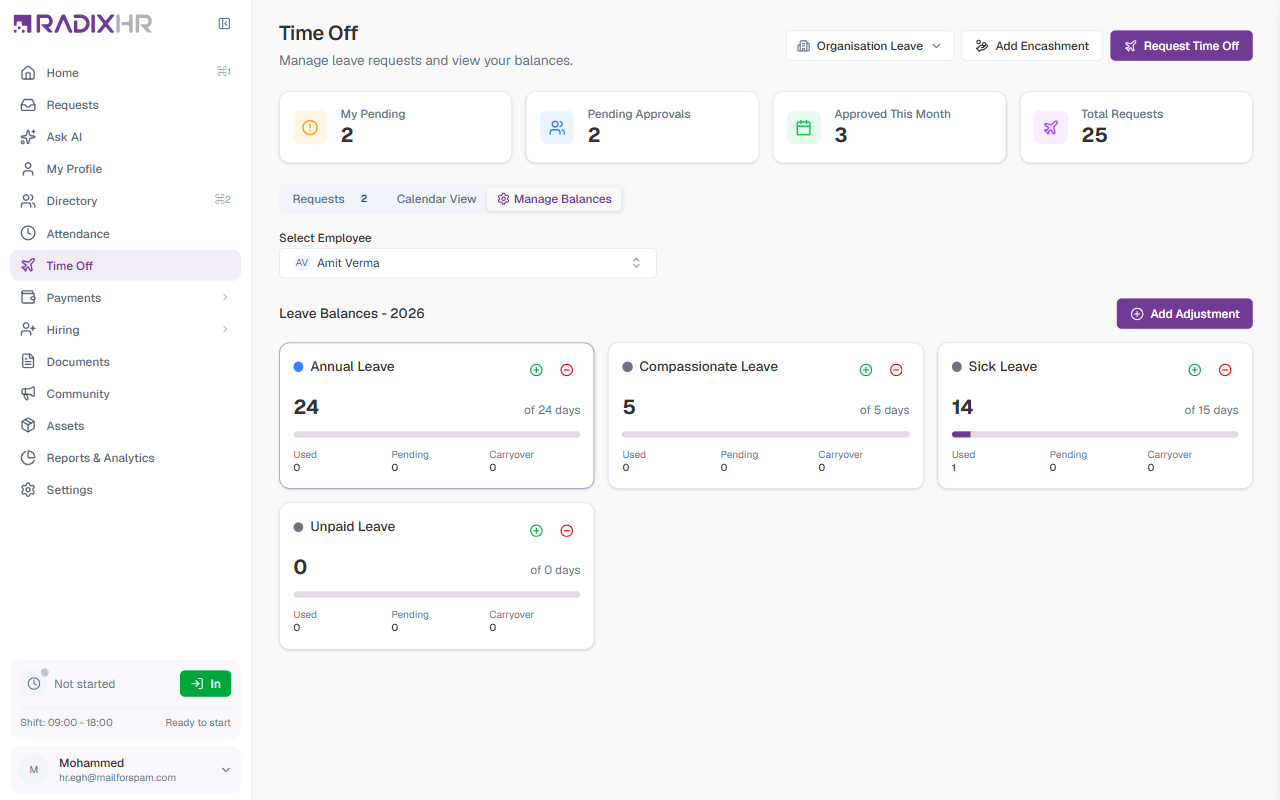
Once an employee is selected, a balance card appears for each leave type they are enrolled in:
| Field | Description |
|---|---|
| Available | Days the employee can still use this year |
| Total / Allowance | Their full entitlement including any carryover |
| Used | Days already taken |
| Pending | Days locked up in pending requests |
| Carryover | Days brought forward from the previous year |
| Progress bar | Visual indicator showing how much of the allowance has been used |
How to Add a Balance Adjustment
Manual adjustments let HR add or remove days from an employee’s balance — for example, to correct a data entry error or grant exceptional extra leave.
- Select the employee in the Manage Balances tab
- Click Add Adjustment
- Fill in the form and click Save
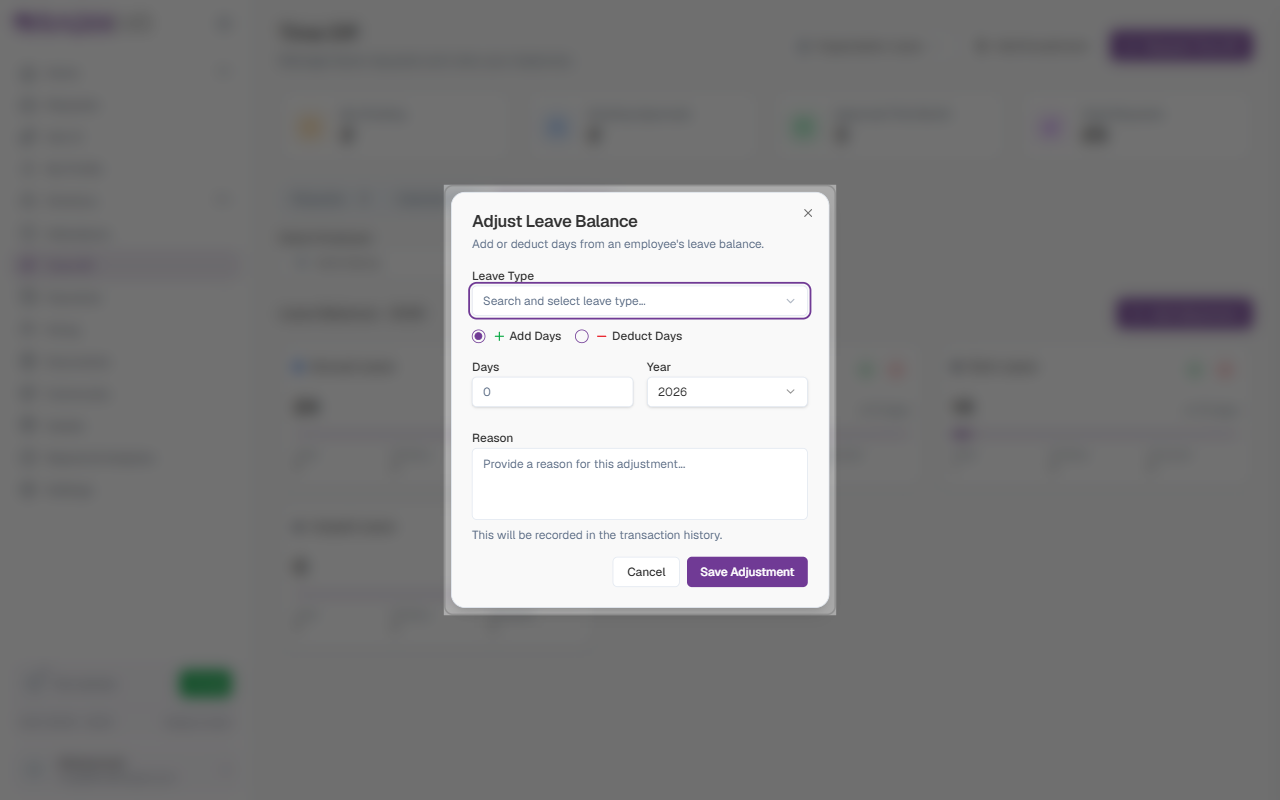
| Field | Description | Required |
|---|---|---|
| Leave Type | The leave category to adjust (e.g., Annual Leave) | Yes |
| Direction | Add Days increases the balance; Deduct Days decreases it | Yes |
| Days | The number of days to add or remove. Decimals allowed for half-day adjustments. | Yes |
| Year | The leave year this adjustment applies to | Yes |
| Reason | A short explanation of why the change was made — stored in the audit log | Yes |
All adjustments are recorded permanently in the employee’s transaction history. Always write a clear reason — it may be reviewed during an audit or queried by the employee.
How to Request Time Off (on Behalf of an Employee)
HR admins and managers can raise a leave request for any employee directly from this page.
- Click Request Time Off in the top-right of the page
- Fill in the form and click Submit
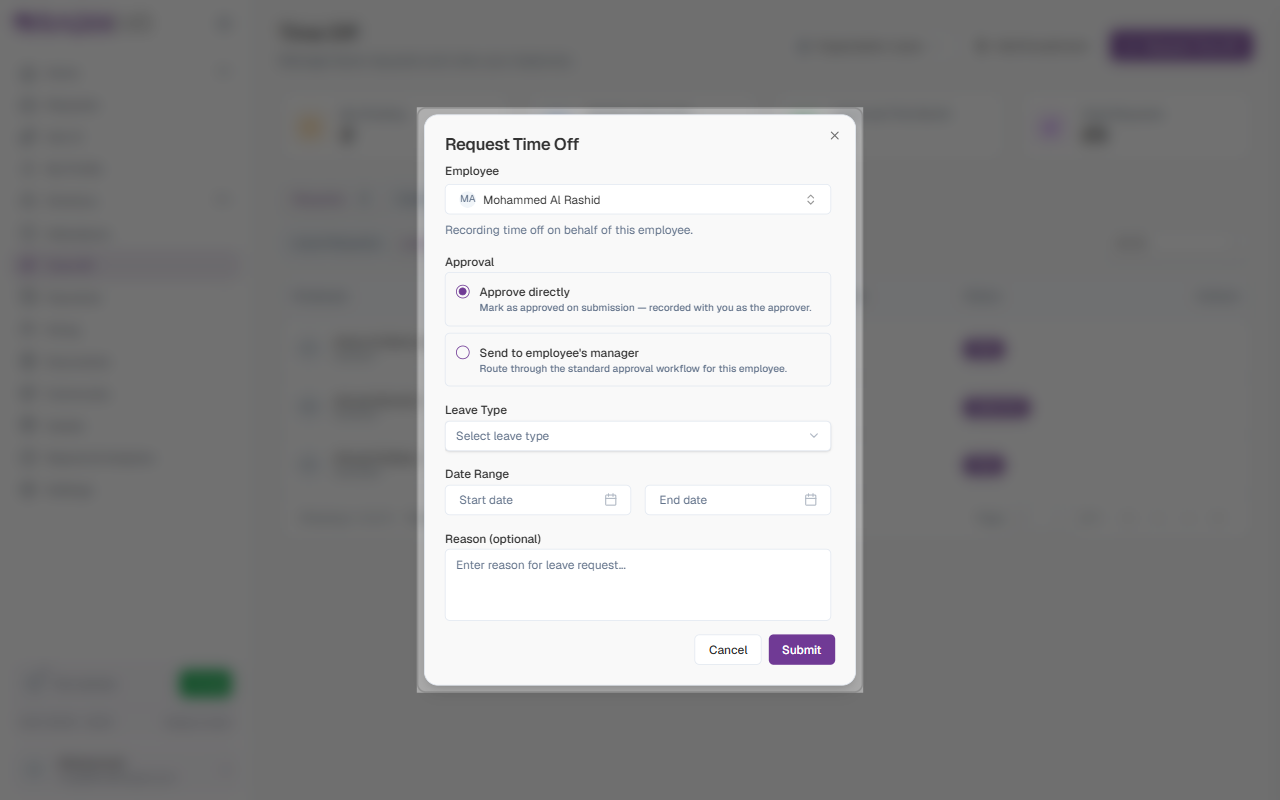
| Field | Description | Required |
|---|---|---|
| Employee | The employee the request is being raised for | Yes |
| Approval | Choose Approve directly to skip the approval workflow, or Send to employee’s manager to follow the normal flow | Yes |
| Leave Type | The category of leave (Annual, Sick, etc.) | Yes |
| Date Range | The start and end dates of the leave | Yes |
| Reason | An optional note about why the leave is being raised | No |
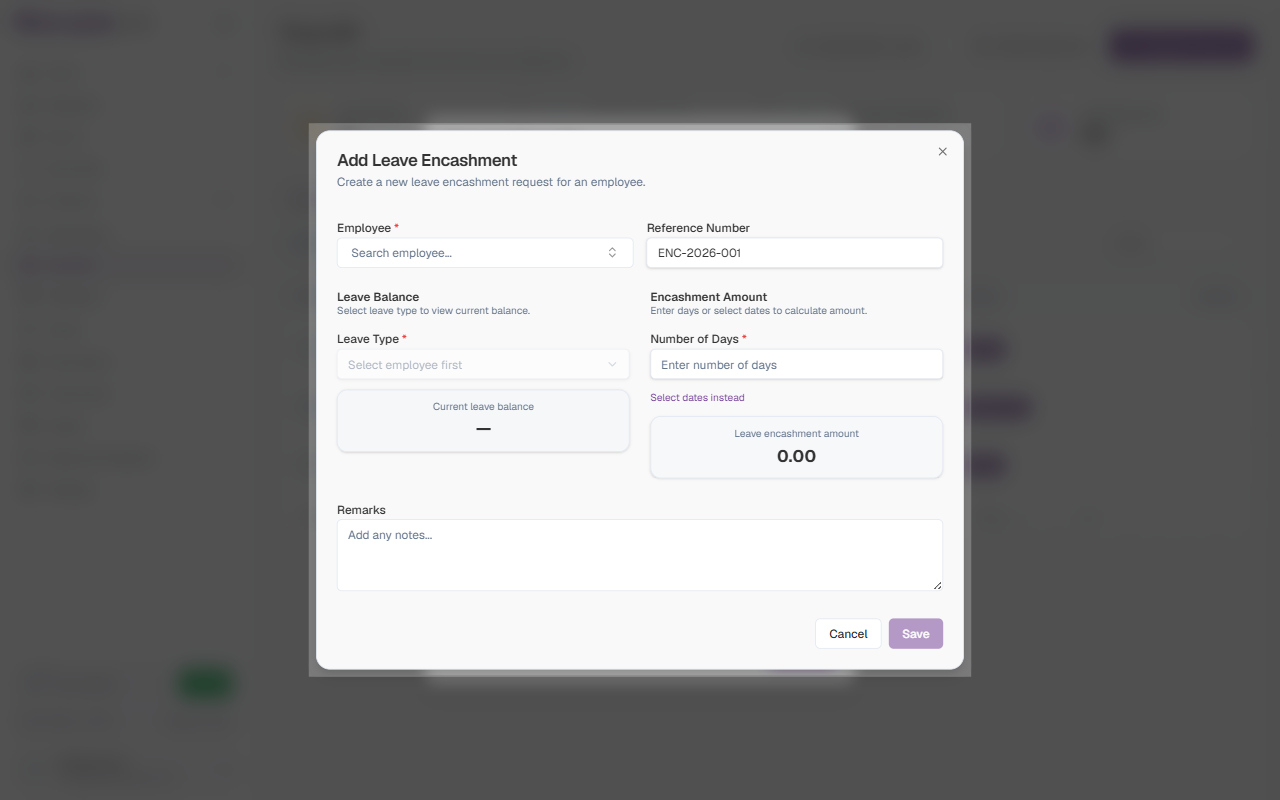
How to Add a Leave Encashment
Leave encashment converts unused leave days into a cash payout for the employee. HR raises encashment requests from the Add Encashment button.
- Click Add Encashment in the top-right of the page
- Fill in the form and click Save
| Field | Description | Required |
|---|---|---|
| Employee | The employee receiving the encashment | Yes |
| Reference Number | Auto-generated (e.g., ENC-2026-001). Can be overridden if needed. | Yes |
| Leave Type | The leave category to encash. The employee’s current balance for that type is shown. | Yes |
| Number of Days | How many leave days to convert to cash | Yes |
| Select dates instead | Toggle to pick specific calendar dates rather than entering a day count | No |
| Leave Encashment Amount | Automatically calculated based on the employee’s salary and days entered — read-only | — |
| Remarks | A note about the encashment reason | No |
The encashment amount is calculated automatically once you select a leave type and enter days. You cannot edit it manually.
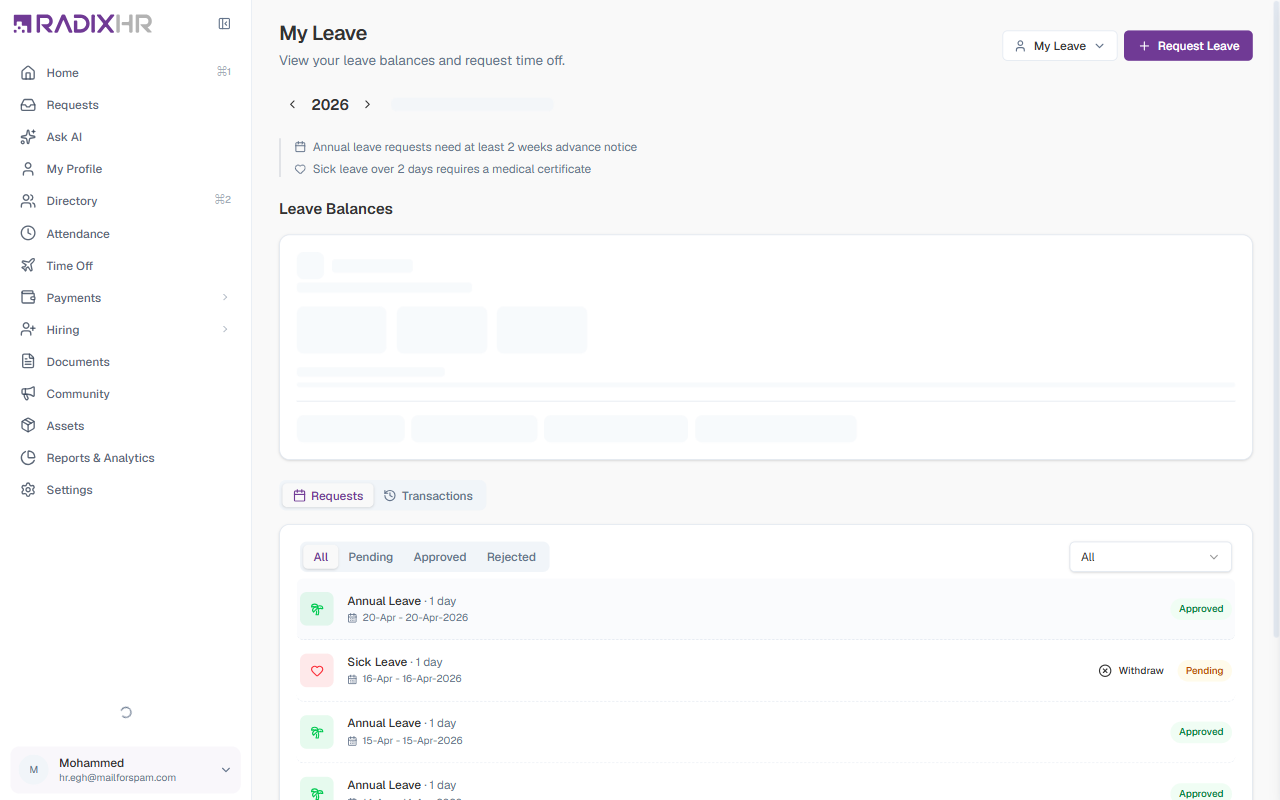
My Leave (Employee Self-Service)
Every employee can switch to My Leave to check their own balances, view their request history, and submit new leave requests. Switch using the scope switcher at the top of the page.
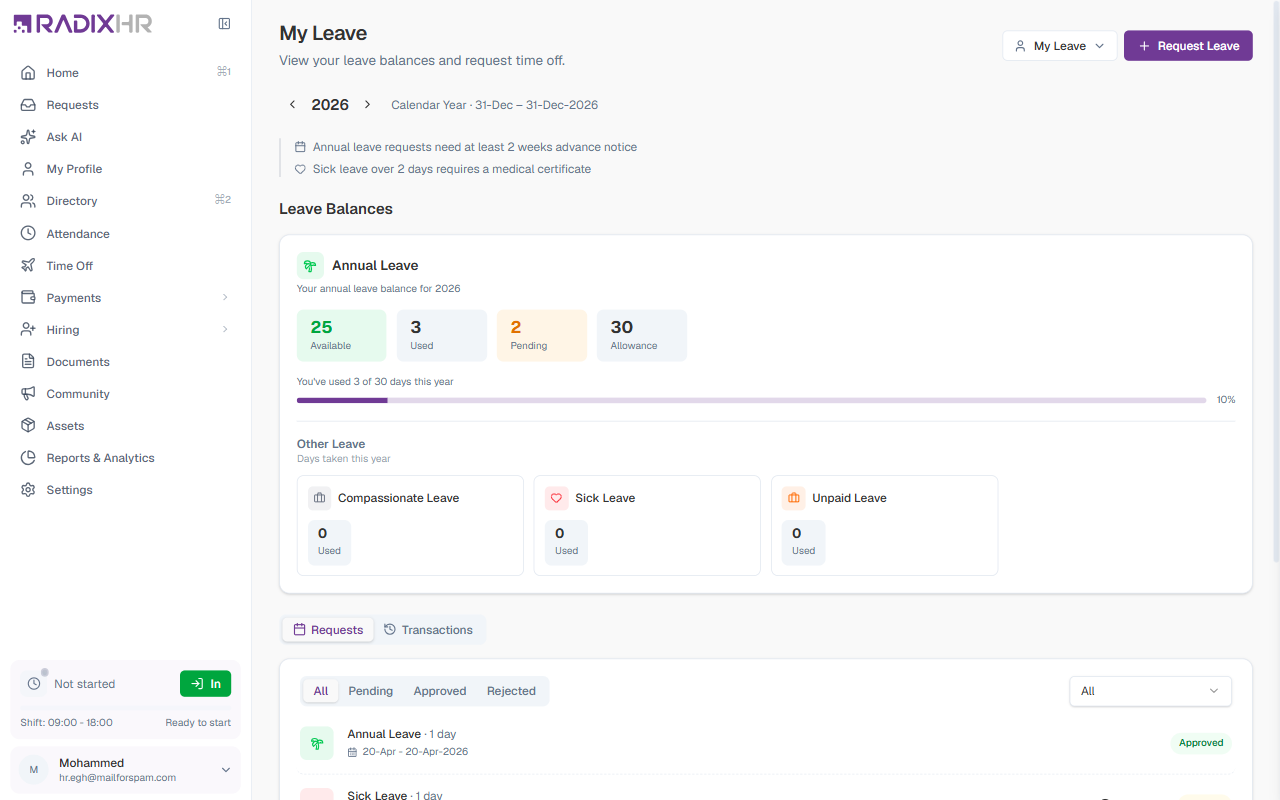
Year Navigator
Use the < Year > arrows to view balances for a past or future leave year. The label below shows whether your organisation uses a Calendar Year or a custom leave year.
Policy Notices
Any active leave policies with employee-facing rules appear as notice banners below the year navigator — for example:
- “Annual leave requests need at least 2 weeks advance notice”
- “Sick leave over 2 days requires a medical certificate”
These notices come from your organisation’s leave policy settings and are informational only.
Leave Balances
The Annual Leave card shows a detailed breakdown of your main entitlement:
| Field | Description |
|---|---|
| Available | Days you can still take this year |
| Used | Days already taken |
| Pending | Days tied up in requests awaiting approval |
| Allowance | Your total entitlement for the year |
| Progress bar | Shows what percentage of your allowance you have used |
Below the Annual Leave card, an Other Leave section shows a compact tile for each other leave type you are enrolled in (e.g., Compassionate, Sick, Unpaid), displaying how many days you have used.
Requests Tab
The Requests tab shows all your leave submissions with filters to narrow by status.
Status filters: All | Pending | Approved | Rejected
There is also a leave type filter dropdown to show only requests for a specific leave category.
Each request card shows:
| Element | Description |
|---|---|
| Leave type | The category of leave (Annual Leave, Sick Leave, etc.) |
| Duration | Number of days (e.g., 1 day, 2 days) |
| +N off indicator | Shown when the date range includes holidays or weekly offs that don’t count as leave days |
| Date range | Start and end dates |
| Status badge | Approved, Pending, Rejected, or Cancelled |
| Withdraw | Button shown on Pending requests — click to cancel the request before it is approved |
Click any request card to see the Request Details dialog:
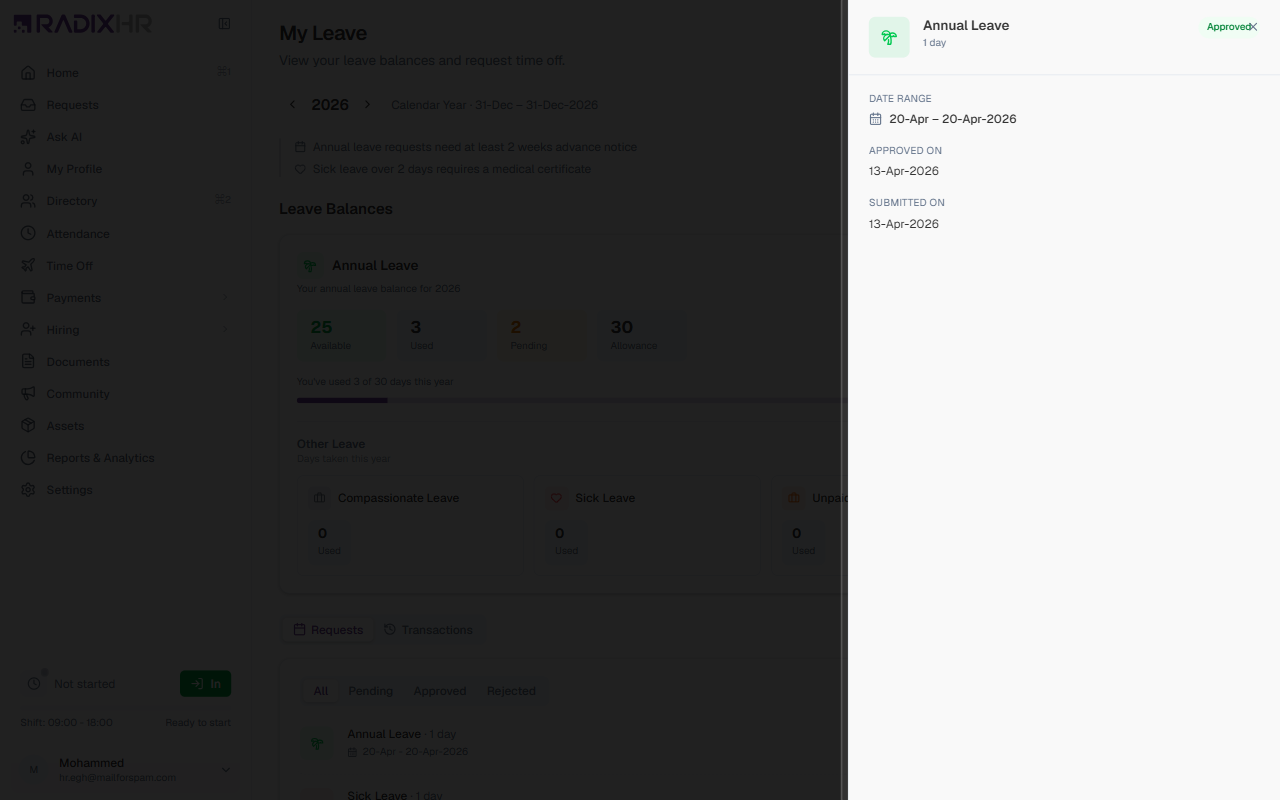
| Field | Description |
|---|---|
| Leave Type | The category and number of days |
| Status | Current approval status |
| Date Range | The dates requested |
| Approved on | When the request was approved (shown for approved requests) |
| Submitted on | When you submitted the request |
Transactions Tab
The Transactions tab shows a full history of every change to your annual leave balance — allocations, deductions for approved leave, and any manual adjustments HR has applied.
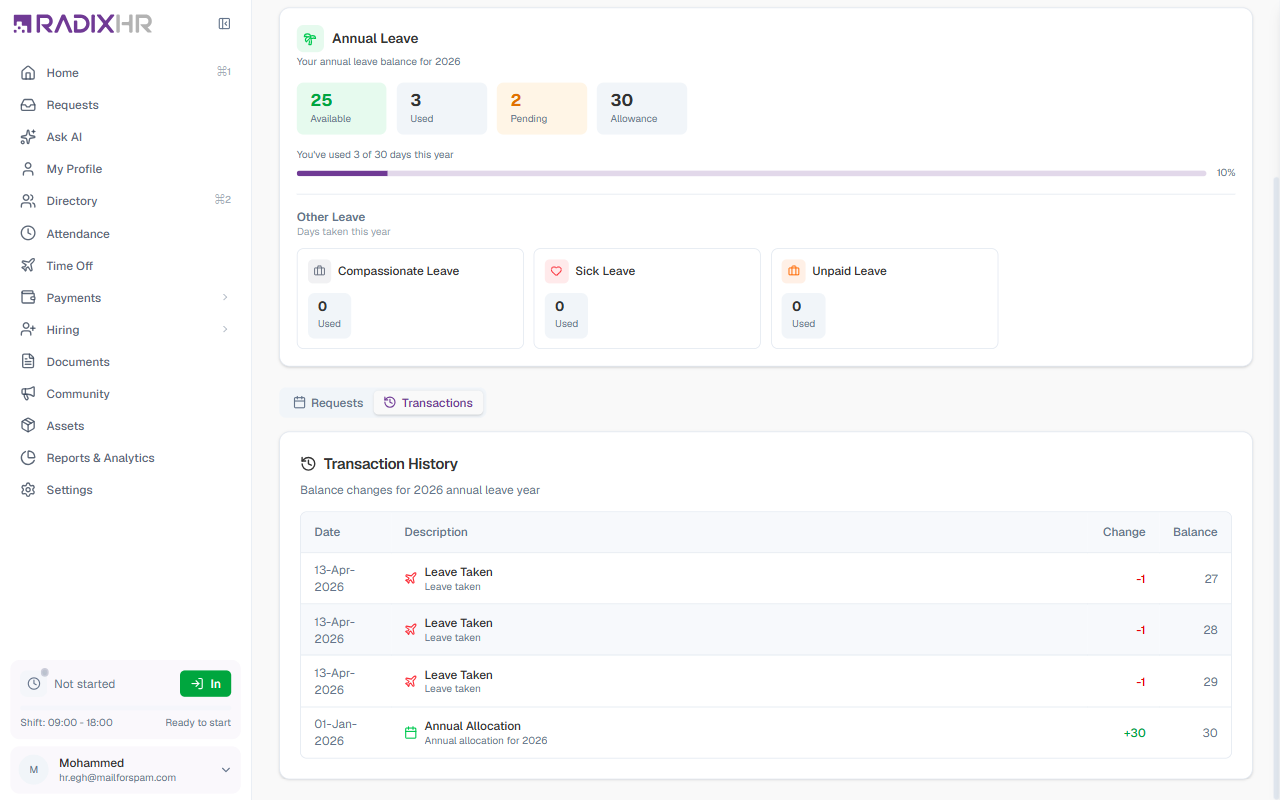
| Column | Description |
|---|---|
| Date | When the transaction was recorded |
| Description | The type of transaction (e.g., Annual Allocation, Leave Taken, Balance Adjustment) |
| Change | The number of days added (+) or removed (–) |
| Balance | Your running balance after the transaction |
If your balance looks wrong, check the Transactions tab first — it shows every change including HR adjustments, which explains discrepancies without having to contact HR.
How to Request Leave (Employee Self-Service)
- Go to Time Off and switch to My Leave using the scope switcher
- Click Request Leave in the top-right
- Fill in the form and click Submit
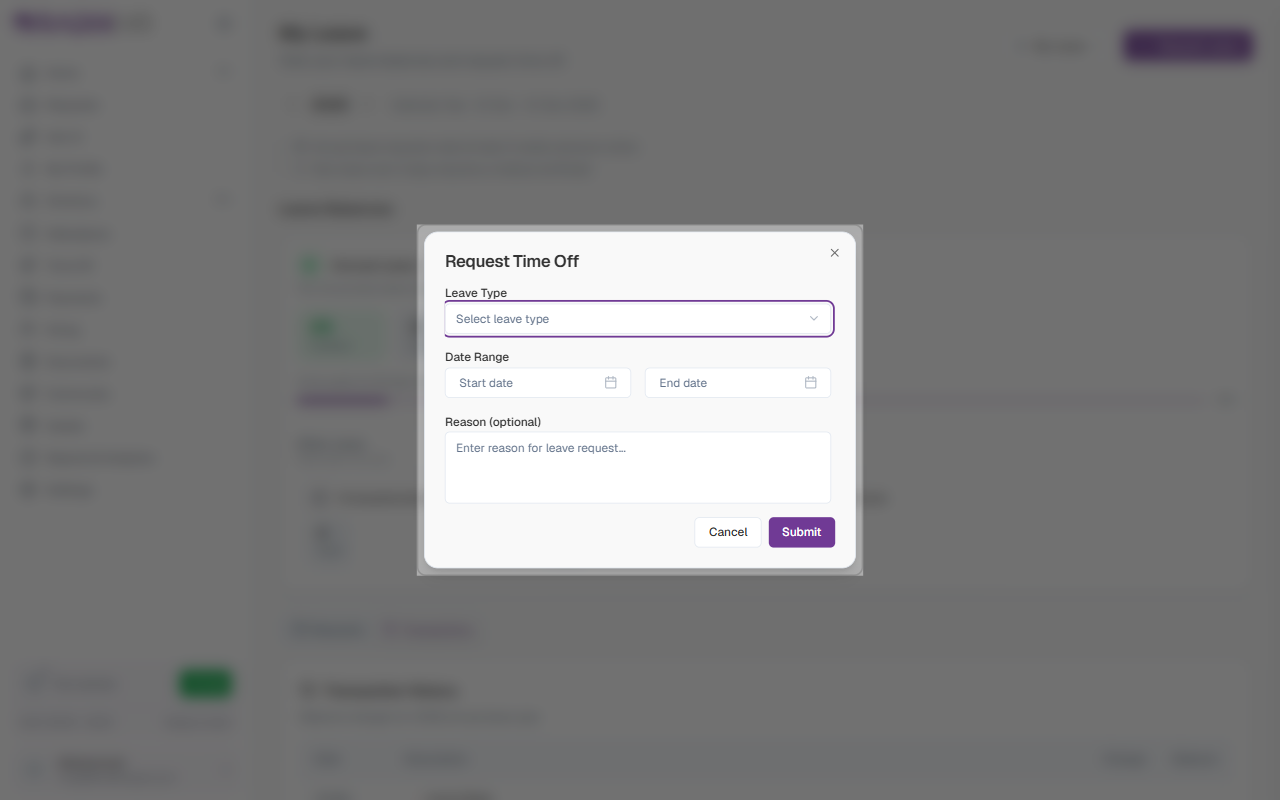
| Field | Description | Required |
|---|---|---|
| Leave Type | The category of leave you want to take (Annual, Sick, Compassionate, etc.) | Yes |
| Start date | The first day of your leave | Yes |
| End date | The last day of your leave. Set to the same as Start for a single day. | Yes |
| Reason | An optional note explaining why you are taking the leave | No |
After submitting, the request appears in your Requests tab with a Pending status and is routed to the relevant approver based on your organisation’s leave approval workflow.
Your organisation’s leave policies may require advance notice (e.g., 2 weeks for annual leave). Policy notices are displayed at the top of the My Leave page.
Approval Workflow
Each leave type follows an approval workflow — an automated sequence of steps that determines who needs to sign off on a request. The workflow is configured per leave type in Settings.
| Pattern | What happens |
|---|---|
| Direct Approval | Request is approved automatically — no manual action needed |
| Manager Approval | Routed to the employee’s direct manager |
| Multi-level Approval | Two or more steps in sequence (e.g., manager then HR) |
| Role-based Approval | Routed to whoever holds a specific role (e.g., HR Administrator) |
When a request reaches your step, the Pending Approvals counter on the page increments, and the request appears in your Requests page under the Approvals view.
If approvals seem stuck, check that the leave type has a workflow assigned. Go to Settings > Leave > Leave Types, edit the leave type, and confirm a workflow is selected. Creating a workflow in Settings is not enough — it must also be attached to the leave type.