Attendance Settings
Configure how employee attendance is captured, calculated, and managed across your organisation. The Attendance Settings page is your central hub for choosing how employees clock in and out, defining time-calculation rules, automating attendance for shift workers, and connecting attendance requests to approval workflows.
What you can do here:
- Enable and configure clock-in/out methods (biometric, mobile, web, manual)
- Define attendance policies that govern working hours, overtime, and deductions
- Auto-capture attendance for selected employees based on their assigned shifts
- Link attendance request types (missing punch, overtime, etc.) to approval workflows
Page Layout
The page is split into four sections, each with its own card. They appear in this order:
- Capture Methods — how employees record attendance
- Policies — rules for calculating hours, overtime, and deductions
- Auto Attendance — automatic capture for selected employees
- Request Type Workflows — approval routing for attendance requests
Set things up in the order shown on the page: enable capture methods first so employees can clock in, then define policies that interpret those punches, then connect request workflows. Auto Attendance can be turned on later once shifts are assigned.
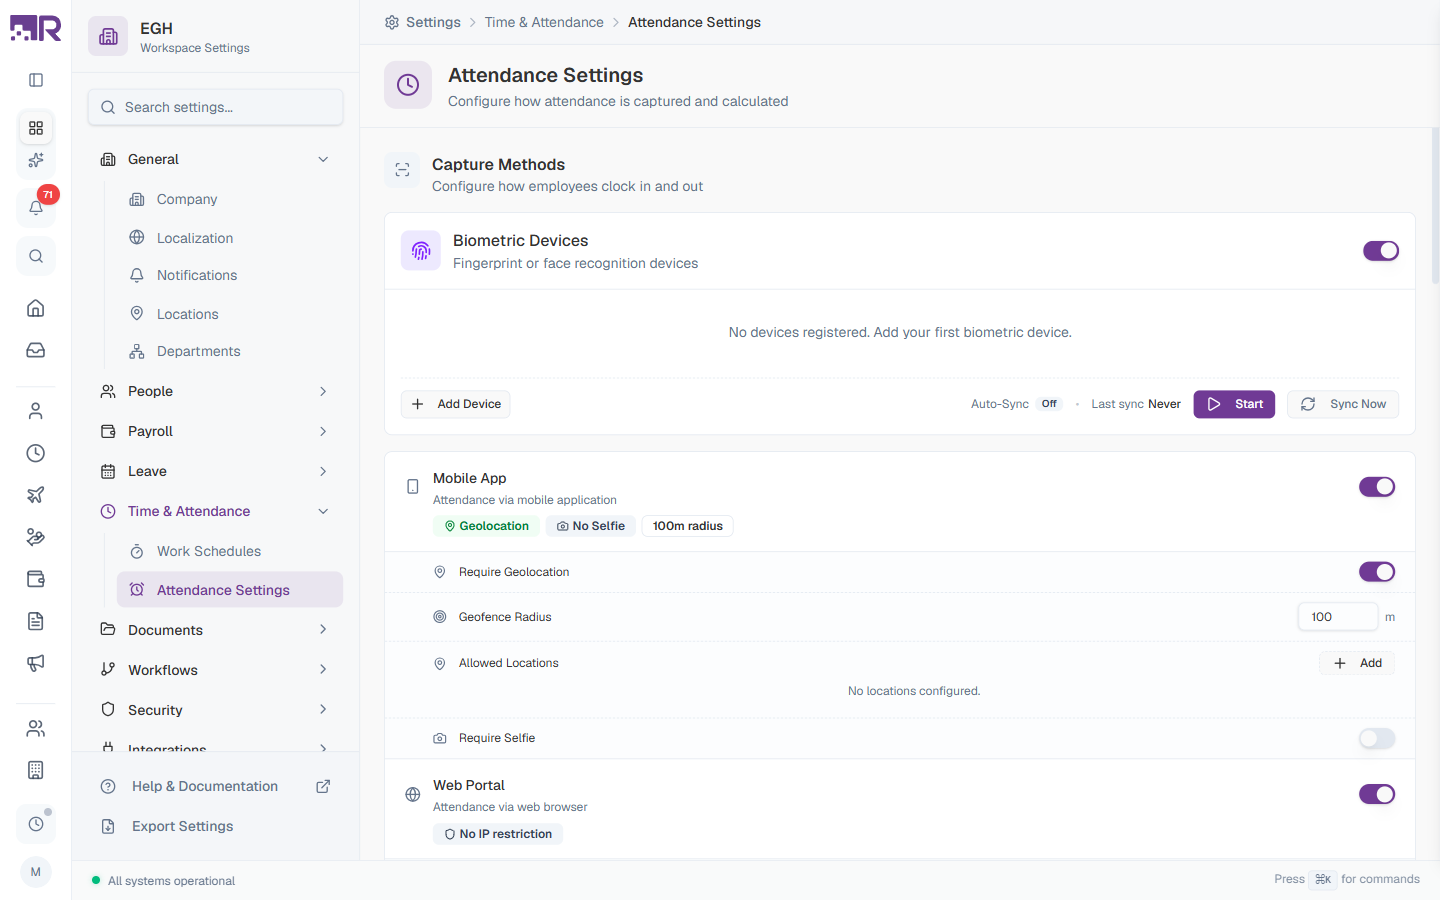
Capture Methods
The Capture Methods card lets you turn on and configure each clock-in/out channel independently. Every method has a master toggle on the right side of its row.
Biometric Devices
Fingerprint or face-recognition devices that push punches into RadixHR.
| Element | Description |
|---|---|
| Add Device | Register a new biometric device by entering its connection details |
| Auto-Sync | Indicator showing whether automatic syncing is on. When Off, you sync manually. |
| Last sync | Timestamp of the most recent successful sync (Never if no sync has happened) |
| Start | Begin a sync run on demand |
| Sync Now | Force an immediate one-time sync of all devices |
Biometric integration is the most tamper-proof clock-in method but requires hardware. If no devices are registered, the empty-state message “No devices registered. Add your first biometric device.” appears.
Mobile App
Clock-in via the RadixHR mobile app, with optional location and selfie checks.
| Setting | Description |
|---|---|
| Status badges | Quick view of what’s enabled — e.g., Geolocation, No Selfie, 100m radius |
| Require Geolocation | ON: Employees can only clock in/out when the app reports a GPS location. OFF: Location is not checked. |
| Geofence Radius (m) | Maximum distance (in metres) from an allowed location at which a clock-in counts. Default: 100. |
| Allowed Locations | List of geofenced points where mobile clock-ins are accepted. Click + Add to add a location. Empty state shows “No locations configured.” |
| Require Selfie | ON: A selfie is required at every clock-in/out for visual verification. OFF: No selfie needed. |
Web Portal
Clock-in from a desktop browser inside the RadixHR app.
| Setting | Description |
|---|---|
| Status badge | Shows the current restriction (e.g., No IP restriction) |
| IP Address Restriction | ON: Web clock-ins are only accepted from a defined list of office IP ranges. OFF: Any network is allowed. |
Manual Entry
Lets HR or admin users add attendance records manually for someone else.
| Setting | Description |
|---|---|
| Status badge | Shows whether manual entries require approval |
| Require Approval | ON: Manual entries must be approved before counting toward attendance. OFF: Manual entries take effect immediately. |
You can enable several capture methods at once — for example, biometric devices for office staff plus mobile app with geofencing for field workers.
Policies
Attendance policies define how the system interprets clock-in data. Each policy controls working-hour calculations, overtime tracking, late tolerance, and deduction rules.
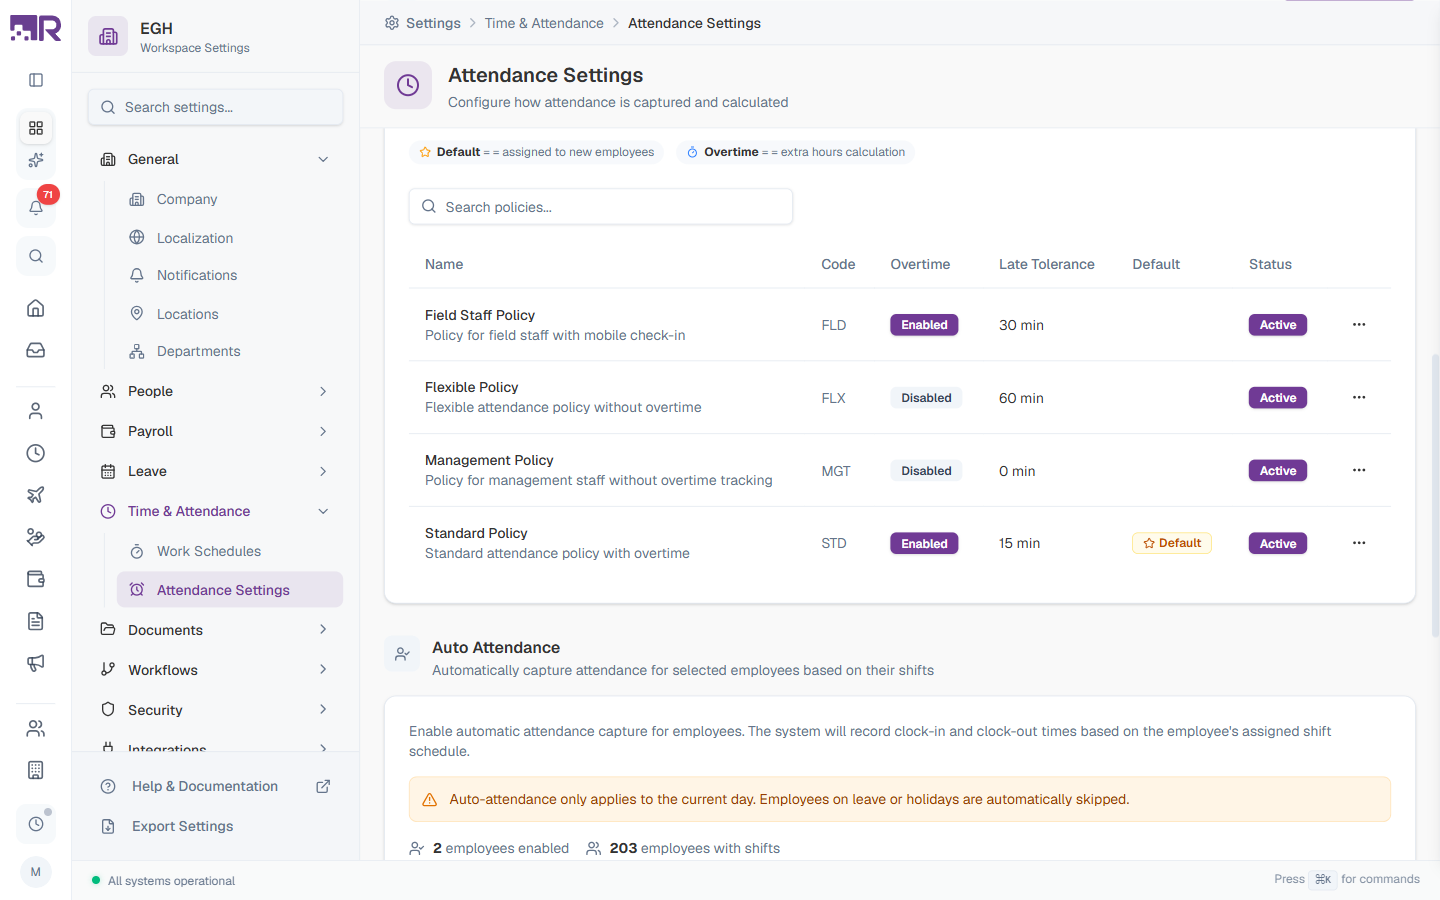
Policies Table
| Column | Description |
|---|---|
| Name | Policy name and short description (e.g., “Field Staff Policy — Policy for field staff with mobile check-in”) |
| Code | Short identifier used in reports and integrations (e.g., STD, FLX, MGT) |
| Overtime | Shows Enabled or Disabled depending on whether the policy tracks overtime |
| Late Tolerance | Grace period in minutes before an arrival counts as late |
| Default | A Default badge marks the policy that’s auto-assigned to new employees. Only one policy can be default at a time. |
| Status | Active policies can be assigned to employees; Inactive ones cannot |
| ⋯ | Row menu for editing or deleting the policy |
The legend at the top of the card explains the two key icons:
- Default — assigned to new employees
- Overtime — extra hours calculation
Click Add Policy to create a new policy. For full details on the policy form (Time Rules, Overtime Settings, Deductions, Alerts), see the dedicated guide.
Learn more about Attendance Policies →
Use the Search policies… box above the table to filter by name or code when you have many policies.
Auto Attendance
Auto Attendance automatically generates clock-in and clock-out records for selected employees based on their assigned shift schedule. This is useful for office workers on fixed shifts who don’t physically punch in.
How It Works
The system records clock-in and clock-out times that match the employee’s assigned shift’s start/end times. Auto-attendance applies only to the current day — past days are not back-filled, and employees on leave or public holidays are automatically skipped.
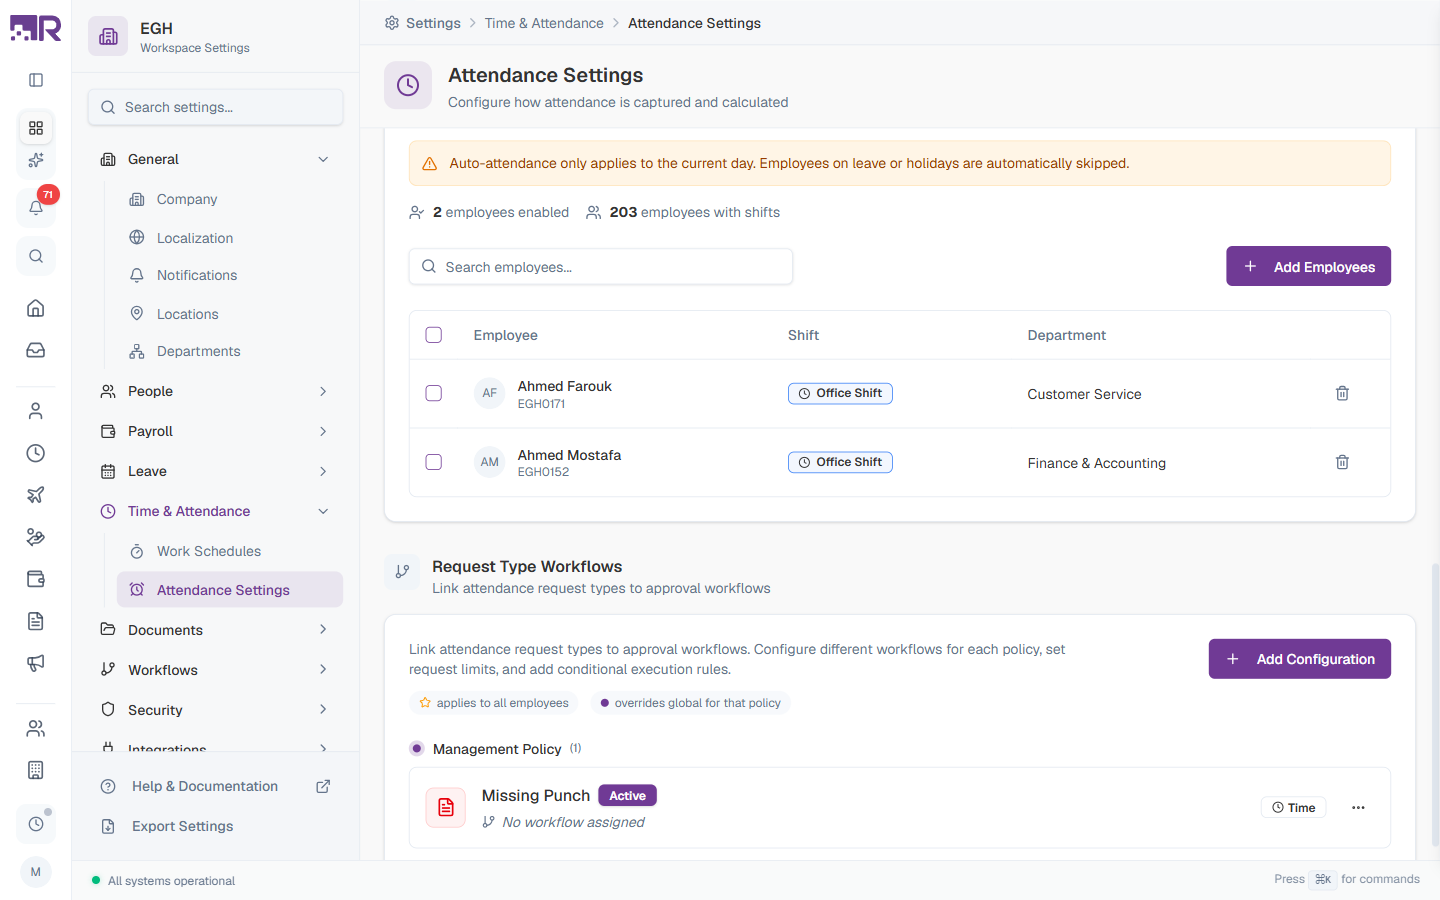
Counters
| Counter | Description |
|---|---|
| N employees enabled | The number of employees currently set to auto-attendance |
| N employees with shifts | The total pool of employees who have a shift schedule (eligible to be added) |
Adding Employees
- Click Add Employees in the top-right of the card
- Pick employees from the list (filtered by the ones with assigned shifts)
- Confirm to enable auto-attendance for them
The table below shows each enabled employee’s name, ID, assigned shift, and department. Use the trash icon at the end of a row to remove an employee from auto-attendance.
Auto Attendance bypasses physical clock-in. Only enable it for employees you trust to be present per their shift schedule, or for situations where presence is verified through other means.
Auto Attendance only works if the employee has a Work Schedule assigned. Without a shift, the system has no reference times to record.
Request Type Workflows
This section connects different types of attendance requests (missing punch, late exception, overtime, etc.) to the approval workflows (automated sequences of approval steps) that should handle them.
How It’s Organised
Configurations are grouped first by policy, then by request type. The legend at the top distinguishes:
- A global workflow — applies to all employees regardless of policy
- A policy-level workflow — overrides the global setting for employees on that specific policy
So you can have one default workflow for missing-punch corrections across the company, but override it with a stricter chain for the Field Staff Policy.
Configuration Cards
Each request-type card shows:
| Element | Description |
|---|---|
| Request type name | E.g., Missing Punch, Late Exception, Overtime Request |
| Status badge | Active if the configuration is in use |
| Workflow name | The linked approval chain (or No workflow assigned if not yet set) |
| Time / limits | Quick view of any request limits or time windows configured |
| ⋯ | Edit, delete, or change the linked workflow |
Click Add Configuration to add a new request type or override the workflow for a specific policy.
For shared approval-chain configuration, see Approval Chains under Workflow Settings.
If a configuration shows No workflow assigned, requests of that type for the matching policy will fall back to the global workflow (or auto-approve if there is none).
Getting Started
For a brand-new workspace, work through the page top-to-bottom:
- Capture Methods — turn on the channels your employees actually use (e.g., biometric for office, mobile for field staff)
- Policies — create at least one policy (mark it as Default) so newly added employees get a sensible set of rules
- Auto Attendance — only after a few employees have shifts assigned, optionally enable it for shift-based employees
- Request Type Workflows — link each request type (Missing Punch, Late Exception, Overtime Request, etc.) to an approval chain so corrections get reviewed properly