Document Templates
Document Templates let you create reusable letter and document formats with dynamic placeholders. Templates use HTML and CSS so you can fully control the layout, branding, and styling of generated documents — offer letters, contracts, certificates, NOCs, and more — that automatically populate with employee, position, salary, and company data.
What you can do here:
- Create custom HTML/CSS templates with
{{placeholder}}substitutions - Organize templates by category (HR, Finance, Legal, etc.)
- Filter and search templates to find the right one quickly
- Preview templates with sample data before saving
- Export generated documents as PDF, Word, or HTML
- Edit or delete templates as your needs change
Page Layout
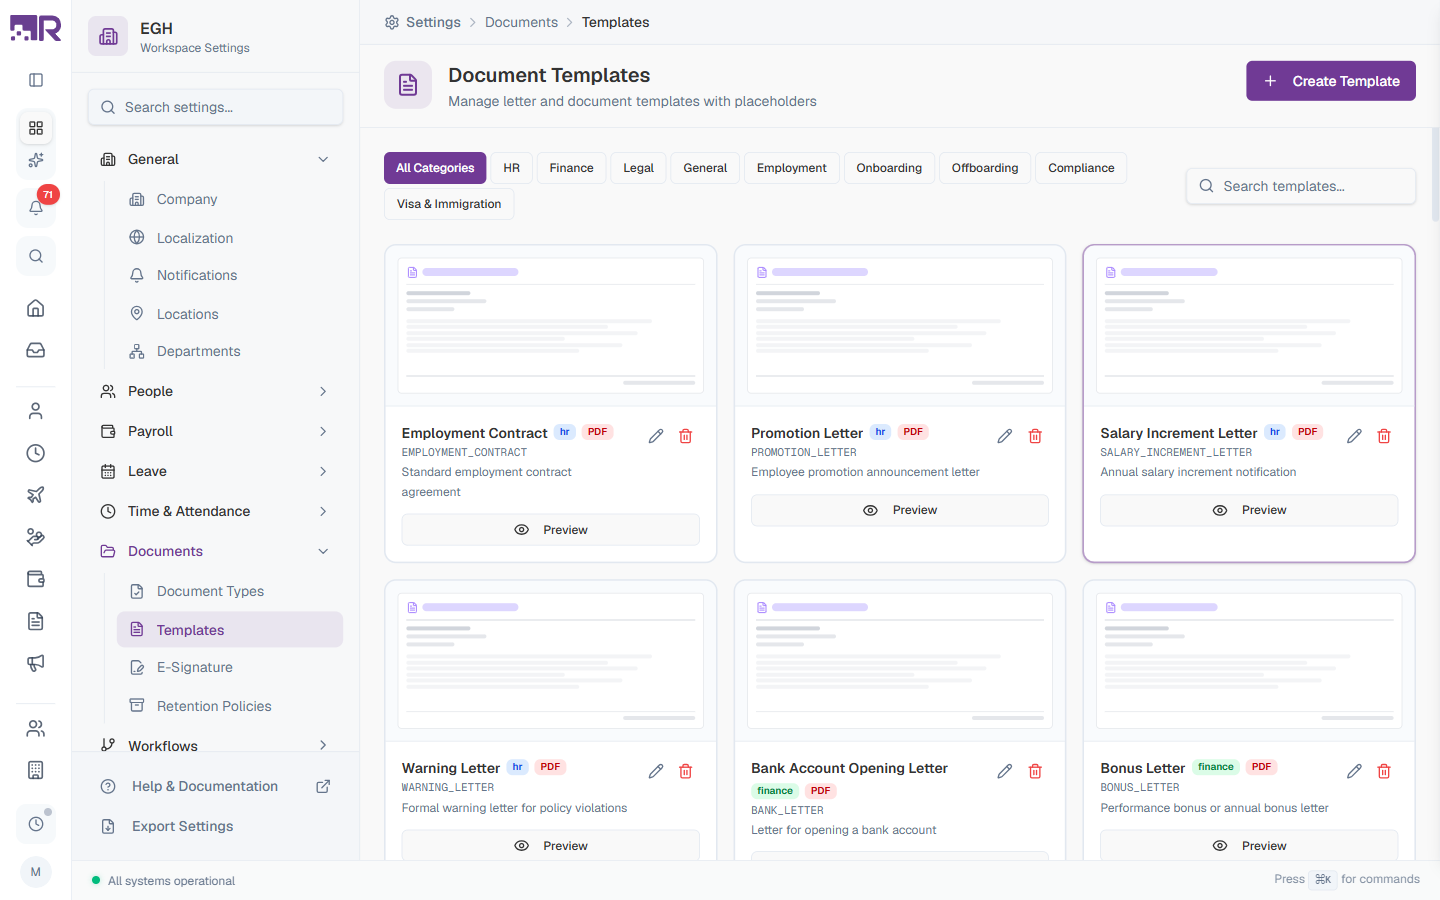
Templates are displayed as a grid of cards rather than a table. Above the grid, you have:
| Element | Description |
|---|---|
| Category tabs | Click a category to filter the grid: All Categories, HR, Finance, Legal, General, Employment, Onboarding, Offboarding, Compliance, Visa & Immigration |
| Search templates… | Free-text search by template name |
| Create Template | Top-right button that opens the template editor side panel |
Each template card shows:
| Element | Description |
|---|---|
| Thumbnail | A visual preview of the template’s output |
| Name | The display name (e.g., “Employment Contract”, “Offer Letter Template”) |
| Category badge | Small coloured tag showing the template’s category (e.g., hr, finance) |
| Format badge | The output format (e.g., PDF) |
| Code | Uppercase identifier shown below the name (e.g., EMPLOYMENT_CONTRACT) |
| Description | Short note about the template’s purpose |
| Edit (pencil) | Open the template in the HTML/CSS editor |
| Delete (trash) | Remove the template |
| Preview | Render the template with sample data to see how it looks |
RadixHR ships with a large set of built-in templates (Employment Contract, Offer Letter, Salary Certificate, NDA, NOCs, Welcome Letter, Final Settlement, etc.). You can use them as-is, Edit them to add your branding, or Create Template to build your own from scratch.
How to Create a Template
- Go to Settings > Documents > Templates
- Click Create Template in the top-right
- Fill in the basic details
- Write the template body using HTML and CSS
- Click Preview to render with sample data
- Click Create
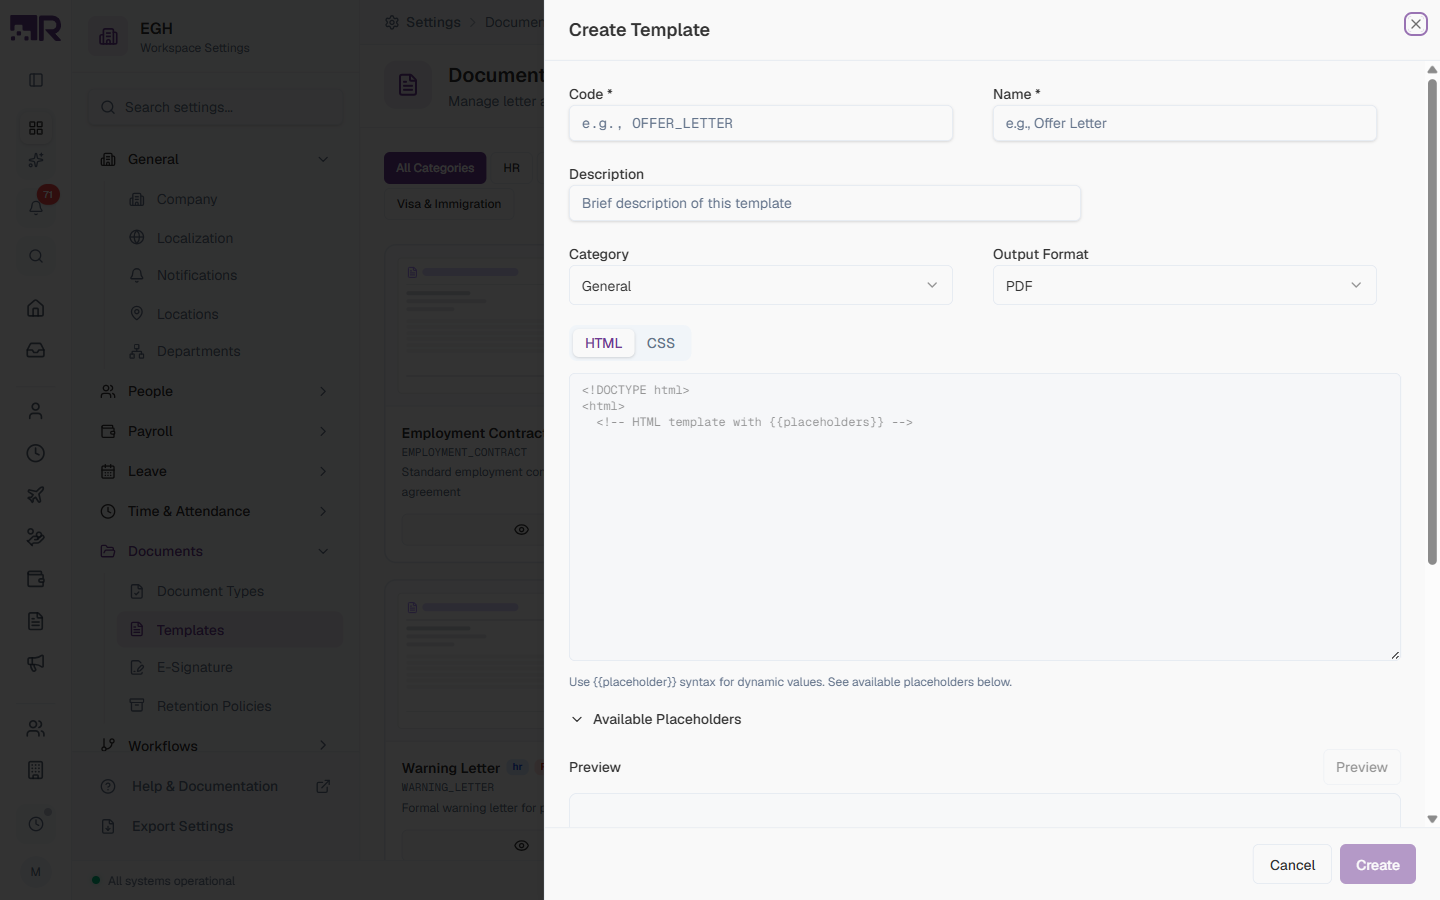
Template Fields
| Field | Description | Required |
|---|---|---|
| Code | A unique uppercase identifier with underscores. Used in reports and integrations. Example: OFFER_LETTER, EXPERIENCE_CERTIFICATE. | Yes |
| Name | A descriptive display name shown on the card and template selector. Example: “Offer Letter”, “Experience Certificate”. | Yes |
| Description | A short explanation of when to use this template. Helps other admins pick the right one. | No |
| Category | Pick the category to file the template under. Options: General (default), HR, Finance, Legal, Employment, Onboarding, Offboarding, Compliance, Visa & Immigration. | Yes |
| Output Format | The file format for generated documents. Options: PDF (default), Word (DOCX), HTML. | Yes |
| HTML | The HTML body of the template, written using {{placeholder}} syntax for dynamic values. The default starter is a minimal <!DOCTYPE html> document. | Yes |
| CSS | Stylesheet that’s inlined into the rendered document. Use this for layout, fonts, colours, and print rules. | No |
Output Formats
| Format | Description | Best For |
|---|---|---|
| Portable Document Format with print-quality fidelity | Official documents that need to be signed, archived, or printed | |
| Word (DOCX) | Microsoft Word document | Documents the recipient may need to edit before sending back |
| HTML | Web format | Email body content or web-only display |
PDF is the recommended format for HR documents — formatting is preserved exactly, and it works with the platform’s e-signature flow.
Using Placeholders
Placeholders are special markers in your template that get replaced with actual data when a document is generated. They use double curly braces: {{placeholder.name}}.
Placeholder Syntax
{{category.fieldName}}For example:
{{employee.firstName}}→ Employee’s first name{{employee.lastName}}→ Employee’s last name{{company.name}}→ Workspace company name{{position.title}}→ Job title
Available Placeholders
The Available Placeholders section in the editor (collapsed by default) lists every placeholder you can use in this workspace, grouped by entity. Common groups include:
| Category | Description | Example placeholders |
|---|---|---|
| employee | Employee personal information | firstName, lastName, email, phone, dateOfBirth, nationality |
| position | Job position details | title, department, location, joinDate |
| salary | Compensation information | amount, currency, frequency |
| company | Organisation information | name, address, phone, website |
| manager | Reporting manager details | name, email, title |
| document | Document metadata | date, number, expiryDate |
Click a placeholder in the Available Placeholders panel to copy it to your clipboard, then paste it into the HTML editor where you want the value to appear.
Example Template (HTML)
<!DOCTYPE html>
<html>
<head><meta charset="utf-8"></head>
<body>
  <h1>Offer of Employment</h1>
  <p>Dear {{employee.firstName}} {{employee.lastName}},</p>

  <p>
    We are pleased to offer you the position of <strong>{{position.title}}</strong>
    at {{company.name}}, reporting to {{manager.name}} ({{manager.title}}).
  </p>

  <p>
    Your starting salary will be {{salary.currency}} {{salary.amount}}
    per {{salary.frequency}}, effective from {{position.joinDate}}.
  </p>

  <p>Please sign and return this letter to accept the offer.</p>

  <p>Sincerely,<br>{{company.name}} HR Team</p>
</body>
</html>
Previewing Templates
Click the Preview button at the bottom of the editor (or the Preview button on a template card) to render the template with sample data. The preview pane below the editor shows exactly how the document will look when generated. Iterate until it’s right, then save.
Managing Templates
Filtering and Searching
- Categories: Click a category tab above the grid to show only templates in that category. All Categories shows everything.
- Search: Type in the Search templates… box (top-right) to filter cards by name in real time.
How to Edit a Template
- Find the template card you want to edit
- Click the pencil icon in the card’s top-right
- Update the fields, HTML, or CSS
- Click Preview to verify your changes
- Click Save Changes
Changes to a template only affect future documents generated from it. Documents that have already been issued keep the layout they were generated with.
How to Delete a Template
- Click the trash icon in the card’s top-right
- Confirm the deletion in the dialog
Deleting a template doesn’t remove documents that were previously generated from it — those stay in employee profiles. But you won’t be able to generate new documents using that template afterwards.
Built-in Templates
RadixHR ships with a comprehensive set of built-in templates. Here’s a sample of what’s available out of the box:
HR
- Employment Contract — Standard employment contract agreement
- Promotion Letter — Employee promotion announcement
- Salary Increment Letter — Annual salary increment notification
- Warning Letter — Formal warning letter for policy violations
Finance
- Bank Account Opening Letter — Letter for opening a bank account
- Bonus Letter — Performance or annual bonus letter
Legal
- Non-Compete Agreement — Non-compete clause agreement
- Non-Disclosure Agreement (NDA) — Standard NDA for employees and contractors
General
- Employment Certificate Template
- Experience Certificate Template
- General Letter — Multipurpose letter template
- Internal Memo
- No Objection Certificate (NOC) Template
- Offer Letter Template
- Salary Certificate Template
Employment
- Employment Verification Letter — Letter verifying current employment status
- No Objection Certificate — General-purpose NOC for employees
- Relieving Letter — Confirms release from employment
Onboarding / Offboarding
- Welcome Letter — Welcome letter for new joiners
- Probation Confirmation Letter — After successful probation
- Final Settlement Letter — Final settlement details for departing employees
- Resignation Acceptance Letter
Compliance
- Code of Conduct Acknowledgment
- Policy Acknowledgment Form
Visa & Immigration
- Employment Letter for Visa — For visa applications
- NOC for Visa Transfer
- Salary Certificate for Visa
Built-in templates are a great starting point. Click Edit on a built-in template to customise it with your company’s logo, fonts, and colours rather than building one from scratch.
Generating Documents
Once your templates are set up, you can generate documents from several places:
- Employee Profile — Generate documents for a specific employee from their profile page
- Bulk Actions — Generate the same document for multiple employees at once
- Workflows — Auto-generate documents as part of onboarding, offboarding, or other automated processes
Each generation:
- Picks the template to use
- Selects the employee(s)
- Resolves all
{{placeholders}}from live data - Renders the output in the template’s chosen format
- Saves it to the employee’s documents and/or sends it via email
Best Practices
-
Use clear names — template names are what HR sees in the picker. “Salary Certificate Template” is clearer than “SC1”.
-
Categorise consistently — pick the right category so templates are easy to find when filtering.
-
Test with sample data — always click Preview with sample data before relying on a template in production. Missing placeholders show as
{{...}}in the rendered output. -
Inline your CSS — print engines work best with inline styles. Keep external dependencies out of templates.
-
Use the Description field — note any usage caveats (e.g., “Use for UAE visa applications only”) so the right template gets picked.
-
Duplicate before editing built-ins — instead of editing a built-in template, copy its HTML/CSS into a new template (via Create Template) so you keep the original as a fallback.
-
Document your placeholders — if you create a custom placeholder structure or rely on specific salary components, leave a comment in the HTML explaining the dependency.