Roles & Permissions
Roles control what each user can see and do in RadixHR. A role is a named bundle of permissions; a permission is a single capability such as “view team leave” or “approve payroll”. You assign roles to employees, and the system grants them every permission inside those roles.
What you can do here:
- See every role in the workspace and how many users hold each one
- Create custom roles for job functions that don’t match the built-in ones
- Edit the permissions inside a custom role
- Assign roles to employees (or remove them)
- Search by role name or description to find a specific one
Understanding Roles
When a user signs in, RadixHR collects the permissions from every role they hold and uses that combined set to decide what they can access. Permissions are additive — there is no “deny” flag. If any of a user’s roles grants a permission, they have it.
Role Types
The Type column on each row tells you where the role came from and how much you can change about it.
| Type | What it is | Can you edit it? | Can you delete it? |
|---|---|---|---|
| System | Built-in roles that ship with RadixHR (e.g., Workspace Owner, Employee). They define the foundational access levels every workspace needs. | No — name, code, level, and permissions are all locked | No |
| Position | Roles that are automatically assigned to employees based on their position in the org chart (e.g., everyone in the “Manager” position gets a Manager role). | Permissions yes, assignments are automatic | No |
| Custom | Roles you create yourself for the job functions in your organisation (e.g., “Recruiter”, “Finance Approver”, “Office Admin”). | Yes — name, description, level, and permissions all editable | Yes, but only when no users are assigned |
System roles can’t be modified because RadixHR depends on them internally. If you need behaviour that differs from a system role, create a custom role with the permissions you want and assign it instead.
Role Properties
Every role — system, position, or custom — has the same four core properties shown in the table:
| Property | Description |
|---|---|
| Role | The display name plus a short description. Names are what employees and admins see; descriptions help admins understand a role’s purpose at a glance. |
| Type | System, Position, or Custom (see above). |
| Level | A number from 0 to 99 representing the role’s seniority. Higher = more authority. Used to resolve conflicts when one approver delegates to another, or when sorting role lists. |
| Users | How many employees currently hold this role. Click the count to open the Manage Users dialog for that role. |
Priority Level — what it does
The Level number does not override permissions (permissions are always additive). It is used to:
- Order the role list so higher-authority roles surface first
- Resolve approval routing when an employee holds multiple roles — the highest-level role’s approver is preferred
- Display the user’s “primary” role in places where only one badge is shown
A typical scale:
| Level | Used for |
|---|---|
| 100 | Workspace Owner (system) |
| 80–99 | Top-tier admins (HR Administrator, Finance Director) |
| 50–79 | Mid-management (Department Heads, Senior Managers) |
| 20–49 | Team leads, supervisors |
| 0–19 | Self-service employee roles |
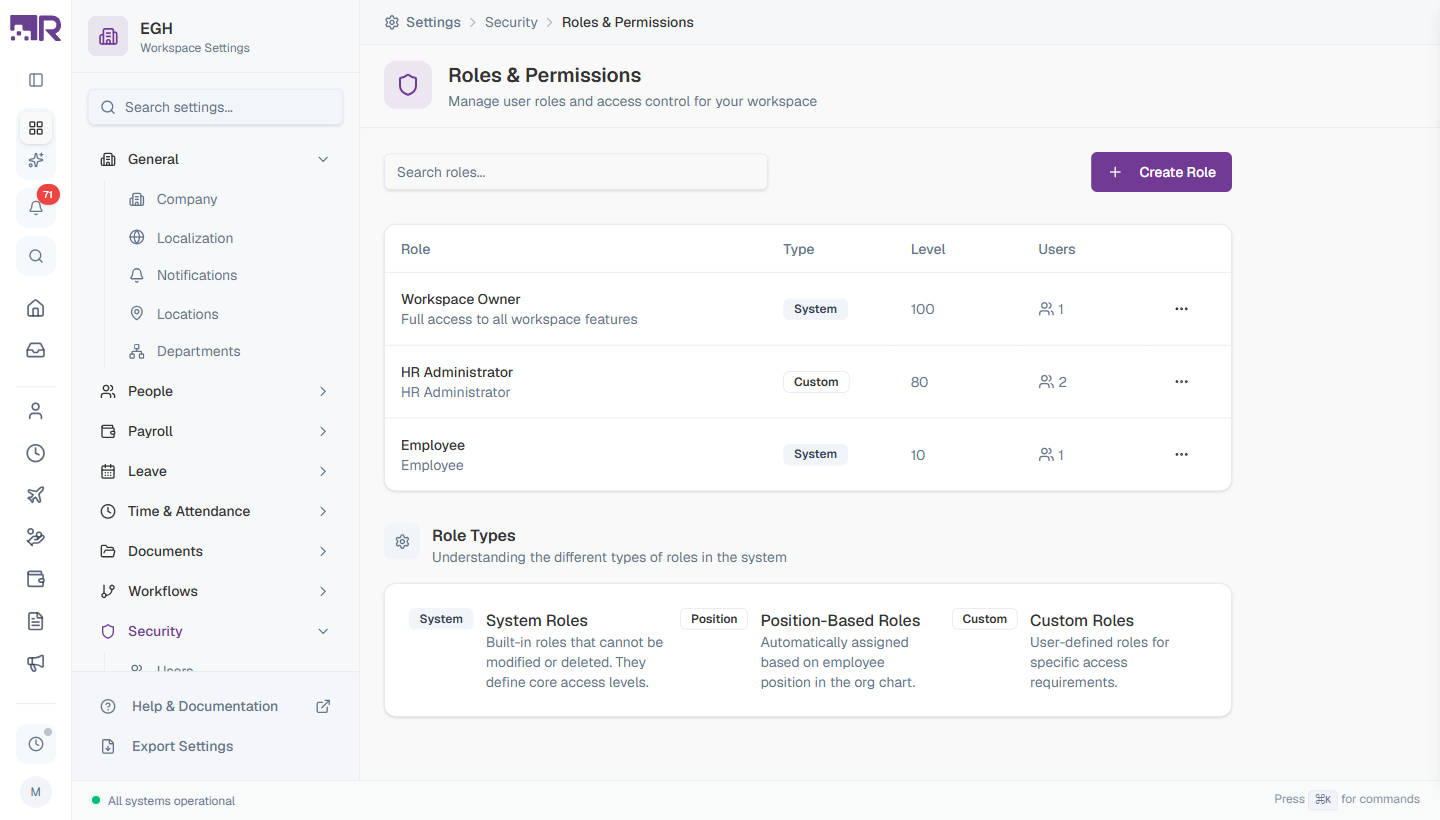
The Roles List
The main page shows every role in the workspace. Each row contains:
| Element | Description |
|---|---|
| Role name + description | Click the row to focus it; the description appears just below the name |
| Type badge | System (filled) or Custom (outlined) |
| Level | The numeric priority (0–99 for custom, may be 100 for Workspace Owner) |
| Users count | An icon + number; click it to open the Manage Users dialog directly |
| ⋯ menu | Per-row actions: Edit Permissions, Edit Role, Manage Users, Delete Role |
Above the table you also have a search box (filters by role name or description) and the + Create Role button.
A reference card titled Role Types sits at the bottom of the page summarising the three types as a quick reminder.
How to Create a Custom Role
Custom roles let you grant access that doesn’t fit the built-in roles — for example, a “Recruiter” who needs hiring access but no payroll, or an “Office Admin” who manages documents and announcements but nothing else.
- Go to Settings > Security > Roles & Permissions
- Click + Create Role in the top-right
- Fill in the role details
- Click Create Role
The new role appears in the list immediately with 0 users and 0 permissions — you’ll add those in the next steps.
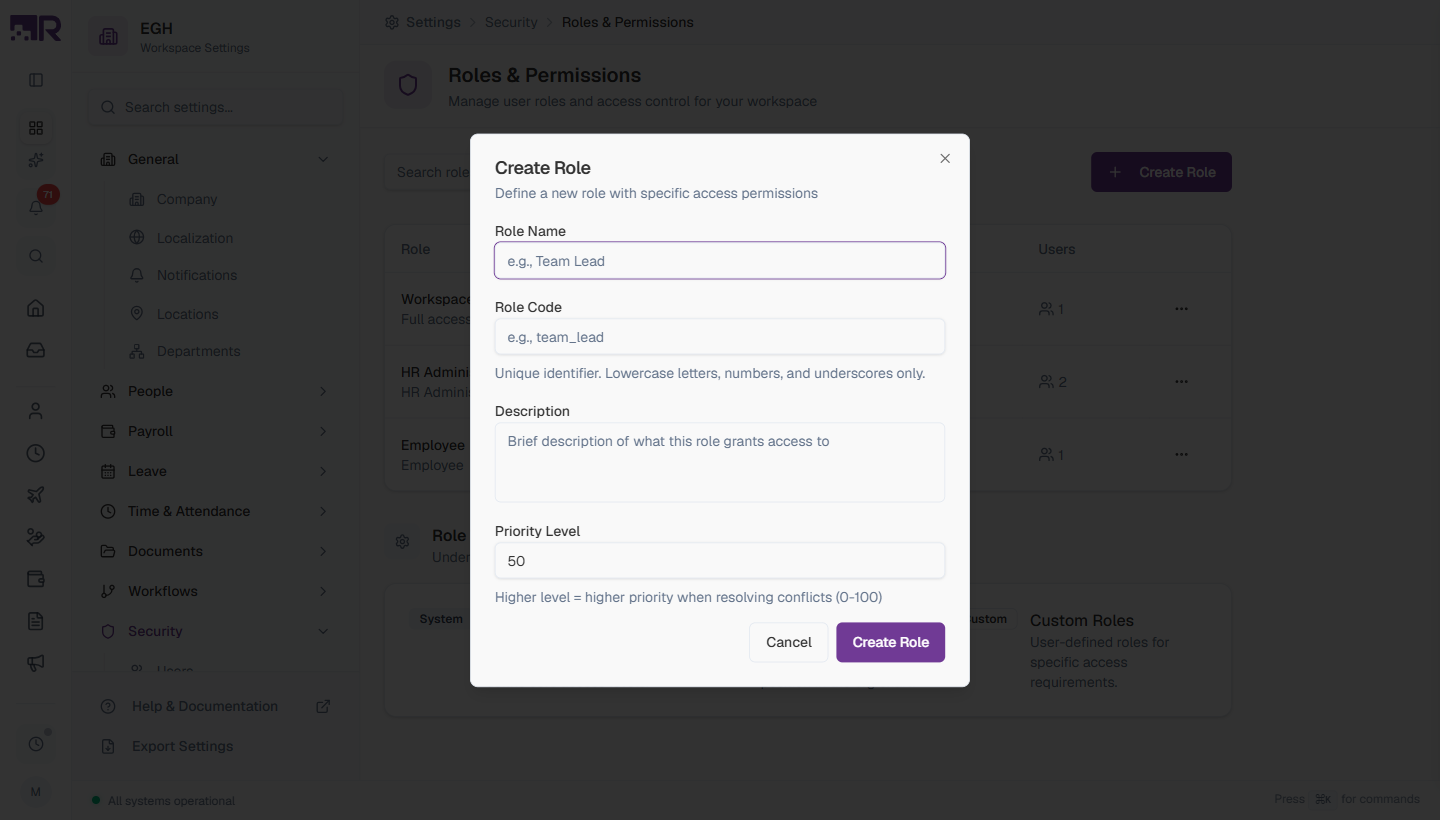
Create Role Fields
| Field | Description | Required |
|---|---|---|
| Role Name | The display name shown everywhere (e.g., “Team Lead”, “Finance Approver”). Use a name that clearly describes the job function. | Yes |
| Role Code | A unique machine identifier. Auto-generated from the name (e.g., “Team Lead” → team_lead). Lowercase letters, numbers, and underscores only. Cannot be changed after the role is created. | Yes |
| Description | A short explanation of what this role grants and who should have it. Shown below the name in the list. | No |
| Priority Level | Number from 0 to 99 (default 50). Higher = more senior. See Priority Level — what it does above. | Yes |
Pick the Role Name carefully — the Role Code is locked once you save, but the Name can still be changed afterwards. The Code shows up in API/audit logs, so a clear code (e.g., recruiter rather than role_a) helps later.
Creating a role does not grant any access by itself. Open the role’s Edit Permissions dialog right after creating it and tick the permissions the role should have, otherwise users assigned to it will have no access through this role.
How to Edit a Role’s Permissions
Permissions are organised by module (Employees, Leave / Time Off, Attendance, Payroll, Documents, Approvals, Reports, Settings, News Feed, Workspace, Hiring / ATS). For each module you can tick individual permissions or use the module’s master checkbox to toggle everything in that module at once.
- Find the role in the list
- Click the ⋯ menu and select Edit Permissions (for system roles this becomes View Permissions — read-only)
- Expand a module by clicking its header
- Tick or untick the permissions you want
- Click Save Permissions

Anatomy of the Permissions Dialog
| Element | Description |
|---|---|
| Module header | The module name and a counter (e.g., 13/13 = 13 of 13 permissions in that module are selected). Click to expand or collapse the section. |
| Module checkbox | Master toggle that selects or clears every permission in that module in one click. Shows an indeterminate state when only some are selected. |
| Permission row | A single capability with its name, scope badge (own / team / department / all), short description, and the underlying code (e.g., employees:view:team). |
| Selected count | Footer shows total permissions selected across all modules — useful sanity check before saving. |
| Save Permissions | Persists the change. Disabled when there are no unsaved changes. |
For system roles this dialog opens in read-only mode — checkboxes are disabled and a System badge appears in the title indicating the permissions cannot be changed.
Permission codes follow the pattern module:action:scope — for example, leave:approve:team means “approve leave requests for members of the user’s team”. See Permission Definitions for the full catalogue and what each scope means.
How to Edit Role Details
To change the name, description, or priority level of a custom role:
- Click the ⋯ menu on the role
- Select Edit Role
- Update Role Name, Description, or Priority Level
- Click Save Changes
The Role Code is greyed out — codes cannot be changed after creation because they are referenced by other parts of the system.
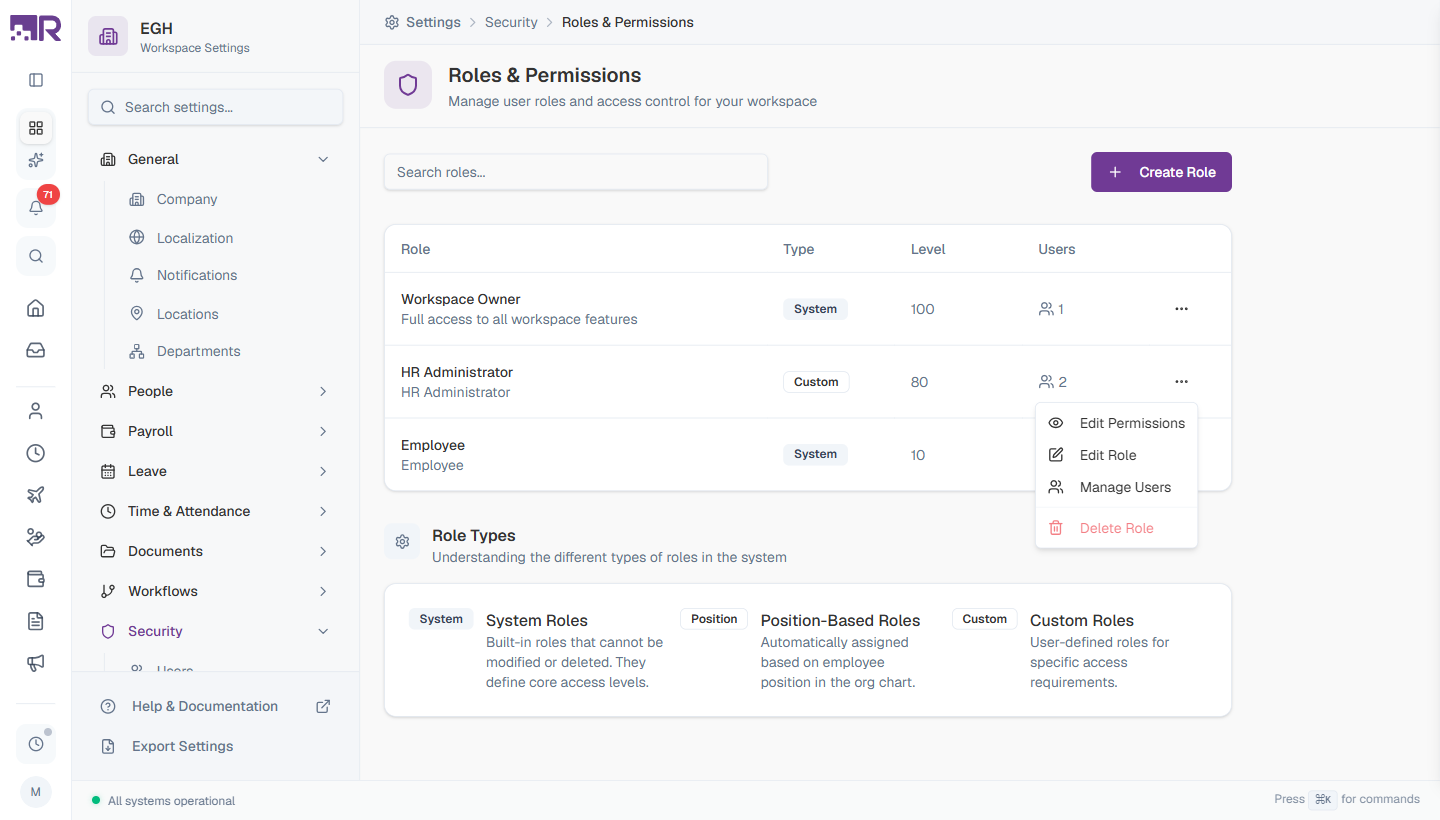
The ⋯ row menu offers:
| Action | What it does | When it’s disabled |
|---|---|---|
| Edit Permissions | Opens the permissions selector (or View Permissions in read-only for system roles) | Never — always available |
| Edit Role | Opens the role details form (Name, Description, Priority Level) | For System roles |
| Manage Users | Opens the dialog to add or remove employees from this role | Never |
| Delete Role | Permanently removes the role | For System roles, or when the role still has users assigned |
How to Assign or Remove Users on a Role
You can manage which employees hold a role from the Manage Users dialog.
- Click the users count badge on a role row (the icon + number), or open the ⋯ menu and pick Manage Users
- To add: click + Add Employee, search and pick employees from the list, then click Assign
- To remove: click the red minus icon next to an employee’s row and confirm
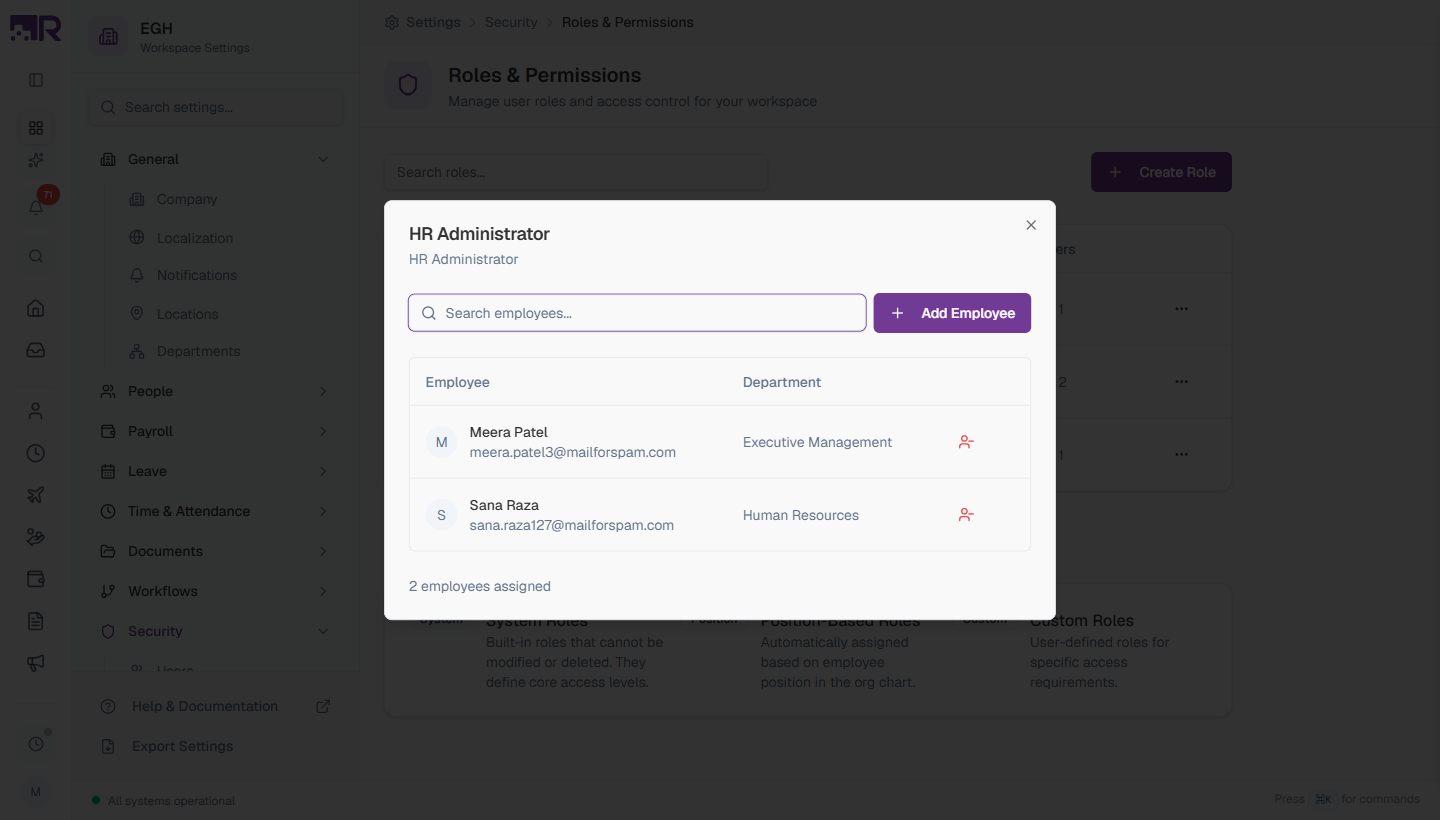
The Manage Users dialog shows:
| Column | Description |
|---|---|
| Employee | Avatar, name, and email |
| Department | The employee’s department (or — if not set) |
| Remove icon | Red minus icon — removes this user from the role after a confirmation prompt |
The footer shows a live count of how many employees currently hold this role (after any search filter).
Add Employee Dialog
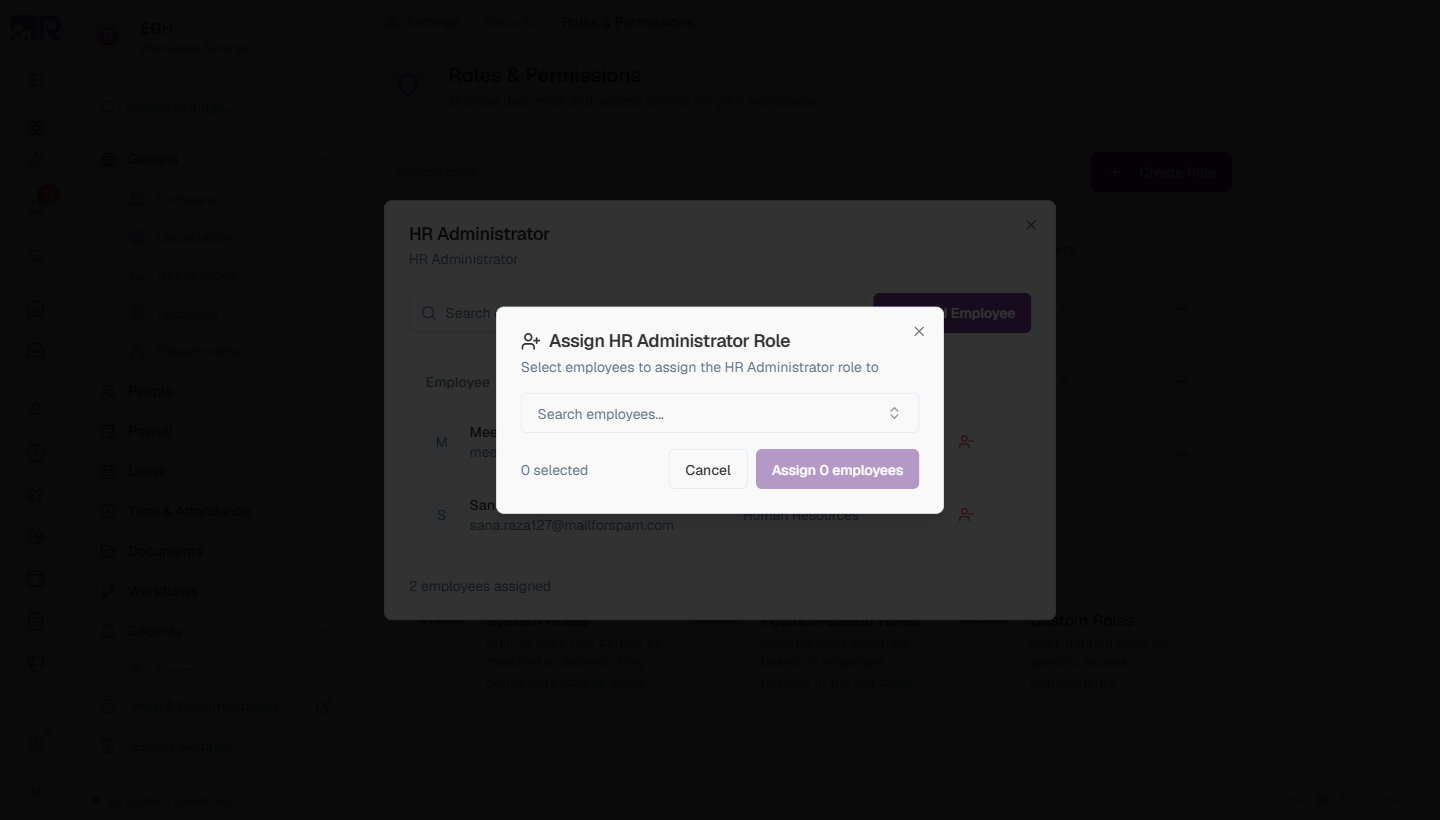
| Field | Description |
|---|---|
| Search employees | Type to filter active employees by name. Pick one or more to assign in a single action. |
| Selected count | Footer shows how many employees are currently selected. |
| Assign N employees | Submits the selections; the dialog closes and the new users appear in the Manage Users list. |
You can also assign a role from an employee’s profile (People > select employee > Access section). The Manage Users dialog here is faster when you’re rolling out a new role to multiple people at once.
How to Delete a Custom Role
- Make sure no employees are assigned to the role — if any are, the Delete Role option will be disabled. Use Manage Users to remove them or move them to a different role first.
- Click the ⋯ menu and select Delete Role
- Confirm the deletion in the prompt
Deleting a role is permanent. If the role had any custom permission assignments, those mappings are lost — you cannot undo a deletion. Consider editing the role to remove all permissions instead if you want to keep the audit trail.
System roles cannot be deleted under any circumstances.
Permission Modules at a Glance
The permissions dialog groups capabilities into the following modules. The full list of permissions (with codes and scopes) is in Permission Definitions.
| Module | What it controls |
|---|---|
| Employees | Viewing and managing employee profiles, org data, imports/exports |
| Leave / Time Off | Leave requests, balances, approvals, and policy management |
| Attendance | Time tracking, clock-in/out, attendance corrections and approvals |
| Payroll | Salary, payslips, payroll runs, and processing |
| Documents | Uploading, viewing, signing, and managing documents and templates |
| Approvals | Approval workflows, chains, delegations |
| Reports | Viewing and exporting reports |
| Settings | System-wide configuration including security |
| News Feed | Company feed posts and announcements |
| Workspace | Workspace-level administration |
| Hiring / ATS | Hiring requests, jobs, candidates, interviews |
Best Practices
-
Start with the built-in roles. RadixHR ships with Workspace Owner, HR Administrator, and Employee — most workspaces only need a handful of additional custom roles on top of these.
-
Name roles by function, not person. A role called “Recruiter” can outlive any individual recruiter. Avoid names like “Sara’s Permissions”.
-
Follow least privilege. Grant the narrowest scope that lets the user do their job. Prefer
leave:approve:teamoverleave:approve:allif a team-only scope is sufficient. -
Set the priority level deliberately. Use 0–19 for self-service-only roles, 20–49 for team leads, 50–79 for mid-management, 80–99 for top admins. Reserve 100 for the Workspace Owner.
-
Document custom roles. Use the Description field — when an admin two years from now asks “what does the ‘Office Admin’ role do?”, a sentence in the description saves the conversation.
-
Review annually. Periodically open the role list and confirm each custom role is still needed and that the people holding it are still the right ones.
-
Test before deploying. When you create or significantly change a role, assign it to a test account and verify the access is what you intended before rolling it out to real users.
Troubleshooting Access Issues
If a user reports they can’t see or do something they expect to:
- Open Settings > Security > Users, find the user, and check the roles assigned to them.
- For each of those roles, click ⋯ > Edit/View Permissions and confirm the relevant permission is ticked at a wide enough scope (e.g.,
:teamor:all). - If multiple roles are assigned, remember permissions are additive — the user has the union of all roles’ permissions. The user is missing a permission only if none of their roles grants it.
- Check whether a delegation rule is rerouting their requests — they may have access but the system is sending the work elsewhere.