Biometrics & Devices
Connect physical biometric attendance devices (fingerprint or face-recognition terminals) to RadixHR, and choose how their punch data reaches the system. This is a new page (added September 2026), sitting alongside Work Schedules and Attendance Settings under Settings → Time & Attendance.
What you can do here:
- Turn biometric attendance capture on or off for your workspace
- Choose how devices send data to RadixHR (cloud or on-site agent)
- Connect a new device by its serial number
- Control automatic syncing, or trigger a sync manually
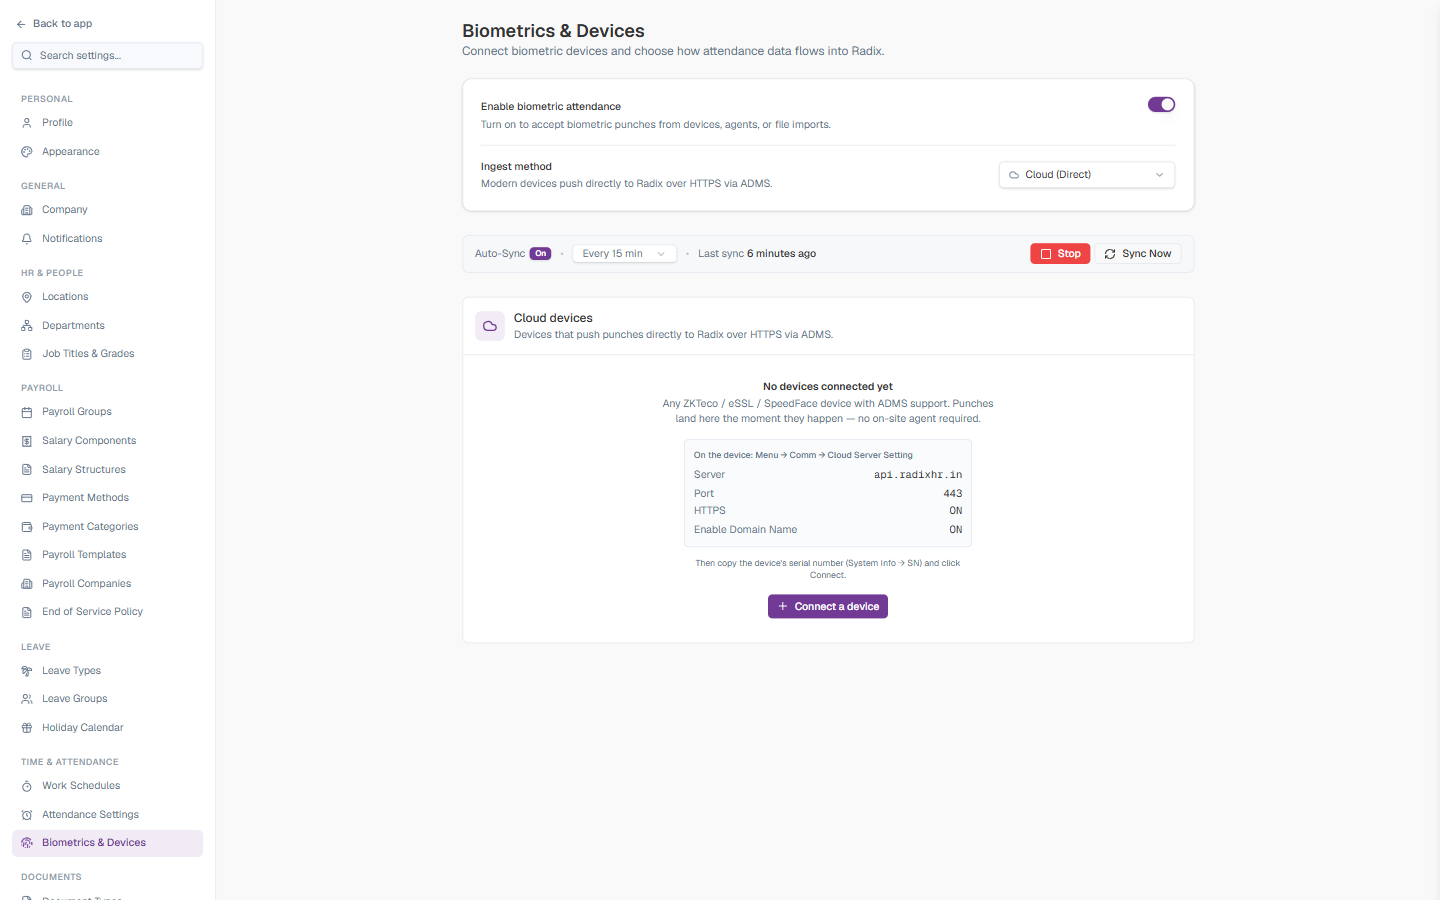
This complements the Capture Methods already listed on Attendance Settings (Biometric, Mobile, Web, Manual). This page is specifically where you connect and manage the physical biometric hardware.
Enable Biometric Attendance
| Setting | Description |
|---|---|
| Enable biometric attendance | Master switch. Turn ON to accept biometric punches from devices, agents, or file imports. Turn OFF to stop accepting them entirely. |
| Ingest method | How punch data reaches RadixHR — see below. |
Ingest Method Options
| Option | Description |
|---|---|
| Cloud (Direct) | Modern devices push punches directly to RadixHR over HTTPS via ADMS (a standard push protocol most current fingerprint/face devices support). No on-site software needed. |
| Local (Agent) | Devices that can’t push to the cloud directly send data through a small agent program running on a computer at your office. |
| Import | Marked Soon — not yet available. Will let you upload punch files exported from a device manually. |
Auto-Sync
A status bar shows whether automatic syncing is On or Off, the sync interval (e.g., Every 15 min), and when the last sync happened.
| Control | What it does |
|---|---|
| Interval dropdown | How often RadixHR pulls new punches automatically |
| Stop / Start | Pause or resume automatic syncing |
| Sync Now | Triggers an immediate sync instead of waiting for the next scheduled one |
Cloud Devices
Lists every device connected via the Cloud (Direct) method. When you haven’t connected any devices yet, this section shows setup instructions instead:
| Field | Value |
|---|---|
| Server | api.radixhr.in |
| Port | 443 |
| HTTPS | ON |
| Enable Domain Name | ON |
Enter these into the device’s own menu (Menu → Comm → Cloud Server Setting), then copy the device’s serial number (System Info → SN) and click Connect a device here.
How to Connect a Device
- On the physical device, configure the Cloud Server settings above
- On this page, click Connect a device
- Fill in the form
- Click Continue
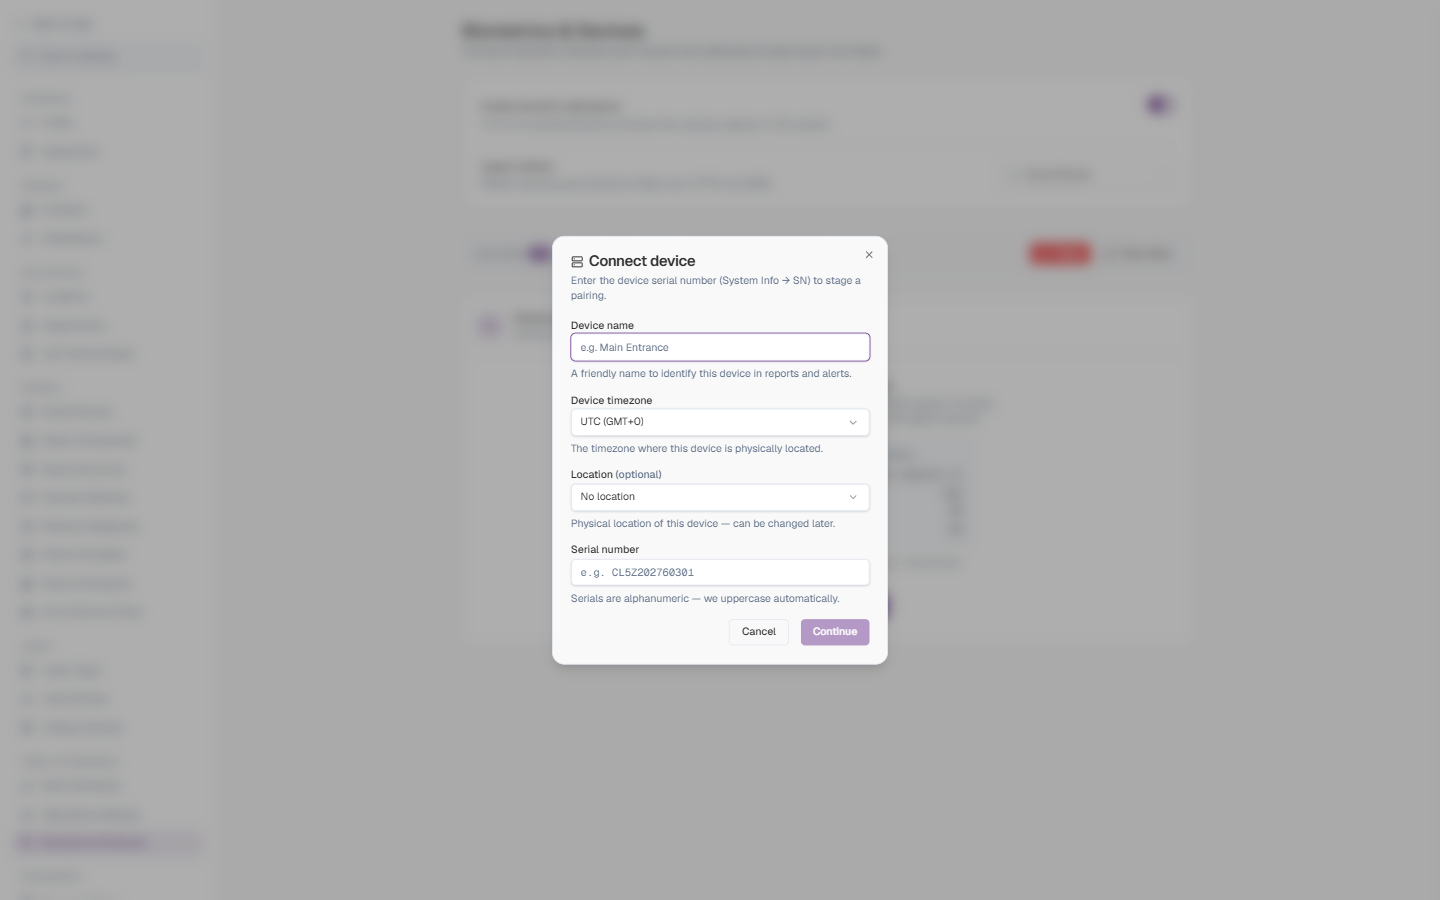
Connect Device Fields
| Field | Description | Required |
|---|---|---|
| Device name | A friendly name to identify this device in reports and alerts (e.g., “Main Entrance”). | Yes |
| Device timezone | The timezone where this device is physically located. | Yes |
| Location | The device’s physical location — can be changed later. | No |
| Serial number | The device’s serial (from System Info → SN on the device). Serials are alphanumeric and are automatically uppercased. | Yes |
Supported hardware: any ZKTeco / eSSL / SpeedFace device with ADMS support. Once configured on the device side, punches land in RadixHR the moment they happen — no on-site agent required.